🎁 Buy 2 kits, get the 3rd FREE · Free shipping on every order

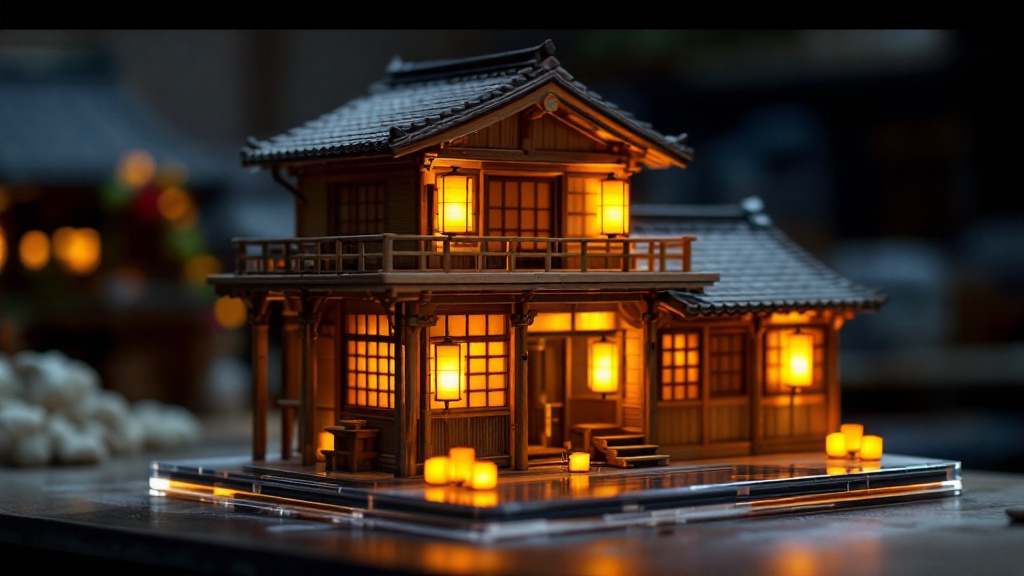
Spirited Away Bathhouse Miniature Inspiration: Bringing Chihiro’s World to Your Worktable
Build your own Spirited Away bathhouse miniature with this practical guide covering Japanese architecture details, lantern lighting techniques, material aging methods, and kit selection tips for all skill levels.

The first time you see Aburaya lit up at night, reflected in flooded rice paddies, something clicks. That layered wooden architecture, the red lanterns swaying in humid air, the stacked balconies draped in warm amber light: it feels like a place you have visited in a dream. For miniature builders, Spirited Away bathhouse miniature inspiration hits differently. It is not just nostalgia. It is a precise visual vocabulary you can actually translate into wood, paper, and resin at 1:24 scale.
This article is for you if you have ever paused that Miyazaki film, squinted at a background detail, and thought: “I could build that.” You can. Here is how to read those architectural layers and turn them into a build plan, whatever your experience level.
Reading Aburaya’s Architecture as a Builder, Not Just a Viewer
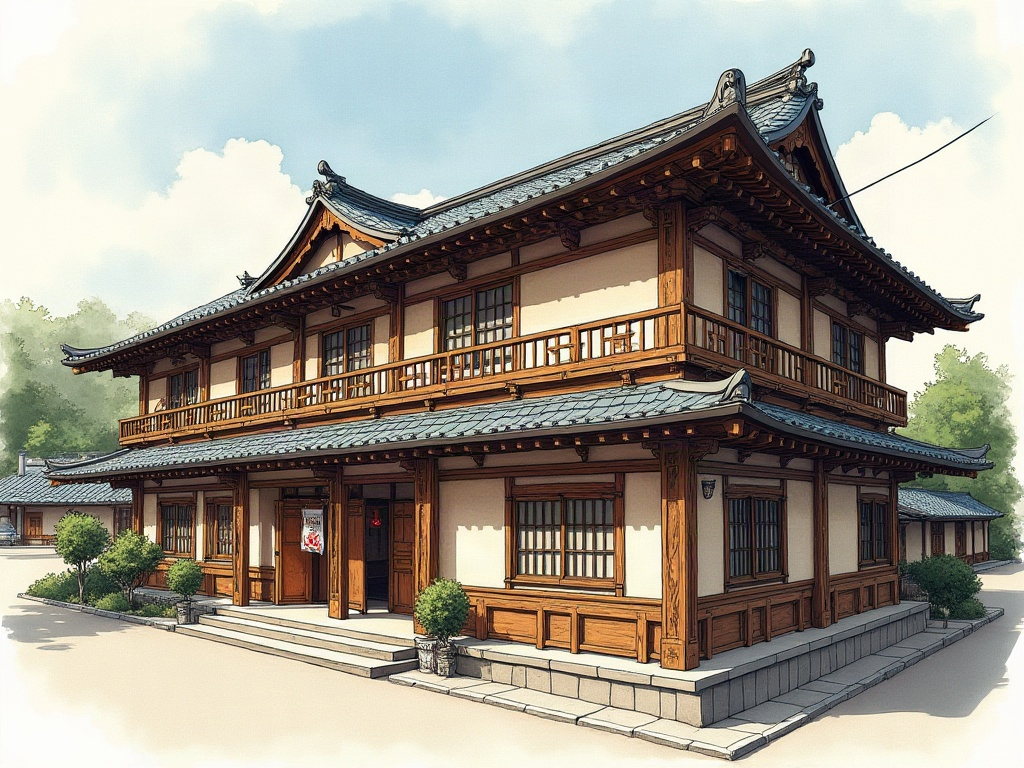
Reading Aburaya’s architecture as a builder means identifying its four core repeating elements: stacked hip rooflines with upturned corners, a post-and-beam facade grid, narrow wraparound verandas, and fabric banners at every entrance, all of which translate directly to miniature scale. Aburaya (the bathhouse in the film) draws heavily from real Edo-period ryokan and public bathhouse architecture. The building stacks four to six visible floors, each with a narrow wooden veranda and overhanging eave that casts deep shadow lines. Those shadow lines are your best friend in miniature work. They create visual depth even at small scale, and you do not need the full building to get the effect.
A few structural details worth noting before you start sketching your build:
- Stacked rooflines: Each floor has its own shallow hip roof with upturned corners. In Japanese carpentry this curve is called sori. At 1:24, you can fake it with dampened balsa strip bent over a curved form.
- Post-and-beam framework: The facade reads as a grid of dark wooden posts with lighter infill panels. Pre-cut laser kits from Japanese-style miniature house kits often replicate exactly this framing pattern, which saves you hours of fiddly measurement when you are just getting started.
- Wraparound verandas: The narrow walkway running around each floor is where all the action happens visually. Even a single-floor vignette with a veranda, a paper lantern, and a worn railing reads immediately as “this world.”
- Signage and banners: Large fabric banners (noren) and painted wooden signs hang at every entrance. Printing them on tissue paper and stiffening with a thin PVA wash keeps them at realistic scale without bulk.
You do not need to build all six floors to capture the spirit of Aburaya. A two-floor section with the right lantern placement and weathered wood finish will do more atmospheric work than a technically complete but sterile model. Keep that in mind as you scope your project below.
Choosing Your First Kit: Why Pre-Cut Laser Components Make Sense Here
Pre-cut laser kits make sense for a Spirited Away bathhouse miniature because they solve the three hardest structural problems at once: calibrated post spacing for plumb floor stacking, machine-precise shoji grids, and a reliable foundation that frees your creative energy for the atmospheric details that define Aburaya. Before we get into finishing and lighting, let us talk about your structural foundation, because this is where many first-time Spirited Away bathhouse miniature builders spend too long reinventing the wheel. Scratch-building every post, beam, and shoji grid from raw balsa is deeply satisfying once you have the skills. But if you are new to multi-floor builds, the geometry of stacked floors with verandas can feel overwhelming fast.
A pre-cut laser kit solves three real problems: the post spacing is already calibrated so floors stack plumb, the shoji grids are machine-precise (hand-cutting them is genuinely difficult), and you get to spend your creative energy on the details that make your build feel like Aburaya rather than on structural troubleshooting. Think of the kit as your scaffolding. The weathering, the lanterns, the aged wood finishes: those are yours.
The Tranquil Life DIY Miniature House Kit is a strong starting point for this aesthetic. Its post-and-beam facade framing closely echoes the Edo-period grid you need, and the included window components adapt well to shoji screen modification. Builders in our community have used it as a base for Japanese-inspired scenes specifically because the proportions feel right without heavy structural modification.

Bestseller with post-and-beam framing
Tranquil Life DIY Miniature House Kit
Pre-cut laser components, shoji-adaptable windows, ideal base for Aburaya-style modification
$67.90
Lantern Lighting: the Detail That Changes Everything
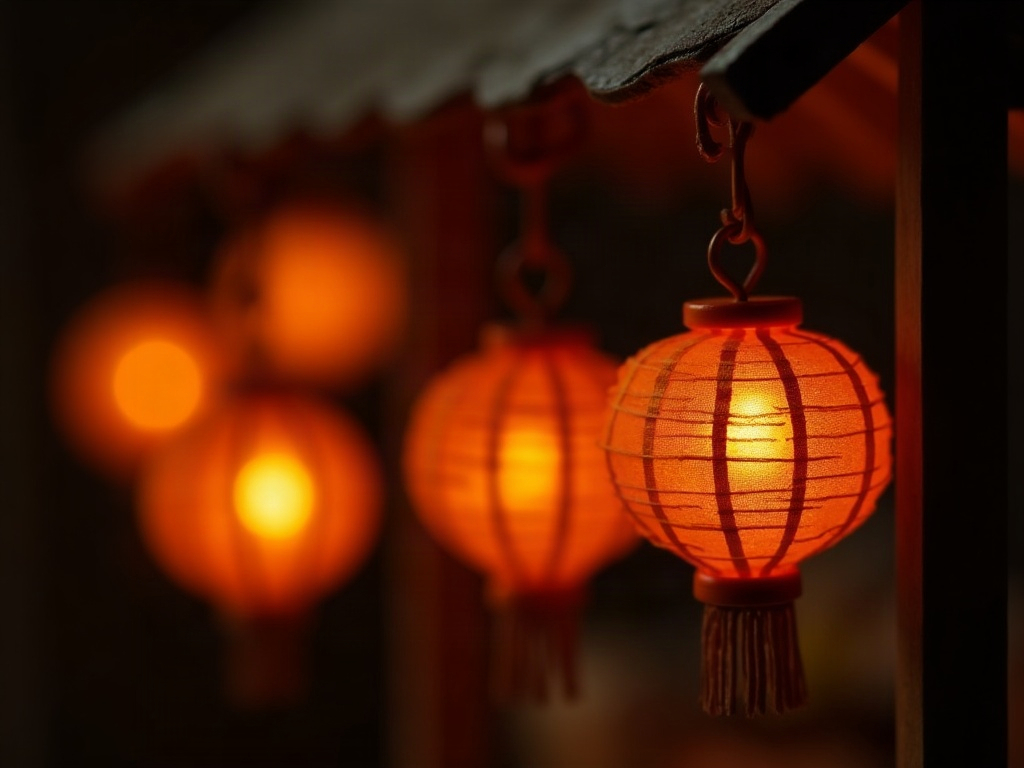
Lantern lighting transforms a daytime Spirited Away bathhouse miniature diorama into a living scene: warm orange-amber paper lanterns hung from eaves at staggered heights, powered by 1800-2200K micro LEDs, deliver the signature Aburaya atmosphere no paint finish alone can replicate. If there is one element that defines the bathhouse’s visual character, it is the paper lanterns. Hundreds of them, warm orange-amber, hanging from eaves, lining staircases, clustering at entrances. In a real build, lighting is what separates a daytime diorama from a living scene. Getting this right is worth more of your time than almost any other decision you make.
For small-scale lanterns, a few practical paths work well:
- Punched washi paper over wire frames: Wrap 28-gauge wire around a small cylinder (a marker cap works perfectly), twist it closed, then wrap with dampened washi paper. The translucency of washi is exactly what you want for warm LED glow. Regular tissue paper works in a pinch but tears more easily when damp.
- 3mm warm-white micro LEDs: Thread them through your lantern before closing the top. Use a resistor on a 3V coin cell battery tucked inside the base of your structure. If you have never wired miniature lighting before, our guide to LED lighting in miniature house kits walks through the basics step by step.
- Color matters more than you expect: Standard “warm white” LEDs at 2700K read closer to daylight than to Miyazaki amber. Warm orange LEDs rated at 1800-2200K, the kind sold as “flame” LEDs for dollhouse fireplaces, nail the aesthetic far better. Test before you commit to wiring a whole facade.
🪄 Hannah’s tip
Before you wire anything permanently, tape a single test LED inside a finished lantern shell and photograph it in a darkened room. Your camera reveals color temperature and hotspot issues that your eyes simply miss under workshop lighting. Fix your light source before you glue thirty lanterns to the facade. I learned this the hard way on my first Japanese-style build: everything looked perfect until I photographed it, and then every lantern read as a harsh yellow blob rather than a warm amber glow. One round of testing saves hours of rework.
Before you wire anything permanently, tape a single test LED inside a finished lantern shell and photograph it in a darkened room. Your camera reveals color temperature and hotspot issues that your eyes simply miss under workshop lighting. Fix your light source before you glue thirty lanterns to the facade. I learned this the hard way on my first Japanese-style build: everything looked perfect until I photographed it, and then every lantern read as a harsh yellow blob rather than a warm amber glow. One round of testing saves hours of rework.
Hang your lanterns at staggered heights rather than in a single row. String three or four from the same eave anchor point at drops of 2cm, 3.5cm, and 5cm. The slight irregularity reads as handmade and lived-in, not manufactured, which is exactly the quality that makes Aburaya feel real rather than decorative.
Materials That Honor the Japanese Aesthetic at Miniature Scale
Honoring the Japanese aesthetic at miniature scale comes down to two choices: tea-stain your wood before cutting for an authentic amber-brown depth no acrylic wash replicates, and simulate kawara roof tiles from hand-scored card strips that catch light the way real clay does. Aburaya reads as old, humid, and slightly worn. Pristine white wood would kill the atmosphere instantly. Your material choices and finishing sequence are where this build lives or dies, so give them as much thought as you give the structure itself.

Perfect for a focused Aburaya vignette
All Book Nook Kits
76 handcrafted book nook kits
Book nook formats are ideal if you want a shelf-ready Aburaya entrance vignette: the constrained footprint forces you to be selective about details, and the result displays beautifully without dominating a room.
Wood Selection and Aging Techniques
Basswood and balsa are the standard miniature timbers, but for this build, tea-staining your wood before cutting it gives the grain a natural amber-brown depth that no acrylic wash fully replicates. Steep two black tea bags in 200ml of water for ten minutes, brush the solution onto raw wood, and let it dry completely before sanding with 220-grit. The tannins bond with the wood fibers. You get a warm, slightly uneven tone that photographs beautifully and never looks painted-on.
For the darker structural posts, a thin wash of raw umber acrylic over the tea stain adds just enough visual weight to separate post from panel. Keep the wash thin: two passes of heavily diluted paint, not one thick coat. If you can still read the wood grain through the wash, you are in the right territory.
Roofing and Tile Simulation
Traditional Japanese clay tile roofs (kawara) have a distinctive rhythmic pattern of curved rows. At 1:24 scale, cutting individual tiles from card stock is meditative, slow, and honestly one of the most satisfying parts of this build. Cut strips 3mm wide, score every 4mm along the length, curl each section slightly over a pencil, and glue them in overlapping rows from eave to ridge. The result catches light at a grazing angle in a way that printed texture sheets simply cannot match. Give yourself a full session just for the roof: put on a podcast, make tea, and enjoy the repetition.
Gray acrylic with a dry-brush of lighter silver-gray over the top brings the aged clay color without looking painted. A very light dusting of dark gray pastel powder pressed into the recesses between rows adds shadow depth that reads convincingly in photographs.
📜 Did you know?
Hayao Miyazaki and his background art director Kazuo Oga spent weeks visiting real onsen towns in Japan, particularly Jiufen in Taiwan and the Dogo Onsen in Ehime Prefecture (operating continuously since 1894), to study how weathered wood, moss, and lamplight coexist in humid mountain environments. That obsessive reference work is why the building feels architecturally coherent rather than merely fantastical. When you are aging your wood and finishing your tiles, you are working from the same visual logic they documented.
Hayao Miyazaki and his background art director Kazuo Oga spent weeks visiting real onsen towns in Japan, particularly Jiufen in Taiwan and the Dogo Onsen in Ehime Prefecture (operating continuously since 1894), to study how weathered wood, moss, and lamplight coexist in humid mountain environments. That obsessive reference work is why the building feels architecturally coherent rather than merely fantastical. When you are aging your wood and finishing your tiles, you are working from the same visual logic they documented.
Scoping Your Build: Three Approaches for Three Commitment Levels
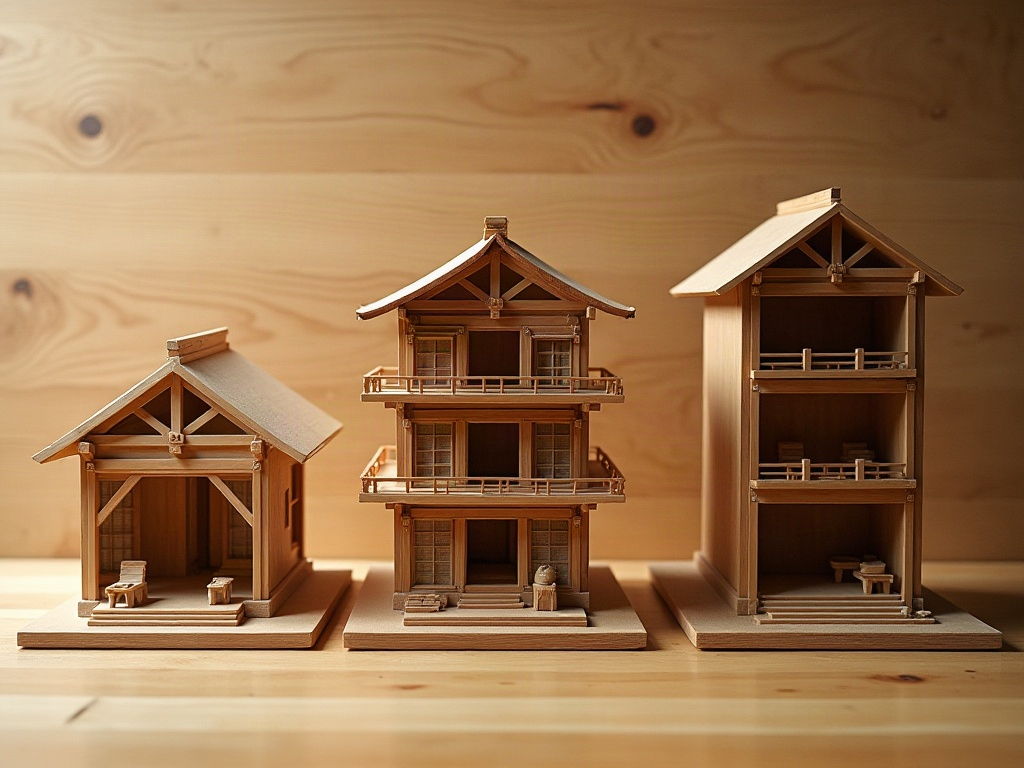
There are three practical scopes for a Spirited Away-inspired miniature: a beginner entrance vignette taking 10-15 hours, an intermediate two-floor balcony section at 25-40 hours, and a full-height advanced diorama running 80-120 hours, a focused vignette delivers 90% of the emotional impact at 30% of the build time. One question you will face early: how much do you actually want to build? The full Aburaya silhouette is iconic, but a multi-floor complete build is a multi-month project. For most builders, a focused vignette delivers 90% of the emotional impact at 30% of the build time. There is no wrong answer, only the scope that fits your current season of life. Here are the three most common approaches the community gravitates toward, with honest time estimates for each.
The Single-Floor Entrance Vignette
A wooden entrance gate with noren banners, two flanking lanterns, a stone step, and a small wooden sign is recognizable immediately to anyone who has seen the film. It fits a 15cm x 15cm footprint, which means it displays on a bookshelf or desk without demanding real estate. Difficulty: beginner to intermediate. Build time: 10-15 hours. This scope is also a strong gift option, and if you are working from a book nook kit as your structural base, the constrained format actually helps you make better compositional decisions.
The Two-Floor Balcony Section
Two floors with verandas, a visible interior room behind shoji screens, and a staircase between levels. Difficulty: intermediate. Build time: 25-40 hours. The shoji screens are the genuinely tricky part of this scope: laser-cut grids are far more consistent than hand-cutting, and several Japanese architecture miniature kits include them as pre-cut components. If you are considering this scope, the Sun Room DIY Miniature House Kit offers a manageable entry point under $50 that teaches you the core floor-stacking technique before you commit to a larger structure.

Great for learning floor-stacking technique
Sun Room DIY Miniature House Kit
Under $50 and a genuinely good teacher: this kit’s multi-level structure builds the same spatial reasoning you need for a two-floor Aburaya section, without the pressure of working on your showpiece build.
$49.99
The Full-Height Diorama
Four or more floors, full lighting rig, and a water reflection panel at the base. Difficulty: advanced. Build time: 80-120 hours. This is the project you plan over months and display with genuine pride. A mirrored acrylic base panel under the structure, lit from beneath with a thin LED strip in warm orange, recreates the nighttime reflection effect without actual water. The builders in our community who have completed this scope consistently describe it as one of the most meditative and satisfying long-form projects in the hobby: the kind of build you remember making, not just having made.

Advanced builds with LED lighting included
Miniature Greenhouse Kits
22 LED-lit greenhouse builds
If you are ready for an advanced LED-lit build, our greenhouse range gives you experience wiring multi-point lighting into a complex structure, exactly the skill set the full Aburaya diorama demands.
Whichever scale you choose, pre-cut kits provide a reliable structural starting point. Browse the full miniature house kit collection to find formats that match your chosen scope, especially kits designed around East Asian architectural framing.
Sourcing and Customizing a Base Kit for This Theme
The fastest, most structurally sound route to an Aburaya-inspired build is to start from a laser-cut Japanese-style house kit with post-and-beam framing, multiple floor levels, and pre-scored roof sections, then add lanterns, banners, and aged finishes as purely additive modifications. Working from a blank scratch build is one approach. But starting with a laser-cut Japanese-style house kit and modifying it for Aburaya aesthetics is faster and often more structurally sound, especially if you are newer to multi-floor construction. The key insight is that you are not compromising by using a kit as your foundation. You are making a practical choice that frees up your time and attention for the atmospheric details that actually define this build.
What to look for in a base kit:
- Post-and-beam facade framing (not solid wall panels)
- Multiple floor levels, ideally three or more
- Included shoji screen or window grid components
- Pre-scored roof sections that accept additional tile layering
Once you have a base kit, the Aburaya-specific modifications are mostly additive: lanterns, banners, aged wood finishes, and the nighttime lighting rig. You are not rebuilding the kit, you are dressing it. That distinction matters a lot for time planning, especially if this is a project you are fitting around work and family commitments.
Check the Japanese miniature architecture kits category for kits rated for intermediate builders, which tend to include the structural complexity this aesthetic demands without requiring advanced joinery skills from scratch. For a premium collector-level base with exceptional detail out of the box, the Monet’s Garden DIY Miniature House Kit is worth considering: its layered facade and included LED components give you a head start on the atmospheric lighting work that defines a Spirited Away bathhouse miniature build.
Premium collector piece with LED components
Monet’s Garden DIY Miniature House Kit
Its layered facade structure and included LED wiring give you a practical foundation for the atmospheric lighting work that defines an advanced Aburaya-style diorama. A genuine collector-level starting point.
$155.00
Frequently Asked Questions about Spirited Away Bathhouse Miniature Builds
Everything you might be wondering before you start (click a question to expand).
Do I need woodworking experience to build an Aburaya-inspired miniature?
Not at all. You can absolutely start with the focused entrance vignette described above, which sits comfortably at beginner to intermediate difficulty. The skills you actually need are patience with small cuts and steady hands with PVA glue: nothing that requires a workshop full of tools. A pre-cut laser kit reduces the woodworking demand significantly, letting you focus on finishing and atmosphere rather than structural joinery. Many builders in our community completed their first Japanese-style scene with no prior miniature experience.
What scale works best for a Spirited Away bathhouse miniature?
1:24 (half-inch scale) hits the sweet spot for Aburaya-inspired builds. It is large enough to show roof tile texture and individual lantern detail, but compact enough to fit a full two-floor section on a standard shelf. 1:12 (one-inch scale) works well for single-floor vignettes where you want maximum interior detail visible through the shoji screens, though it demands more physical space. Avoid going smaller than 1:48 for this theme: the lantern and banner details become nearly impossible to render convincingly below that threshold.
Where can I find authentic-looking paper for noren banners and shoji screens?
Japanese washi paper (available through specialty art suppliers and online import stores) is the standard choice. For shoji screens, unryu washi with embedded fiber texture catches light in a way that regular tissue paper cannot match and holds its shape better once PVA-stiffened. For noren banners, plain white mulberry paper printed with a home inkjet printer, then tea-stained after printing, gives convincing aged fabric texture without any bulk. The tea stain also slightly blurs the inkjet print, making it read as fabric dye rather than a printed image.
How do I create the water reflection effect at the base of the structure?
A sheet of mirrored acrylic cut to your base footprint is the most accessible method. Scratch the surface very lightly with fine steel wool before installing it: a perfect mirror looks artificial at this scale, but a slightly diffused one reads convincingly as dark, still water. Tuck a thin LED strip in warm orange under the building edge to illuminate the reflection from below, and it recreates the signature flooded-field night scene from the film with striking accuracy. If you want more depth, a thin pour of clear epoxy resin tinted very slightly blue-black over the scratched acrylic adds a genuine sense of liquid surface.
Are there official licensed miniature kits based on Studio Ghibli properties?
As of 2026, licensed Studio Ghibli miniature architecture kits exist primarily in the Japanese market through publishers like Sankei and Clever Idiots, occasionally available through import retailers. Most builders outside Japan work from unlicensed Japanese-style architectural kits customized with fan-made finishing details, which is the approach outlined throughout this guide. The community around this aesthetic is active and generous: you will find shared templates for noren prints, shoji grid dimensions, and weathering recipes through miniature building forums and social media groups.
How long does a full Aburaya-inspired diorama actually take to build?
Honest answer: the entrance vignette runs 10-15 focused hours. A two-floor balcony section takes 25-40 hours depending on how much you agonize over the shoji screens (most builders do, at least the first time). The full-height diorama with lighting and reflection base sits at 80-120 hours across several months of weekend sessions. None of those numbers should discourage you: this is a hobby built on the meditative pleasure of slow, careful work, and the full diorama builders in our community are unanimous that the process is as rewarding as the finished piece.
Starting Small, Thinking Big: Your First Spirited Away Bathhouse Miniature
Start with the entrance vignette, nail the amber lantern lighting, and age the wood until it looks like it has stood in mountain humidity for a century, one glowing lantern in a dark room does more atmospheric work than a technically flawless unlit model on a shelf. Your build does not have to be perfect. It has to feel alive. One lantern glowing amber in a dark room does more atmospheric work than a technically flawless model sitting unlit on a shelf. Start with the entrance vignette. Get the lighting right. Age the wood until it looks like it has stood in mountain humidity for a century.
Then, if the project pulls you the way Spirited Away bathhouse miniature builds tend to pull people, add a floor. Then another. The meditative rhythm of cutting tile strips, stringing lanterns, and dry-brushing wood grain is exactly the kind of unhurried making that this hobby does best. Aburaya was built over generations in the story. Your miniature version has all the time it needs.
When you are ready to pick your base kit, start with the miniature house kit collection and filter by East Asian architectural styles. And if you want to share your progress, the community building around this aesthetic is warm, generous, and always ready to help troubleshoot a shoji screen or a stubborn lantern wire. 🪄
