🎁 Buy 2 kits, get the 3rd FREE · Free shipping on every order

Moroccan Miniature Riad: Building Intricate Tilework and Courtyard Gardens
Discover how to build a Moroccan miniature riad with authentic tilework patterns, carved archways, and tranquil courtyard gardens. Learn about zellige tile techniques, materials, and the meditative craft of creating North African architectural details at miniature scale.

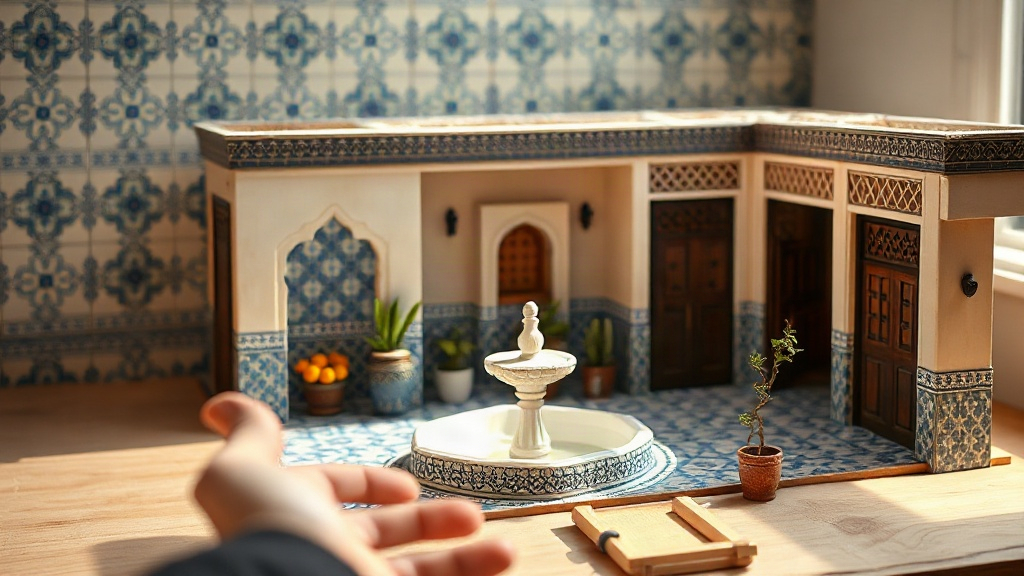
Moroccan miniature riads have become a beloved subject for builders who crave patterns, color, and the calming geometry of North African design. A riad, traditionally an enclosed residential palace built around a central courtyard, carries centuries of craftsmanship into a compact, buildable form. The appeal is immediate: intricate zellige tilework (the hand-cut geometric tiles that define Moroccan interiors), carved archways, and the promise of a serene garden space all beckon from a single kit or custom commission.
What makes a riad different from other miniature house projects is the texture and repetition. You are not simply assembling walls; you are recreating an entire language of pattern, symmetry, and light. The building itself becomes less about rooms and more about surfaces, shadows cast through latticed screens, and the ritual of a fountain at the courtyard’s heart. For hobbyists, that means deeply satisfying work at every stage.
Understanding Riad Architecture in Miniature
A miniature riad captures the essence of its full-scale ancestor: four walls enclosing a central courtyard with a fountain, upper-level galleries, and carved openings that hint at rooms beyond, all reproduced at scales ranging from 1:48 to 1:144. In a real Moroccan riad, four walls enclose one or two courtyards, with a fountain, plants, and galleries overlooking the green space. Bedrooms and living areas sit on the upper levels; storage and service rooms occupy the ground floor. This design kept homes cool, private, and focused on family life away from the street.
Most builders opt for a fully accessible riad, meaning you can remove or lift a roof section and look into the courtyard, or design the roof as a permanent feature that reveals layers as you approach. Scale choice is the single biggest decision you will make before buying anything. At 1:48 (half-inch scale), individual zellige tiles and carved plaster details are achievable and visually rich. At 1:144, the build is more display-focused and each detail must be suggested rather than fully rendered. The smaller the scale, the more patience zellige and carved details demand.
📜 Did you know?
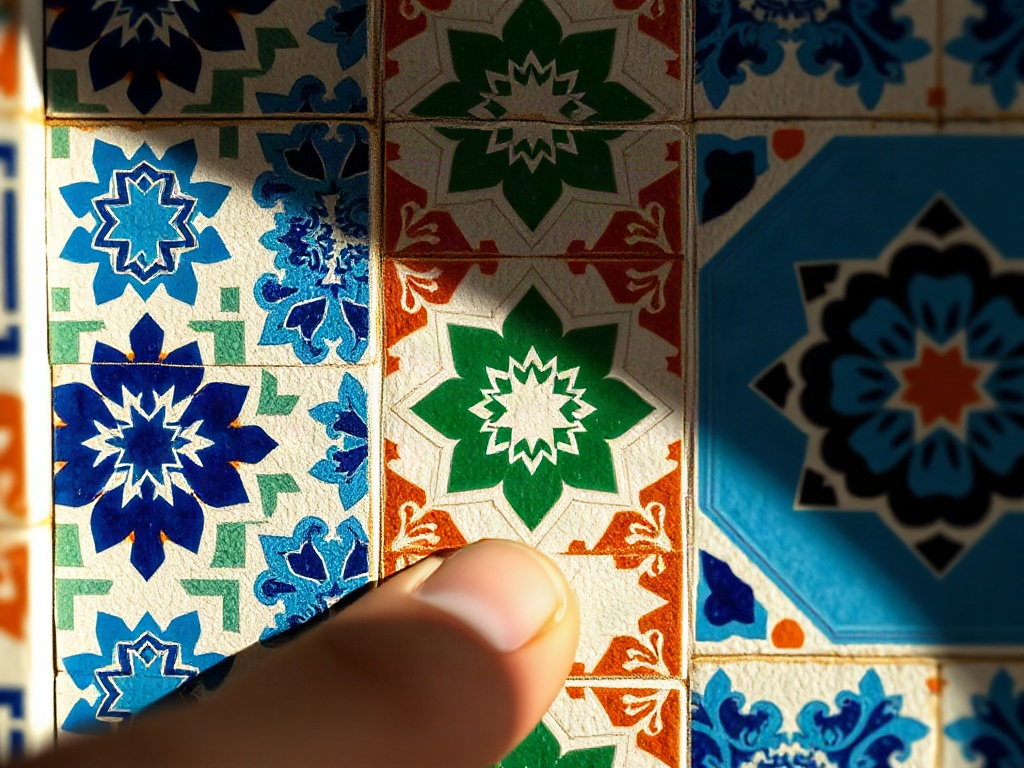
Zellige tilework dates back to the 10th century in Morocco and Spain. The tiles are individually hand-cut from clay, glazed in jewel tones (cobalt blue, emerald, rust, ivory), and fitted together in complex geometric patterns without grout. Craftspeople who master zellige train for years. In miniature, the illusion of zellige can be achieved with printed papers, hand-painted details, or tiny pre-cut ceramic tiles from specialty suppliers.
Zellige tilework dates back to the 10th century in Morocco and Spain. The tiles are individually hand-cut from clay, glazed in jewel tones (cobalt blue, emerald, rust, ivory), and fitted together in complex geometric patterns without grout. Craftspeople who master zellige train for years. In miniature, the illusion of zellige can be achieved with printed papers, hand-painted details, or tiny pre-cut ceramic tiles from specialty suppliers.
Essential Materials for Zellige Tilework and Details
Authentic zellige tile effects for miniatures come down to three main paths: printed tile papers, hand-painted acrylics, or micro-ceramic tiles, each offering a different balance of time, cost, and realism suited to different skill levels. Knowing which method fits your build before you start saves a lot of frustration. The table below lays out the honest differences at a glance.
| Method | Approx. Cost (per wall) | Time (per wall) | Final Look | Best For |
|---|---|---|---|---|
| Printed tile papers | $2 – $8 | 30-60 min | Flat; reads well at 30cm+ | Beginners, display builds |
| Hand-painted acrylics | $3 – $12 (paints) | 2-4 hours | Personal; slight variation adds warmth | Intermediate builders, meditative builders |
| Micro-ceramic tiles | $20 – $60+ | 4-8 hours | Museum-quality depth and texture | Advanced builders, collector pieces |
Not sure which path suits your riad? Read on for a closer look at each.
If you want to practice tiling rhythm before committing to a full riad, a smaller enclosed build is a great warm-up. The Tranquil Life kit below has a similar courtyard-style enclosure and enough interior wall space to test all three tilework methods without the pressure of a large project:

Ideal zellige practice build
Tranquil Life DIY Miniature House Kit
$67.90
View this kit →
Printed and Painted Tile Papers
High-resolution printed papers mimic zellige geometry without the physical tile cutting. Suppliers like Parchment Graphics and Copley Prints offer sheets scaled to 1:48 and 1:96, featuring traditional star, geometric, and floral patterns in period-accurate colors. Seal them with matte acrylic varnish to prevent peeling. Application takes patience; you will need craft scissors, a good bone folder for creasing, and contact cement or spray adhesive. The result reads as authentic zellige from a distance and mid-distance. Up close (within a few inches), the flat finish can feel less dimensional than carved or textured plaster.
Hand-Painted Detail Work
If you prefer painting directly onto prepared walls or cardstock, acrylics or gouache work beautifully. Sketch geometric patterns lightly in pencil first. Use a ruler, compass, and template for accuracy. Traditional zellige typically features 6, 8, 12, or 16-pointed star patterns mixed with smaller interlocking shapes. Limit your palette to 3-5 colors per wall to keep it historically plausible: blues and greens dominant, warmed by rust-orange accents and ivory or off-white for contrast. A single wall (roughly 4 by 6 inches at 1:48 scale) can take 2-4 hours if you are rendering detail rather than blocking in solid colors. Many builders find this meditative; others prefer speed.
Micro-Ceramic Tiles
True believers source tiny pre-cut zellige from artisan suppliers or commission custom tile sheets. Kiln-fired ceramic tiles, roughly 3-5mm per side, arrive glazed and ready to set onto prepared walls with tile adhesive. The dimensional quality is unmatched. The cost and time are real commitments: a single wall might need 100-200 tiles, each placed individually. This method suits builders with intermediate to advanced skills and time to spare. The payoff is riads that photograph with museum-quality depth and look extraordinary under glass.
Courtyard Design and the Fountain Feature
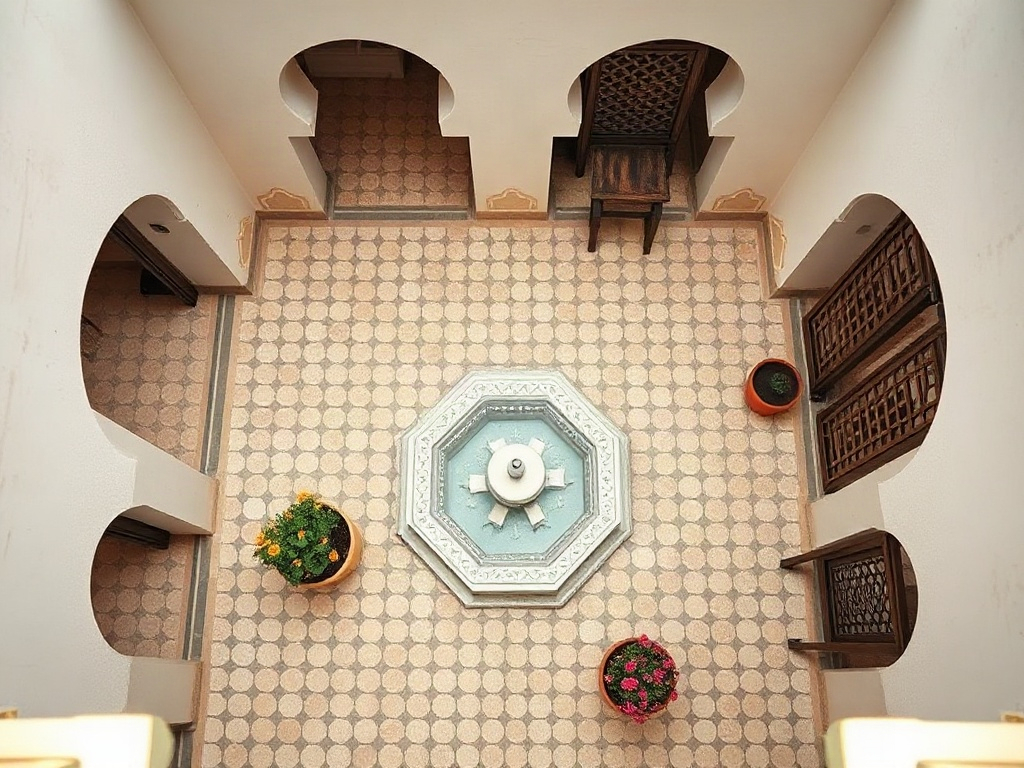
The courtyard is the visual and emotional heart of any miniature riad: get this space right, with its fountain, planted pots, and paved floor, and the whole piece comes alive even if the surrounding rooms stay simple. Most traditional designs measure 15 to 25 feet across in real riads; at 1:48 scale, that is roughly 4 to 6 inches. Leave the courtyard floor open to the sky (or place a glass or acrylic panel if you want a closed riad). The floor itself can be tiled, planted, or paved with tiny stones.
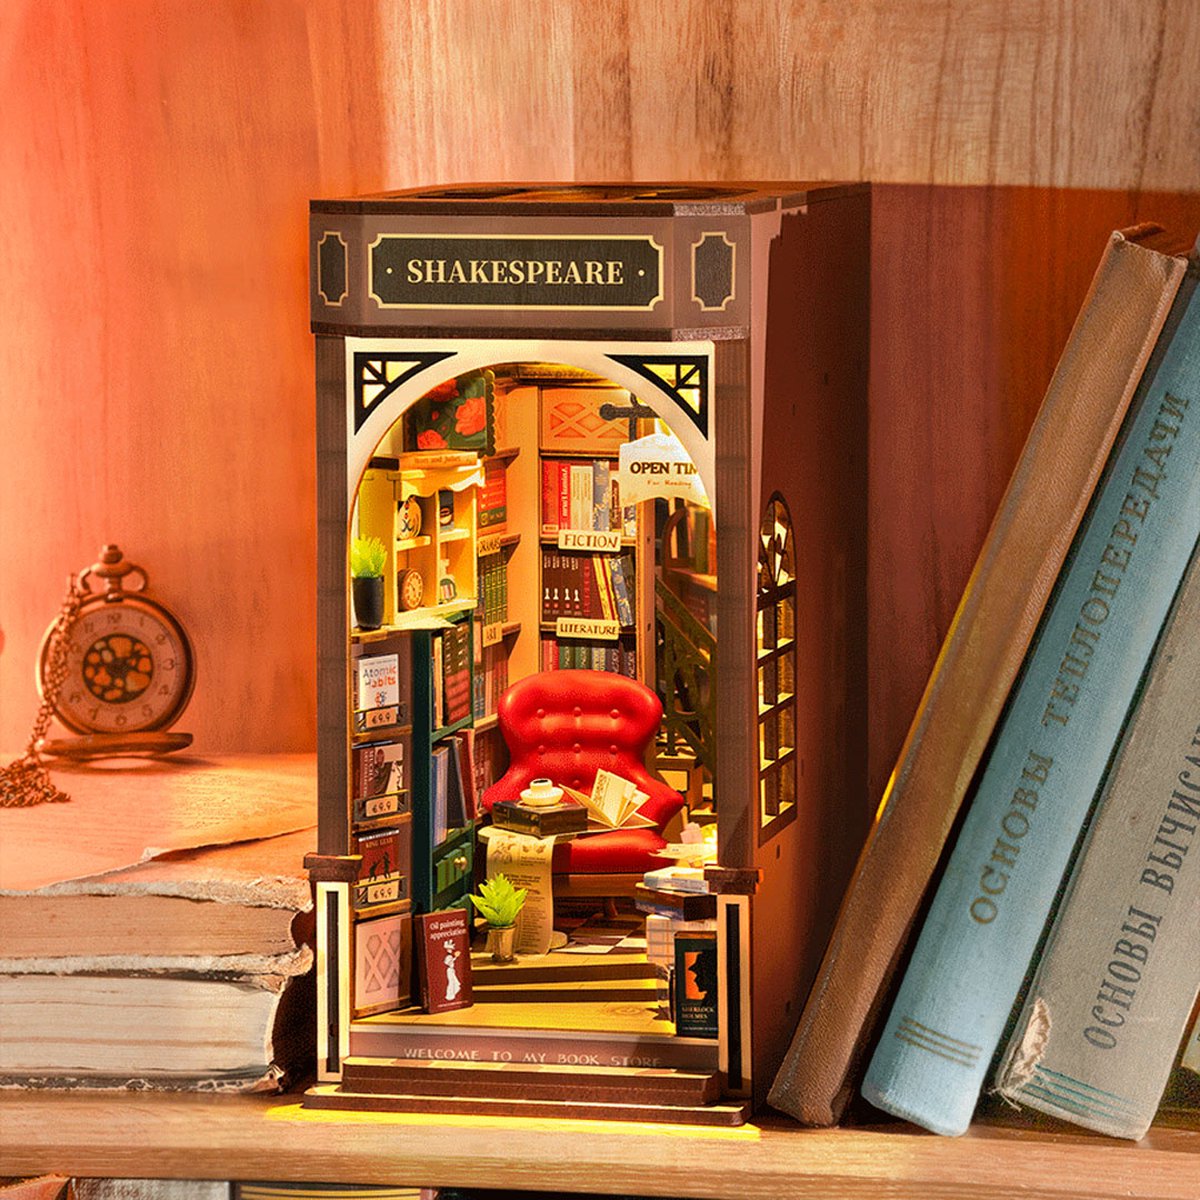
If you are drawn to the idea of a lush enclosed garden but not quite ready for a full riad build, our book nook kits include several courtyard-inspired scenes with pre-cut greenery and paving details that are perfect for learning plant and water feature placement at a smaller commitment. The collection below is a good starting point:
Practice courtyard scenes first
All Book Nook Kits
76 handcrafted book nook kits
Browse all book nooks →
A fountain sits at the center, typically fed by a channel that runs along the walls. The fountain may be a simple basin, a multi-tiered structure, or an ornate carved piece. You can source fountain kits from miniature suppliers (working or static), or build your own from polymer clay, epoxy, or resin. If you choose a working fountain, plan electricity first: hidden LED wiring and a small pump require advance layout so cables do not show once walls are glued in place.
Around the fountain, place potted plants: miniature orange trees (orange blossoms carry symbolic weight in Moroccan culture), roses, and trailing ivy. Pottery for these plants should reflect Moroccan terracotta: unglazed red clay, hand-thrown appearance, sometimes with minimal painted details. Scale is critical; a plant that looms over the fountain disrupts proportion and pulls the eye away from the composition rather than into it.
🪄 Hannah’s tip
If you’re building your first riad and feeling daunted by tilework, start with the courtyard. Design a simple paved floor, install the fountain, and populate it with plants and a few carved plaster columns. Add tilework to interior walls one section at a time as your confidence grows. A beautiful courtyard carries the entire piece even if interior rooms remain simpler. Work in layers, not all at once.
If you’re building your first riad and feeling daunted by tilework, start with the courtyard. Design a simple paved floor, install the fountain, and populate it with plants and a few carved plaster columns. Add tilework to interior walls one section at a time as your confidence grows. A beautiful courtyard carries the entire piece even if interior rooms remain simpler. Work in layers, not all at once.
Carved Plaster and Archways
Carved stucco work, known in Arabic as tadelakt and gebs, covers arches, friezes, and wall panels in real Moroccan riads; in miniature you can recreate that intricate relief texture through sculpted foam, polymer clay, cast plaster, or carved wood, each suited to a different budget and skill level.
Moroccan riads feature carved stucco (plaster) extensively. Arches, friezes, and wall panels showcase intricate relief work, often painted or gilded. In miniature, you can simulate carved plaster through several techniques.
Sculpted Foam or Polymer Clay
Carve plaster from foam sheets (insulation foam or art foam) using a craft knife, rotary tool, or wire cutter. Shape simple arches, floral motifs, or geometric borders. Paint with acrylics and seal. Polymer clay (Sculpey, Fimo) works for smaller ornaments: door frames, capital pieces atop columns, frieze segments. Condition the clay, sculpt your design, bake according to manufacturer instructions, then hand-paint details. This method offers freedom and is forgiving for learners.
Cast Resin or Plaster Components

Easy starter under $50
Sun Room DIY Miniature House Kit
$49.99
Start with this kit →
Purchase or commission cast plaster archway kits. Several miniature suppliers offer Moroccan-specific arch sets, coved ceiling sections, and capital pieces ready to install. These arrive primed and ready for paint. Quality varies; research reviews and request photos of finished examples. The cost per component runs $5-$25 depending on size and detail.
Carved Wood Details
Cedar or basswood carves cleanly and absorbs stain well. Thin strips (1/16 to 1/8 inch thick) can be shaped into latticed screens (a key riad feature), door panels, or corbels. Hand-carving demands a sharp knife and a steady hand; power tools introduce risk at miniature scale. Many builders commission carved wood details from specialists. A single carved door panel (6 by 4 inches) costs $15-$50 depending on complexity, and the warm grain of real wood adds a dimension no resin piece quite matches.
Color Palette and Period Accuracy
A historically grounded riad color palette centers on cobalt blue, emerald green, rust-orange, and ivory, drawn from the natural mineral glazes and pigments used in real Moroccan interiors, and it reads as period-accurate only when those colors carry slight depth and variation rather than flat, modern primaries.
Moroccan interiors traditionally favor warm jewel tones. Dominant colors include:
- Cobalt and navy blue: the most iconic zellige shade, often paired with white geometric borders.
- Emerald and forest green: symbolizing paradise gardens in Islamic tradition.
- Rust, terracotta, and burnt orange: earth tones that warm courtyards and transition between cool and warm zones.
- Cream, ivory, and pale ochre: provide breathing room and highlight carved plaster details.
- Deep red or wine: used sparingly as accents or in carpets and textiles.
Avoid pure white (too modern) and pastels (too contemporary). The colors in a historic riad were achieved through natural pigments and mineral glazes; they carry depth and slight variation. When painting or selecting tile papers, choose colors with slight impurities or texture rather than flat primaries. A tiny amount of raw umber mixed into your cobalt blue will immediately read as more authentic than paint straight from the tube.
Assembly, Stability, and Display Considerations
Assemble your miniature riad in five stages, always finishing surface decoration on individual wall panels before gluing the frame together, since trying to tile inside a closed box is the most common and most avoidable beginner mistake. Most Moroccan riad kits arrive as flat-pack components: walls, roof sections, floor panels, and architectural pieces.
- Prepare walls: Apply tile papers, paint, or pre-glued tile sheets before assembly. Dry thoroughly.
- Construct the frame: Glue interior walls to floor and exterior walls to each other, typically with PVA wood glue or hot glue. Support with temporary bracing until dry (2-4 hours).
- Install courtyard features: Set fountain, add paving, place plants, and install any latticework or screens.
- Attach roof and galleries: Once walls are stable, secure roof sections and upper-floor railings or galleries.
- Final detailing: Add doors, shutters, cushions, lanterns, and smaller decorative objects.

Rare in the niche
Miniature Greenhouse Kits
22 LED-lit greenhouse builds
See our greenhouse range →
A completed riad at 1:48 scale weighs 2-5 pounds depending on materials. Display on a sturdy shelf or glass case away from direct sunlight, which fades zellige colors over time. Dust gently with a soft brush; avoid liquid cleaners on unvarnished painted surfaces.
Community Builds and Variations
The riad form is unusually welcoming of personal variation: community builders are currently experimenting with mixed-scale courtyards, animated lantern lighting, motorized shutters, and playful cross-cultural mashups that blend riad architecture with Victorian or Japanese interior furnishings. That kind of creative freedom is one reason riad projects keep generating so much excitement in miniature communities online.
Recent trends show increased interest in mixed-scale courtyards (where the central garden reads larger than surrounding rooms, creating a surreal depth effect) and animated elements like tiny lantern lights or even motorized shutters. Some hobbyists combine riad architecture with Victorian or contemporary furnishings as a playful cross-cultural experiment. If that cross-cultural angle appeals to you, our full miniature house kit collection includes several architectural styles worth layering. The structure is forgiving enough to support individual vision.
Sourcing Kits and Suppliers
Complete Moroccan miniature riad kits range from around $80 for a basic flat-pack with printed tile papers up to $400 or more for resin components with micro-ceramic options, so matching the kit to your skill level before buying saves both money and frustration. Explore our miniature house kit collection to compare difficulty levels and included materials. Many kits note whether tiles are pre-applied or require assembly, and whether a courtyard fountain is included or sold separately.
For individual components (tiles, carved plaster, wood lattice, fountains), check specialized suppliers like The Dollhouse Etcetera, Houseworks, and international artisan shops on Etsy. Lead time can stretch 4-8 weeks for custom ceramic tiles. Plan accordingly if you are building toward a deadline.
Time Commitment and Skill Level
A Moroccan miniature riad sits at medium to advanced difficulty overall, but beginners working with printed tile papers and pre-cast components can build a genuinely beautiful first riad in 30-50 hours, and every one of those hours is more absorbing than it sounds.
Intermediate builders with some painting or crafting experience typically invest 40-80 hours for mixed techniques: painted detail work on walls, hand-assembled tilework on feature walls, and cast plaster arches. Advanced builders pursuing full hand-carved plaster and custom ceramic zellige may spend 100-150+ hours on a single piece. None of that time is wasted; the repetitive, focused work of placing tiles or refining painted patterns is meditative in the best way.
If you want to step up from printed papers to something that still feels manageable, the Monet’s Garden kit below shares that same careful-layering philosophy: it rewards patient builders who enjoy adding detail in stages rather than rushing to a finished look:
For patient, detail-loving builders
Monet’s Garden DIY Miniature House Kit
$155.00
Discover this kit →
Frequently Asked Questions about Moroccan Miniature Riads
Everything you might be wondering (click a question to expand).
Which kit would you recommend for a complete beginner?
Start with a kit that uses printed tile papers rather than individual tiles, so you can focus on structure and assembly before tackling surface detail. The Tranquil Life kit at $67.90 is a favorite first build for this reason: the enclosed layout is similar in spirit to a riad courtyard, the instructions are clear, and the wall areas are large enough to experiment with paint once you feel confident. Once you have one kit under your belt, riad-specific builds feel far less daunting.
Do I need an open courtyard or can I build a closed riad?
Both approaches are valid, and the choice mainly comes down to how you want to display and interact with the finished piece. Open courtyards show the garden and fountain directly, making them more visually dramatic. Closed riads with a glass roof panel maintain the architectural logic while allowing interior detail work to shine. Some builders create a removable roof to access the courtyard for seasonal updates or cleaning.
What scale is easiest for beginners?
1:96 scale (1/8-inch = 1 foot) is the most forgiving starting point for a first riad. Proportions are slightly less critical, and individual tiles or carved details do not demand as much precision. As you build confidence, 1:48 opens up finer detail work and richer surface texture.
What is a realistic total budget for a first miniature riad?
Plan for $80-$180 all-in for a beginner-level riad using printed tile papers and a kit-based structure. That covers the kit itself ($80-$120), a set of acrylic paints ($10-$20), matte varnish and adhesive ($8-$15), and a small selection of accessories (fountain, plants, lanterns: $15-$30). Advanced builds with custom ceramic tiles and cast plaster components can reach $300-$500 or more, but that level of investment makes sense only after you have completed at least one simpler build.
Can I use acrylic paint directly on cardboard walls?
Yes, but prime first. Apply two coats of gesso or matte white acrylic to seal the surface and prevent the paint from soaking in unevenly. Once dry, paint your zellige patterns or base colors. Seal the finished work with matte acrylic varnish for durability.
How do I keep zellige colors from fading over time?
Keep the riad out of direct sunlight and, ideally, inside a UV-protective glass or acrylic display case. If your riad sits on an open shelf, rotate it periodically so one side does not face constant light. High-quality acrylics and glazed ceramic tiles resist fading far better than budget brands. A final coat of UV-resistant matte varnish over all painted surfaces adds another layer of protection.
Are there Moroccan miniature riad kits with working lights?
Yes, some advanced kits include pre-wired LED components for courtyard lanterns or interior gallery lighting. You will need a small battery pack or USB connection. Pre-wired kits cost more but eliminate the need to plan electrical infrastructure yourself. Check product descriptions carefully to confirm what is included, and look for kits where the wiring channel is already routed through the walls.
The Riad as a Gateway to Architectural Detail Work
Building a Moroccan miniature riad teaches pattern recognition, color harmony, and structural thinking in ways few other miniature projects can match, and the skills transfer directly to Japanese torii gates, Victorian gingerbread trim, or any build where surface detail carries the visual weight.
You begin to see zellige geometry in photographs of real riads, notice how light plays across carved plaster, and understand why symmetry feels restful to human perception. Once you have mastered riad tilework, other complex architectural styles feel genuinely approachable. The craft itself becomes less about following instructions and more about understanding the logic underneath.
Whether you choose a kit or source components individually, start with a single feature you are excited about. Perhaps it is the fountain, or a wall of intricate tilework, or a carved archway. Let that detail anchor the entire piece. The courtyard will grow around it, and in weeks or months you will have built something tactile, beautiful, and entirely your own. 🪄
