🎁 Buy 2 kits, get the 3rd FREE · Free shipping on every order

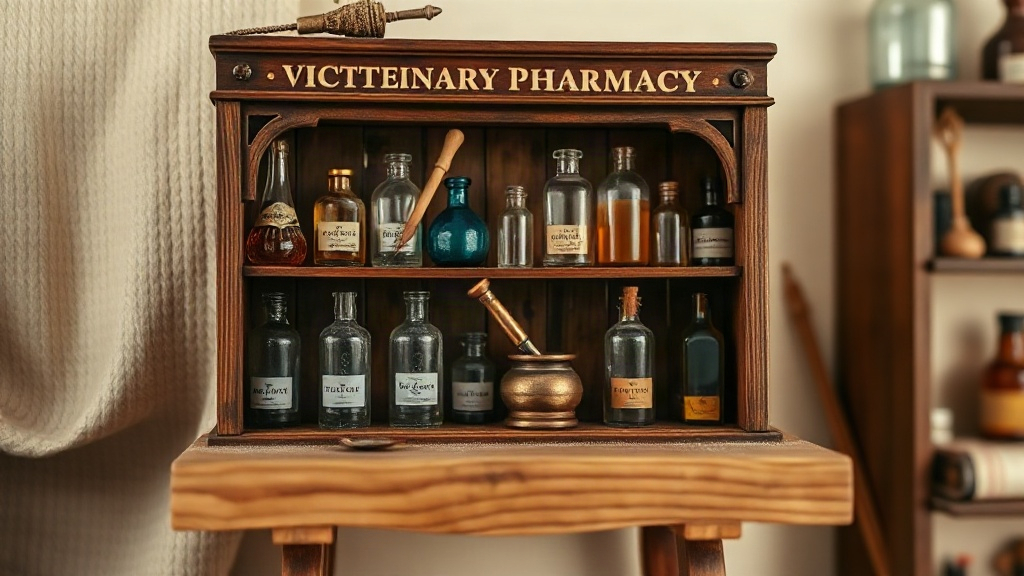
Pharmacy Miniature Scene Kit: Build a Victorian Apothecary in Miniature
Discover how to build an authentic Victorian-era pharmacy miniature scene with a curated kit. Learn what's included, difficulty levels, and why these meditative projects captivate both beginners and experienced builders.

There’s something almost magical about recreating a vintage pharmacy in miniature form. Tiny glass bottles filled with imaginary remedies, hand-painted labels, wood shelving that looks aged by decades: a pharmacy miniature scene kit invites you into the quiet, methodical work of building history at 1:12 scale. This isn’t rushed. It’s the kind of project that rewards patience and attention to detail, one small component at a time.
Whether you’re new to miniature building or returning after years away, a pharmacy kit gives you a focused creative challenge. You’re not staring at a blank canvas. Instead, you have a framework: authentic apothecary aesthetics, period-correct materials, and a destination that emerges piece by piece. The meditative rhythm of assembly, painting, and arrangement becomes the heart of the experience.
What Makes a Pharmacy Miniature Scene Kit Special
A pharmacy miniature scene kit stands apart because it combines genuine historical atmosphere with hands-on craft: every tiny bottle, every aged wood shelf, and every hand-lettered label teaches you something real about how apothecaries actually worked.
A well-designed pharmacy kit captures the essence of 18th and 19th century apothecaries, spaces where herbalists and early pharmacists prepared remedies by hand. The aesthetic pulls from real history: dark wood cabinetry, glass vessels with cork stoppers, handwritten ingredient labels, mortar and pestle tools scaled down to fit a 3-inch shelf.
The appeal runs deeper than nostalgia. Building a pharmacy scene mirrors the work that apothecaries actually did: careful measurement, organization, attention to texture and color. Your hands move through the same motions at a different scale. A pharmacist of 200 years ago arranged bottles by type and efficacy; you arrange them by composition and visual balance. The parallel is satisfying.
Most pharmacy kits include wooden structural pieces (walls, shelving, or a counter base), pre-cut and sometimes pre-stained. Bottles, jars, and containers arrive either pre-made or as components to assemble. Labels and signage may be printed sheets ready to cut and apply, or blank templates for custom lettering. Adhesives, small tools, and lighting elements round out the package.
Difficulty Levels and Build Time
Pharmacy miniature kits range from beginner to advanced, with build times spanning 6 hours for simple assembly kits up to 30 or more hours for projects that include hand-painting, custom furniture, and sculpted botanical details.
A beginner kit focuses on assembly and gluing: fit pieces together, apply labels, arrange items on shelves. You’ll spend 6 to 12 hours spread across a few weeks, working in short sessions. No painting or delicate carving required.
| Level | Build Time | Key Skills | Best For |
|---|---|---|---|
| Beginner | 6 to 12 hours | Assembly, gluing, label application | First-time builders, gift recipients |
| Intermediate | 15 to 30 hours | Hand-painting, wood staining, clay sculpting | Crafters with some miniature experience |
| Advanced | 30+ hours | Custom sourcing, scratch-built elements, LED wiring | Experienced builders, collectors |

Top pharmacy kit
Apothecary Pharmacy DIY Miniature House Kit
$67.90
View this kit →
Intermediate kits ask more. You might hand-paint tiny text on labels, stain wood pieces to match a reference photo, or sculpt small clay elements like herb bundles. These projects stretch across 15 to 30 hours. The payoff is a scene that feels deeply personal, one you’ve shaped beyond assembly instructions.
Advanced builders sometimes modify kits wholesale, sourcing their own bottles, creating custom furniture, and building the entire backdrop from sketch. For them, a kit becomes a springboard, not a boundary.
Hannah’s tip
Start with a beginner kit even if you have experience elsewhere. Miniature scale demands a different hand-eye rhythm. Once you’ve felt how glue sets on 1-inch wood pieces, how labels look on 0.5-inch bottles, you’ll know your pacing. Then advance confidently.
Start with a beginner kit even if you have experience elsewhere. Miniature scale demands a different hand-eye rhythm. Once you’ve felt how glue sets on 1-inch wood pieces, how labels look on 0.5-inch bottles, you’ll know your pacing. Then advance confidently.
Essential Materials in a Typical Pharmacy Kit
A complete pharmacy miniature kit typically includes a pre-cut wooden structure, glass or resin vessels in period shapes, printed label sheets, wood glue, decorative tools like a scaled mortar and pestle, and optional LED lighting to illuminate finished shelves.
Open a pharmacy scene kit and you’ll usually find these core components:
- Wooden base and structure: A cabinet, shelf unit, or counter framework, pre-cut and ready for assembly.
- Glass or resin vessels: Bottles, jars, vials, and apothecary jars in various sizes and shapes.
- Labels and signage: Printed sheets with period-appropriate text (remedy names, ingredient lists) or blank stock for custom decoration.
- Adhesives and fasteners: Wood glue, super glue, small hinges, or magnetic closures depending on kit design.
- Decorative details: Tiny mortars and pestles, scales, herb bundles, or dried flower elements.
- Tools: Hobby knife, small saw, sandpaper, or paintbrushes if finishing work is included.
- Lighting (optional): Battery-powered LED strips or bulbs to illuminate shelves and create ambiance.
Some kits ship pre-assembled, requiring only decoration and arrangement. Others arrive as raw components, asking you to build from foundation up. Check the product description carefully to understand what assembly level suits your comfort zone.
Authenticity in Victorian Pharmacy Aesthetics
Authentic Victorian pharmacy aesthetics rely on deep wood stains, amber and cobalt glass vessels, script lettering on labels, and small brass details: together these visual cues immediately signal the period and make a miniature apothecary scene feel historically convincing.
The golden age of the apothecary shop spanned roughly 1750 to 1900. During this period, pharmacists combined roles: they diagnosed, prescribed, and formulated remedies on-site. The shop itself was theater. Customers saw knowledge displayed: rows of identically labeled jars, tools hanging within reach, a sense of order and expertise.
Did you know?
The gilded mortar and pestle became the universal symbol of pharmacy in Europe during the 1600s. Apothecaries displayed them prominently to signal that remedies were compounded on-premises, not imported wholesale. That same symbol appears on pharmacy signage today.
The gilded mortar and pestle became the universal symbol of pharmacy in Europe during the 1600s. Apothecaries displayed them prominently to signal that remedies were compounded on-premises, not imported wholesale. That same symbol appears on pharmacy signage today.
A credible miniature pharmacy scene echoes this visual language. Deep wood stains (mahogany, walnut) convey age and craftsmanship. Glass vessels in amber, blue, or clear tones suggest ingredient categories: amber for oils and tinctures, blue for cooling preparations, clear for salts and powders. Hand-written or script lettering on labels feels more authentic than sans-serif fonts. Tiny brass hooks, wax seals on bottle necks, and rolled parchment scrolls add texture.
Explore the collection
Pharmacy & Apothecary Miniature Kits
82 handcrafted miniature scene kits
Browse all kits →
The color palette matters. Avoid bright, modern hues. Reach instead for muted golds, deep reds, slate grays, and forest greens. These tones appeared in actual period interiors and on actual remedy bottles. Your scene will feel historically grounded rather than cartoonish.
Arrangement and Storytelling Within Your Kit
Arrangement is where a pharmacy miniature scene comes alive: placing the mortar front and center, opening the ledger to a half-filled page, and leaving a customer’s order half-wrapped on the counter all work together to suggest a moment interrupted, a real apothecary at work.
Once pieces are assembled, the real creative work begins: arrangement. This isn’t decoration for its own sake. You’re building narrative. Where is the pharmacist’s most-used remedy? The mortar sits front and center, recent use visible in faint herb dust. Behind it, ranked bottles of ingredients: nettle, valerian, feverfew, each labeled and organized by frequency of use or efficacy. A ledger lies open nearby. A customer’s order waits on the counter, half-wrapped in brown paper.
Storytelling at miniature scale teaches you to see spaces differently. Every object must earn its placement. Every detail contributes to a sense of inhabited time. This constraint is freeing. You’re not trying to fill a large room; you’re curating a moment frozen at 1:12 scale.
Many builders photograph their finished scenes from multiple angles, capturing light as it shifts through a day. Others display them in shadow boxes or on shelves. The community shares builds on forums and social media, and the conversation often turns to historical accuracy, material sourcing, and clever improvisation. If you glue your first tiny bottle cap upside down, someone online will have done the same and found a workaround.
Sourcing Custom Pieces and Extending Your Kit
Once you’ve completed your first pharmacy kit, extending it with custom pieces is straightforward: specialty suppliers sell period Victorian pharmaceutical labels, artisan-blown resin bottles, and pressed botanical elements that slot straight into your existing scene.
A pharmacy kit sets the frame. But hobbyists often venture beyond. Specialty suppliers sell Victorian-era pharmaceutical labels by the sheet (printable PDFs or pre-cut stickers). Artisans craft resin bottles with hand-painted labels. Woodworkers offer pre-stained cabinetry in period-specific styles. Botanical enthusiasts press real dried herbs, scaled to miniature proportions, and offer them for sale.
The beauty of starting with a kit is that it teaches you what to look for. After you’ve built one scene, you’ll recognize quality in custom components. You’ll know whether a particular shade of glass authentically represents a specific remedy category. You’ll see how proportions should align. Then, if you choose, you can customize your next build with confidence.

Easy starter under $50
Vintage Apothecary Cabinet DIY Miniature Kit
$49.99
Start with this kit →
Community forums and maker groups often swap recommendations for suppliers of period-specific details: brass nameplate engravings, hand-spun glass vessels, historically accurate printing on label stock. You’re not inventing these items; craftspeople have already solved these problems. The knowledge is shared freely, a hallmark of the miniature-building community.
Lighting and Display Considerations
Warm white LEDs at 2700K to 3000K transform a finished pharmacy miniature scene by mimicking candlelight and gas lamp glow, making amber bottles glow from within and giving the whole cabinet the atmospheric depth of a real period interior.
A pharmacy scene gains depth and warmth under proper light. Warm white LEDs (2700K to 3000K color temperature) mimic candlelight or early gas lamps. Cool whites feel too clinical, wrong for an aged apothecary. Battery-powered strips or micro-bulbs fit inside cabinet frames, illuminating bottles and labels without visible wiring.
Placement matters too. A pharmacy scene displayed on an open shelf in an east-facing window catches morning light beautifully. The same scene in a shadow box on a north wall might benefit from added lighting. Experiment. Photograph your work in different settings and times of day. Light transforms small spaces in ways that large rooms can’t match.
Dust protection is practical but invisible. A clear acrylic cover, a glass dome, or a closed shadow box keeps your finished scene pristine. Dust won’t settle on tiny bottles or accumulate in corners. Your work stays exhibition-ready for years.
Why Pharmacy Kits Appeal to Gift-Givers
A pharmacy miniature scene kit makes an unusually thoughtful gift because it is self-contained, works in a small space, and produces a display-ready finished object that tells a historical story on any shelf or mantelpiece.
A pharmacy miniature kit makes a thoughtful gift for several reasons. It’s enclosed and focused, not requiring a sprawling workspace. A beginner can finish it in a few weeks of casual evenings. It appeals across age ranges: teenagers enjoy the historical element and creative problem-solving; adults find meditative rhythm in assembly; older crafters appreciate the nostalgia and precision required.
The finished scene is display-ready. Unlike a painting or sculpture that requires framing or a pedestal, a completed pharmacy kit sits naturally on a shelf, bookcase, or mantelpiece. It tells a story without explanation. Visitors ask about it, and the giver becomes the storyteller, sharing what they learned while building.

Premium collector piece
Herbalist Workshop DIY Miniature Kit
$155.00
Discover this kit →
For collectors, a pharmacy kit complements other book-nook and scene kits. A library nook can have a companion pharmacy shelf. A kitchen scene gains depth with a period apothecary cabinet nearby. Thematic clustering builds a miniature world, each piece enriching the others.
Common Building Challenges and Solutions
The most common challenges in building a pharmacy miniature scene are excess glue in tight corners, labels that wrinkle on curved bottles, and paint that obscures fine detail when applied too heavily: all three have simple, well-tested fixes that the community has refined over decades.
Small spaces demand precision. Glue can drip into tight corners. Labels can wrinkle during application. Paint can obscure fine details if applied too heavily. These are not failures; they’re normal hurdles, and the community has refined solutions over decades.
Excess glue: Use a toothpick to apply adhesive in micro-amounts. Let it cure fully before moving pieces. Dried glue usually peels cleanly if you’re patient.
Label application: Spray adhesive works better than brush-applied glue for thin paper. Smooth from center outward with a soft cloth to avoid wrinkles and air bubbles.
Paint saturation: Thin coats win every time. Two or three light applications of color look better than one thick coat. Letting each coat dry fully prevents muddy tones.
Bottle arrangement: Organize by height and color first, stepping back frequently to see balance. Asymmetrical arrangements often feel more natural than rigid grids.
These aren’t advanced techniques. They’re the accumulated wisdom of builders who’ve made the mistakes before you. That knowledge is available; you’re simply joining a conversation already underway.
Frequently Asked Questions about Pharmacy Miniature Scene Kits
Everything you might be wondering (click a question to expand).
How long does a pharmacy kit realistically take to complete?
Beginner kits typically take 6 to 12 hours of actual work time, spread across several weeks. That’s 1 to 2 hours per session, maybe two sessions a week. Intermediate kits stretch to 20 to 30 hours. Most builders find that pacing their work prevents fatigue and mistakes.
Do I need special tools to build a pharmacy miniature scene?
A basic hobby knife, small scissors, glue, and a ruler cover most kits. Advanced work might benefit from a craft saw, magnifying lamp, or fine paintbrushes, but these are optional, not required. Start with what’s included and upgrade only if you choose to customize extensively.
Can I use actual dried herbs and real glass in my pharmacy scene?
Yes, many builders do. Real herbs add authentic texture and scent. Real glass bottles feel more substantial than resin. Check your kit’s material list first; if it includes modern adhesives, they’ll bond to natural materials safely. Just ensure dried botanicals are actually dry to prevent mold.
What happens if I make a mistake during assembly?
Mistakes are part of the process. Glue joints can be carefully separated with gentle heat from a hair dryer. Painted pieces can be lightly sanded and repainted. Labels can be carefully peeled and replaced. Most errors are recoverable if you work slowly and don’t panic.
Should I display my pharmacy kit in a shadow box or open shelf?
Both work. Open shelves look stunning and encourage close inspection. Shadow boxes protect from dust and create an elegant presentation, like a museum diorama. Choose based on your space and how much handling you expect the piece to receive.
Is a pharmacy miniature kit suitable for children?
Beginner kits are suitable for ages 14 and up with adult supervision. The hobby knife and small adhesives require care, but the assembly steps are straightforward and clearly illustrated in quality kits. Younger builders often love the historical storytelling aspect as much as the craft itself.
Joining the Miniature Building Community
The miniature building community is one of the most welcoming craft spaces online, with active forums, Instagram groups, and local guilds where beginners and experienced collectors share builds, swap supplier tips, and encourage each other through every crooked label and wobbling shelf.
Your pharmacy kit connects you to thousands of builders worldwide. Online forums, Instagram communities, and local crafting groups all celebrate miniature work. Experienced builders share reference photos, technique videos, and supply recommendations. Beginners post questions and photos of their first attempts, and the response is overwhelmingly encouraging.
This community doesn’t gatekeep or demand perfection. A crooked label, visible glue seams, or slightly uneven paint doesn’t diminish the accomplishment. What matters is the time invested, the attention paid, the story created. Your pharmacy miniature scene is yours. Its quirks are its character.
Many builders find that completing one kit inspires the next. A pharmacy scene teaches you specific skills: glass handling, period accuracy, narrative arrangement. Those skills transfer. Your second build goes faster, deeper, more confidently. Your third opens new creative doors you didn’t know existed. If you’re curious where to go next, our full collection of miniature house kits has something for every stage of the journey.