🎁 Buy 2 kits, get the 3rd FREE · Free shipping on every order

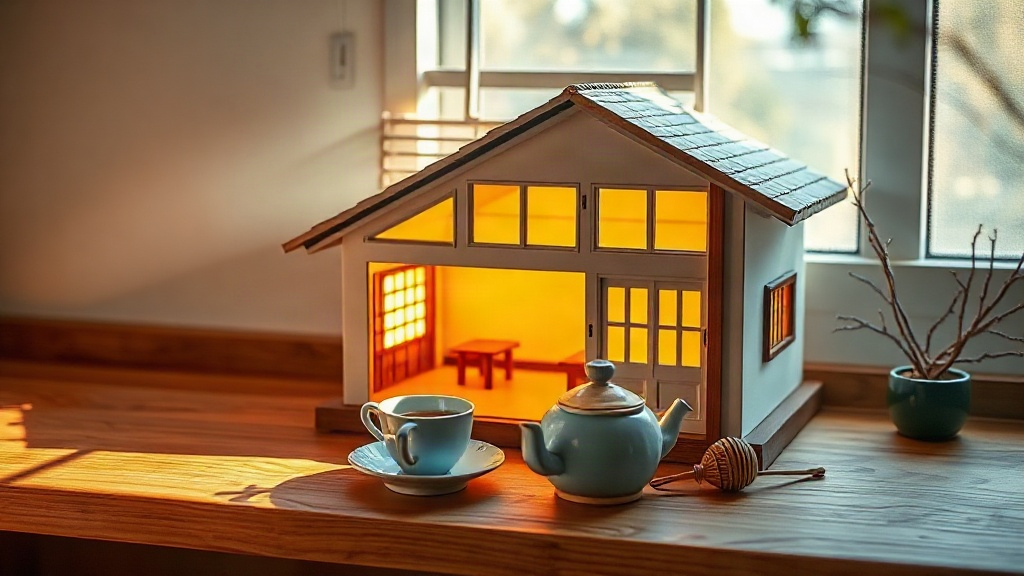
Tea House Miniature Kit: Build a Cozy Escape Room Scene
Discover how to build your own tea house miniature kit from start to finish. This guide covers everything from assembly basics and difficulty ratings to design choices that capture authentic Japanese and English tea room aesthetics. Perfect for beginners and experienced builders seeking a meditative creative project.

A tea house miniature kit sits on the border between craft and meditation. You’re not just gluing walls and arranging furniture; you’re building a place where you can pause. The ritual of it, carefully fitting a tiny teapot onto a shelf, positioning lanterns to catch light, adding the smallest details that make a space feel lived-in, has a way of anchoring you in the present moment.
This guide walks you through everything you need to know to bring your tea house to life, from choosing the right kit to finishing touches that transform miniature rooms into believable worlds.
What Comes Inside a Tea House Miniature Kit
A tea house miniature kit typically includes pre-cut wooden wall panels, a floor base, roof sections, furniture pieces sized to 1:12 scale, decorative accessories, and LED lighting components, giving you everything needed to complete a furnished miniature scene in a single box.
Structural pieces usually include wooden wall panels (often with window and door frames already routed), a foundation base, roof sections, and any architectural details like railings or trim. Many kits ship with adhesive pre-applied to certain joints, which speeds up assembly for beginners.
Furniture and decor vary widely. A Japanese-style tea house kit might include low tables, floor cushions, sliding paper screens (shoji), and decorative scrolls. English tea room kits tend toward upholstered chairs, porcelain teacups, tiered cake stands, and lace curtains. Some kits include everything down to individual tea leaves; others supply only the major pieces and leave styling to your taste.
Lighting is where modern kits shine. Most include small LED strips or bulbs powered by USB or battery, plus wiring that threads through hidden channels in the walls. This transforms your scene from a flat miniature into something that feels genuinely inhabitable when the lights dim.
Difficulty Ratings and Assembly Time
Tea house miniature kits divide into three difficulty tiers: beginner builds take 1-2 hours with snap-fit assembly, intermediate builds require 4-8 hours of careful gluing and painting across several sessions, and advanced builds demand 12 or more hours including woodworking and electrical work.
Beginner kits (1-2 hours of work) use snap-fit or pre-glued construction. Walls click together or are already partially assembled. You mainly arrange furniture and add decor. These are ideal if you’re new to miniatures or want a relaxing weekend project without frustration.
Intermediate kits (4-8 hours spread across several sessions) require careful gluing, simple painting or staining, and attention to wall alignment. You might glue wooden beams, trim excess material, and position windows before assembly. Many tea house kits land here; the craftsmanship matters, but the steps are straightforward enough that mistakes rarely derail the whole build.
Advanced kits (12+ hours over weeks) demand woodworking skills. You sand walls to fit precisely, mix custom paint colors, install electrical wiring with soldered connections, and create your own decor from raw materials. These appeal to experienced builders who view the kit as a framework for original design.
Be honest about your pace. A beginner rushing through intermediate steps produces frustration; an experienced builder bored by snap-fit pieces misses the meditative satisfaction of careful handwork. Choose accordingly. If you want a kit that sits beautifully in that intermediate sweet spot, the Tranquil Life is one Hannah tests regularly at her own workbench, and it delivers that gentle challenge without tipping into overwhelm.
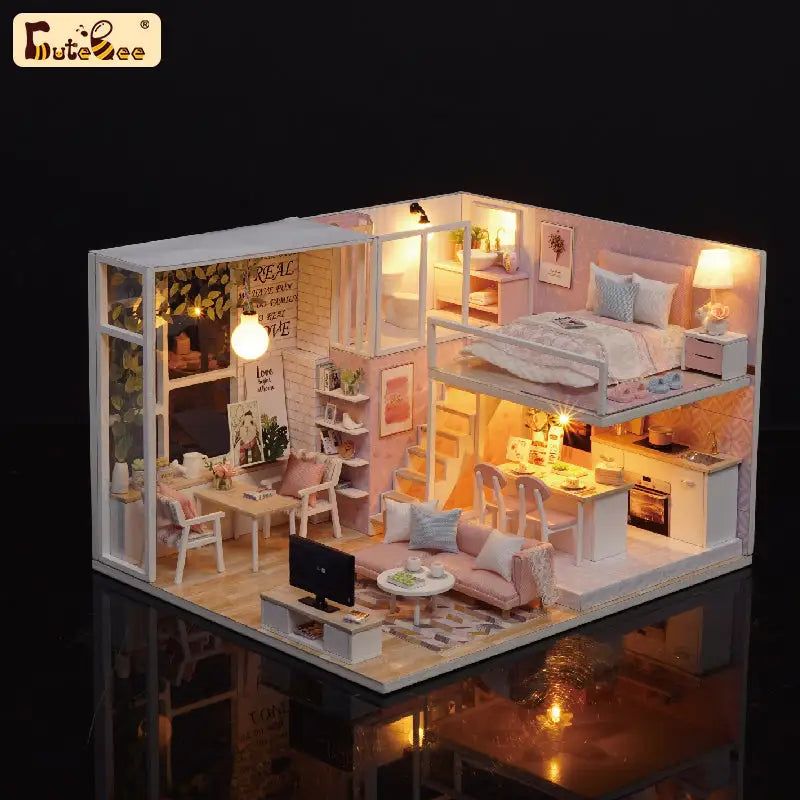
Bestseller cottage kit
Tranquil Life DIY Miniature House Kit
$67.90
View this kit →
Japanese Tea House Design: Aesthetic and Materials
Japanese tea house miniature kits, based on the traditional chashitsu (the small room built specifically for the tea ceremony), emphasise natural materials, minimal colour, and deliberate emptiness: tatami flooring, wooden beams, sliding paper screens, and a single warm light source that together create a mood of quiet attention.
The flooring is typically tatami mat texture (woven rice straw). Walls are painted plaster or wood, usually in soft grays, creams, or pale greens. Windows frame garden views or abstract scenes. The tea preparation area (called the mizuya) shows functional detail: small shelves for utensils, a water source, and storage for tea implements.
Lighting in Japanese designs stays warm and diffused. A single hanging lantern or recessed soft glow mimics candlelight or paper-filtered sunlight. This creates intimacy without harsh shadows.
If your kit includes a garden courtyard or adjacent room, consider adding miniature moss, pebbles, or a small water feature. Even at one-twelfth scale, these elements anchor the space in nature, which is central to the philosophy behind the original tea ceremony.
Hannah’s building tip
When assembling walls, dry-fit everything first before applying adhesive. Tap walls gently with a rubber mallet to seat joints evenly. If a wall sits proud by even 2mm, the roof won’t align, and you’ll spend an hour troubleshooting what could have been solved in 30 seconds of patience upfront.
When assembling walls, dry-fit everything first before applying adhesive. Tap walls gently with a rubber mallet to seat joints evenly. If a wall sits proud by even 2mm, the roof won’t align, and you’ll spend an hour troubleshooting what could have been solved in 30 seconds of patience upfront.
English Tea Room Aesthetic: Comfort and Character
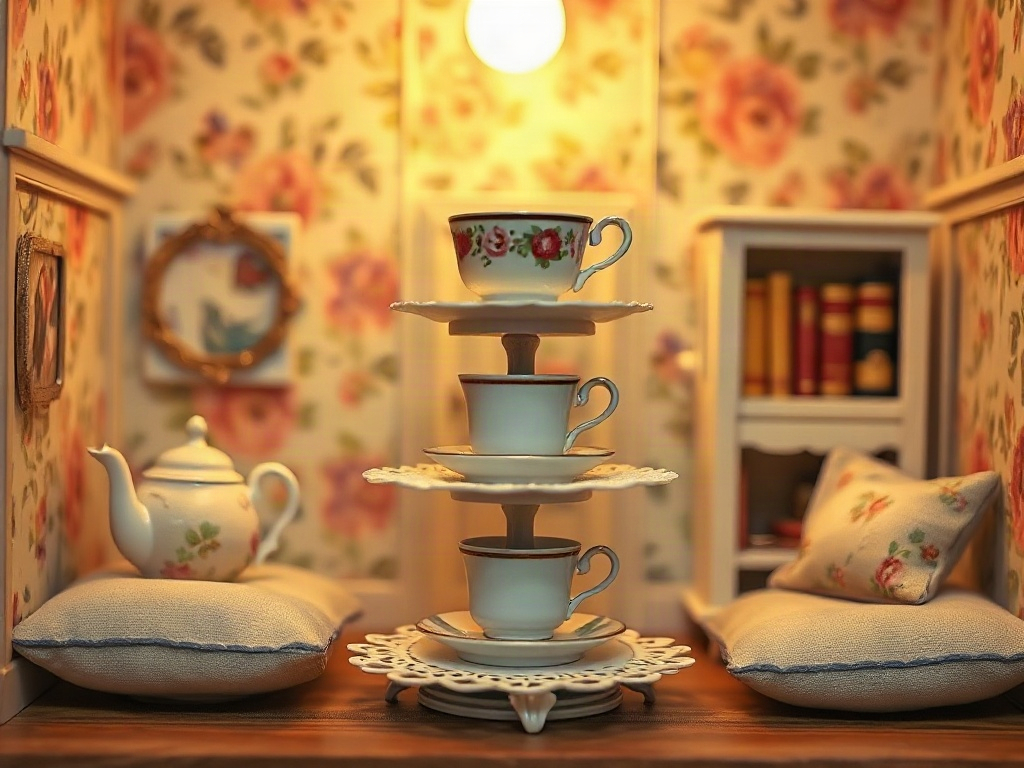
An English-style tea room miniature kit leans into layered comfort: floral wallpaper, mismatched china, upholstered wing chairs, tiered cake stands, and warm amber lighting that together recreate the feeling of a Victorian tearoom on a wet afternoon.
Walls often feature damask or floral prints, painted woodwork in soft whites or sage greens, and framed botanical prints or vintage tea advertisements. The colour palette is warmer and busier than Japanese designs. Layered fabrics, lace doilies, velvet cushions, linen napkins, add texture that rewards close inspection.
Furniture sits higher and more upholstered. Wing chairs, settees, and round tables replace the low seating of Japanese rooms. A tiered cake stand becomes the centrepiece; shelves display teacups and saucers in varied patterns.
Lighting works differently here too. Victorian-era fixtures like table lamps with fabric shades, wall sconces with etched glass, or a small crystal chandelier feel authentic. Warm bulbs around 2700K create that amber glow you see in period photographs.
If your kit includes outdoor elements, add climbing ivy (plastic vines), potted flowers, and perhaps a small bench. An English tea room almost always has a garden connection, even if it’s just a view through lace curtains.
Not sure which style suits you? The quick comparison below captures the main differences at a glance.
| Feature | Japanese Tea House (Chashitsu) | English Tea Room |
|---|---|---|
| Colour palette | Soft grays, creams, pale greens | Warm florals, sage, ivory, amber |
| Flooring | Tatami mat texture | Wood, tile, or patterned rugs |
| Key furniture | Low tables, floor cushions, shoji screens | Wing chairs, settees, tiered cake stands |
| Lighting style | Single lantern, paper-filtered glow | Table lamps, wall sconces, chandelier |
| Mood | Quiet, minimal, meditative | Cosy, layered, personality-rich |
| Typical difficulty | Beginner to intermediate | Intermediate (more textile work) |
If you love the English aesthetic and are curious whether a book nook format might suit a smaller shelf space, our full Book Nook collection applies the same cosy-room feeling to a narrower footprint.
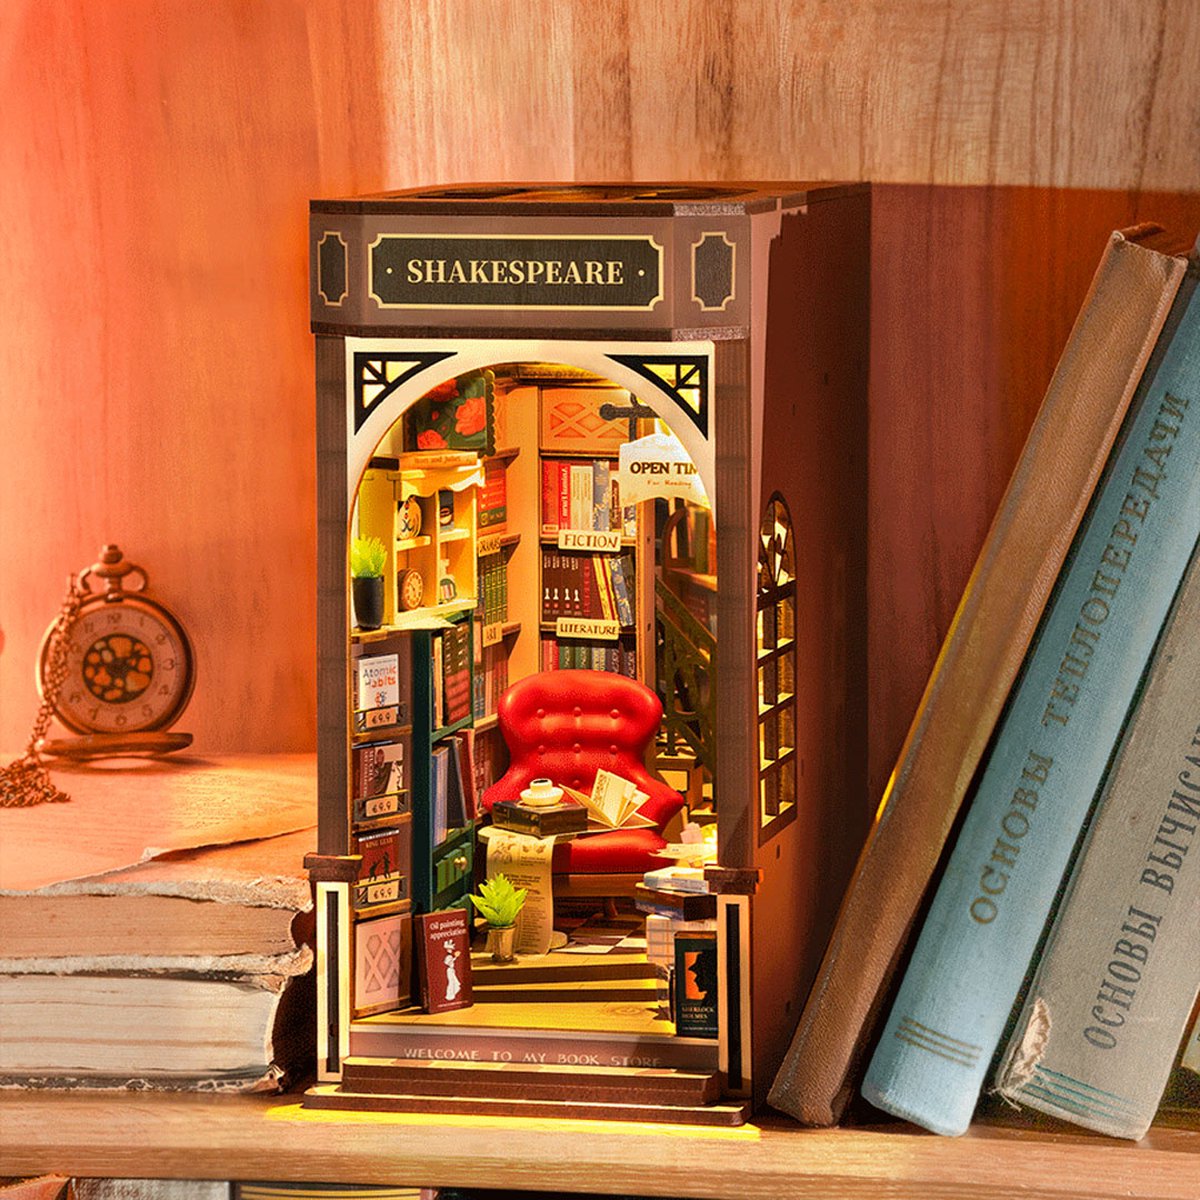
Explore the collection
All Book Nook Kits
76 handcrafted book nook kits
Browse all book nooks →
Assembly Workflow: Step by Step
The single most important rule in assembling a tea house kit is to build in the right sequence: floor and walls first, roof second, fixed interior fittings third, then furniture last, because every earlier layer needs to cure before the next one sits squarely on top of it.
Step 1: Prepare your workspace. Lay out all pieces and verify nothing is missing. Read the instructions twice before touching adhesive. Have a damp cloth nearby for excess glue.
Step 2: Build the base structure. Assemble the floor and walls first, checking squareness with a small level. Most kits include alignment pins or slots; use these. Let adhesive cure fully before moving to the next stage. This is not a place to hurry.
Step 3: Install the roof. Roof alignment is fussy. Dry-fit it multiple times, gently tapping until edges align. Once satisfied, glue and clamp lightly. Uneven roof edges spoil an otherwise beautiful build.
Step 4: Add interior details. Before placing furniture, install any permanent fixtures: shelves, light wiring, wall-mounted art. This prevents you from having to reach around pieces later.
Step 5: Position furniture and decor. Start with large pieces, then layer in smaller items. Step back frequently to assess balance and sightlines. A room that looks finished up close might feel empty when viewed from across a shelf.
Step 6: Test lighting. Power on LEDs and observe how shadows fall and how the room reads in dim light. Adjust bulb positions if needed. This is your final chance to shift pieces without disturbing glued-down details.
Personalizing Your Tea House with Custom Details
The builds that stop people in their tracks are never the ones straight out of the box: they’re the ones where the builder added one or two personal details, a hand-lettered sign, a fabric scrap with history, a tiny object that means something only to them.
Consider adding custom signage. A tiny wooden plaque above the door, painted with calligraphy or lettering, sets the tone. For Japanese rooms, minimal text (just a name) works best. English rooms can include a small price list for tea and pastries.
Textiles make enormous impact. Fabric paint on plain cushions, hand-sewn curtains, or tiny embroidered table runners show intention. Many builders collect antique scraps specifically for miniature projects; these aged fabrics add authenticity that new material can’t match.
Tiny tableware tells stories. Mismatched teacups in an English room suggest history. A complete formal tea service arranged for ceremony in a Japanese room speaks to ritual. Spend time on these small elements; they’re what observers notice first.
Add one or two personal touches that reference your own life. A miniature book spine with a title that means something to you. A photograph in a frame. These details anchor the room in your imagination and make it yours rather than simply a replica. If you’re just starting out and want a forgiving kit to practise personalisation on, the Sun Room is a warm, light-filled build that leaves plenty of room for your own additions.
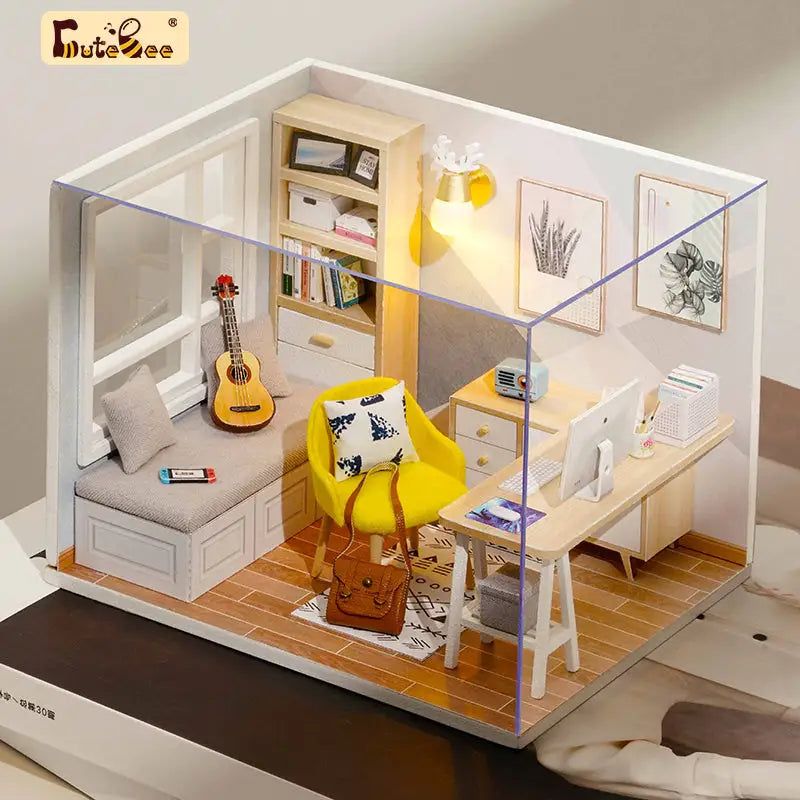
Easy starter under $50
Sun Room DIY Miniature House Kit
$49.99
Start with this kit →
Worth knowing
The tradition of creating scale-model tea rooms has roots in Japan, where detailed miniature chashitsu were made as teaching aids and collector pieces to preserve traditional tea house architecture. Modern DIY kits carry that spirit forward: they’re a way of engaging with a design tradition that rewards slow, careful attention.
The tradition of creating scale-model tea rooms has roots in Japan, where detailed miniature chashitsu were made as teaching aids and collector pieces to preserve traditional tea house architecture. Modern DIY kits carry that spirit forward: they’re a way of engaging with a design tradition that rewards slow, careful attention.
Displaying Your Finished Tea House
How you display a finished tea house miniature matters almost as much as how you built it: the right shelf height, background, and lighting conditions turn a completed kit into a living focal point rather than a dusty ornament.
Lighting conditions shape everything. A room with natural daylight from one direction creates realistic shadows but can fade colours over time. North-facing shelves offer stable, cool light without UV damage. If you use artificial lighting, aim for warm white bulbs (2700K) positioned to minimise glare on glass or clear surfaces.
Shelving height affects viewing experience. Eye level feels most natural; mounting your kit at chest height lets visitors engage without stooping. A shallow shelf (8-10 inches deep) prevents the back from disappearing into shadow and makes every corner visible.
Background choices influence perception. A plain white wall emphasises the kit itself. A textured backdrop (cork board, fabric, painted wallpaper matching the room’s aesthetic) creates context. Some builders create small dioramic extensions: a garden landscape behind a Japanese tea house, or a street scene visible through windows of an English room.
Every few months, rotate your display or your kit’s position slightly. You’ll notice details you missed, catch dust more easily, and prevent uneven fading from directional light.
Common Building Mistakes and How to Avoid Them
The five mistakes that ruin otherwise careful builds are misaligned walls, over-gluing, untested electrical connections, over-furnished rooms, and skipping the instruction sequence; every one of them is avoidable with ten extra minutes of preparation at the right moment.
Misaligned walls. This cascades into roof and door fit issues. Spend five extra minutes checking squareness on each wall. A small carpenter’s square or even a phone level catches this before adhesive sets.
Over-gluing. Excess adhesive oozes out and hardens visibly, then resists cleanup. Use a thin bead only, wiping immediately with a damp cloth. Less is always better; you can apply more, but removing dried glue from intricate joints is maddening.
Poor electrical connections. If your kit includes LEDs, test wiring before final assembly. A bulb that fails after you’ve glued everything down is a catastrophe. Soldered connections should be inspected with a magnifying glass; cold solder joints look dull and break easily.
Rare in the niche
Miniature Greenhouse Kits
22 LED-lit greenhouse builds
See our greenhouse range →
Cluttered decor. Beginners often over-furnish rooms. Empty space matters. Negative space gives the eye room to rest and makes the few pieces you include feel intentional and valuable. Resist the urge to fill every corner.
Ignoring the instructions. Each kit is engineered specifically. Skipping steps because you think you know better courts disaster. The instructions exist because someone tested the assembly sequence. Follow it.
Building as Community: Inspiration and Shared Experience
The miniature building community is one of the most generous creative spaces online: builders freely share work-in-progress photos, troubleshooting fixes, and personalisation ideas across forums, Instagram, and YouTube, which means you are never truly alone when a joint won’t seat or a colour looks wrong.
Many builders post their tea house builds on platforms like Pinterest or YouTube, creating a rich visual library. Seeing how others personalised similar kits sparks your own creativity. Someone’s hand-painted tea leaves on a shop shelf might inspire you to attempt your own details.
Craft groups and conventions gather builders of all skill levels. Showing your finished kit to others who understand the work involved brings unexpected recognition. These communities often share small details (custom figurines, miniature plants, specialty paints) that transform a good build into an exceptional one.
If you get stuck, ask. The community almost always responds with patience and practical advice. This collaborative spirit is part of what makes miniature building healing rather than isolating.
Tea House Kits as Gifts for Different Audiences
A tea house miniature kit makes a genuinely thoughtful gift when you match it to the recipient’s skill level: beginner kits for someone who needs structured calm, intermediate or advanced kits for an experienced builder, and always pair with a handwritten note naming one specific detail you’re curious to see them create.
For someone stressed or burned out, an intermediate beginner kit offers structured creativity without overwhelming complexity. The meditative rhythm of assembly becomes a form of active rest.
For an experienced builder or dollhouse enthusiast, consider an advanced kit or a specialty design (vintage tearoom, Asian fusion, or limited-edition tea house). These builders have the skill to customise extensively and appreciate technical challenges.
For gift-givers unsure of recipient skill level, beginner kits are safest. They rarely disappoint; even if assembly takes longer than expected, the barrier to success is low. Pair it with a small tool kit or specialty adhesive to show thoughtfulness.
Include a handwritten note naming a specific room element you’re curious to see them build. This personal touch transforms a box of materials into a shared creative moment. If you’re looking for a premium gift that doubles as a collector piece, Monet’s Garden is the kit Hannah reaches for when she wants to give something that genuinely surprises people.
Premium collector piece
Monet’s Garden DIY Miniature House Kit
$155.00
Discover this kit →
Frequently Asked Questions about Tea House Miniature Kits
Everything you might be wondering (click a question to expand).
How long does a tea house miniature kit take to build?
Beginner kits take 1-2 hours. Intermediate kits typically require 4-8 hours spread across 2-4 sessions. Advanced builds may take 12+ hours over weeks or months. Your skill level, pace, and customisation ambitions all affect the timeline.
Do I need special tools to assemble a tea house kit?
Most kits require only basic tools: a craft knife, cutting mat, ruler, glue, and small paintbrushes. Advanced kits may call for sanding tools, rotary cutters, or fine-tipped soldering irons for electrical work. Your kit’s instructions specify what’s essential.
Can I modify a tea house kit after assembly?
Absolutely. Once the base structure is complete, adding or changing decor is straightforward. Many builders add lighting, repaint walls, swap furniture, or install custom details months or years after finishing the main build. Consider the kit a foundation, not a final product.
What’s the best way to protect a finished tea house from dust?
A clear acrylic display case or glass dome prevents dust accumulation without blocking the view. If budget is tight, a simple acrylic sheet angled as a roof works for some designs. Avoid thick plastic or cloth covers that trap moisture and fade colours.
Are tea house kits suitable for children?
Yes, with age-appropriate selection. Beginner kits with pre-glued assembly suit ages 8 and up. Intermediate kits (requiring careful gluing and fine motor control) work for ages 12 and up under supervision. Adult guidance makes the experience safer and more rewarding regardless of age.
Should I choose a Japanese or English tea house style?
Choose Japanese if you’re drawn to quiet, minimal spaces and enjoy the meditative side of careful assembly. The palette is restrained and the rooms reward slow looking. Choose English if you love layered colour, textile details, and a warmer, more eclectic mood. If you genuinely can’t decide, the English style tends to be more forgiving for first-time builders because small imperfections are hidden by the busy decor.
Beyond the Build: What Tea House Kits Teach Us
Finishing a tea house miniature kit is the beginning, not the end: what sits on your shelf is evidence that detail matters, that small spaces hold real power, and that the slow, careful work of making something with your hands feeds something essential in you.
The tea house becomes a place you visit with your eyes when the world feels too loud. It’s a reminder that quiet, cosiness, and thoughtful design are not luxuries; they’re necessities. And the skills you learned building it, observing materials, solving spatial puzzles, personalising a vision, carry into every creative project you undertake next.
Whether your tea house sits in a glass cabinet, on a bookshelf, or displayed in a shadow box, it’s a tiny monument to the power of making. That matters far more than whether every joint is perfect or every paint line is straight. The imperfections are where your hand lived.