🎁 Buy 2 kits, get the 3rd FREE · Free shipping on every order


How to Dust-Proof a Book Nook: Practical Tips for Keeping Your Miniature Scene Clean
Dust ruins miniature detail fast. This guide covers how to dust-proof a book nook with varnishes and fixatives for each material type, acrylic panel and display case options, smart shelf placement rules, and a simple ongoing cleaning routine.

You spent weeks assembling tiny shelves, painting brick walls, and gluing down minuscule furniture. The last thing you want is a film of grey dust slowly erasing all of that detail. Knowing how to dust-proof a book nook is one of those practical skills the kit instructions rarely cover, but every builder eventually needs. Here is a straightforward, field-tested approach from someone who has watched more than a few beautiful scenes go hazy.
The good news: protecting your book nook does not require expensive tools or a conservation degree. A few smart sealing choices, the right display location, and a simple maintenance habit are all it takes to keep your miniature scene looking freshly finished for years. I know this because I have been doing it since that first rainy Sunday in 2021 when I fell completely down the rabbit hole with a Victorian dollhouse kit and have not looked back since.
Why Dust Is a Real Threat to Miniature Book Nooks

Dust is a genuine threat to miniature book nooks because their enormous surface area traps particulate matter in every tiny groove and fiber, and over time that accumulation yellows paper elements, lifts decoupage layers, and permanently dulls painted finishes. Miniature scenes have an enormous amount of surface area for their physical size. Tiny grooves in brick wallpaper, exposed fiber in flocked grass, hand-painted wood grain, delicate paper flowers – every one of those textures acts like a dust trap. Regular household dust is not just an aesthetic problem either. Over time, particulate matter carries oils and humidity that can yellow paper elements, lift decoupage layers, and dull painted finishes.
Book nooks sit on bookshelves by design, which places them exactly where natural air convection currents deposit the most airborne particles. Add a nearby window or heating vent, and the accumulation accelerates fast. Tackling protection before the first layer settles is far easier than trying to clean an already-loaded scene.
I noticed this painfully with one of my early builds: a tiny Victorian reading room with embossed wallpaper panels. Within three months of sitting open on my shelf, the cream-colored paper had taken on a flat grey cast that no amount of gentle brushing could fully reverse. The lesson stuck. Now I seal every build before it leaves my workbench.
Did you know?
Museum conservators classify household dust as a “low-level abrasive.” Studies from the Getty Conservation Institute have shown that dry dusting alone, if done with the wrong tool, can scratch matte paint surfaces and permanently dull fine detail work. The same logic applies to miniature scenes: aggressive cleaning does more cumulative damage than gentle prevention.
Museum conservators classify household dust as a “low-level abrasive.” Studies from the Getty Conservation Institute have shown that dry dusting alone, if done with the wrong tool, can scratch matte paint surfaces and permanently dull fine detail work. The same logic applies to miniature scenes: aggressive cleaning does more cumulative damage than gentle prevention.
Sealing the Interior: Varnishes and Fixatives That Actually Work
Sealing a book nook interior with a matte acrylic varnish or fixative spray during the final build stages is the most effective first line of defense: it creates a micro-thin barrier over surfaces so dust sits on the varnish rather than embedding in raw paint or paper fibers. The first line of defense is a surface sealant applied during the final build stages. A matte acrylic varnish, sprayed lightly from about 12 inches away, creates a micro-thin barrier over painted surfaces without flattening the texture. It makes future cleaning far gentler because dust sits on the varnish rather than embedding in raw paint or paper fibers. This single step, done before you call a build “finished,” will save you more grief than any cleaning routine ever could.
Choosing the Right Sealant for Each Material
Not every sealant works on every surface. Here is a quick-reference comparison that took me several builds of trial and error to figure out:
| Material | Recommended sealant | Application tip | Avoid |
|---|---|---|---|
| Painted wood / plywood panels | Water-based matte acrylic varnish (Mod Podge Matte, Liquitex Matte Medium 50/50 with water) | 1 to 2 thin coats; allow 24 hrs between coats | Oil-based varnish (yellows over time) |
| Wallpaper and printed paper elements | Light fixative spray (Krylon Matte Finish, Rust-Oleum Crystal Clear Matte) | Hold can 14 to 16 inches back; one pass only | Brush-on products that saturate thin paper |
| Flocked and fabric textures | None (skip liquid varnish entirely) | Rely on physical cover and placement | Any liquid sealant (mats fibers permanently) |
| Resin and pre-cast pieces | Optional light clear coat to unify sheen | One mist coat from 14 inches | Heavy coats that pool in recesses |
| Dried botanicals and paper flowers | Unscented light-hold hair spray | One pass from 10 inches; let dry fully | Wet varnish (collapses delicate petals) |
Let every sealant coat cure fully, typically 24 hours at room temperature, before moving on to the next stage. Rushing this step is the most common mistake builders make, and the consequences show up weeks later when varnish crinkles or paper elements start to lift at the edges.
Hannah’s tip
Before sealing your completed book nook, do a quick test on the inside bottom panel where it won’t show. Some matte varnishes add a very faint sheen under warm light. Testing first saves you from changing the mood of a carefully lit scene. I learned this the hard way with a night-market nook that suddenly looked “plasticky” after I sprayed it. One test panel saves a lot of regret.
Before sealing your completed book nook, do a quick test on the inside bottom panel where it won’t show. Some matte varnishes add a very faint sheen under warm light. Testing first saves you from changing the mood of a carefully lit scene. I learned this the hard way with a night-market nook that suddenly looked “plasticky” after I sprayed it. One test panel saves a lot of regret.
Physical Covers: Acrylic Panels, Display Cases, and DIY Options
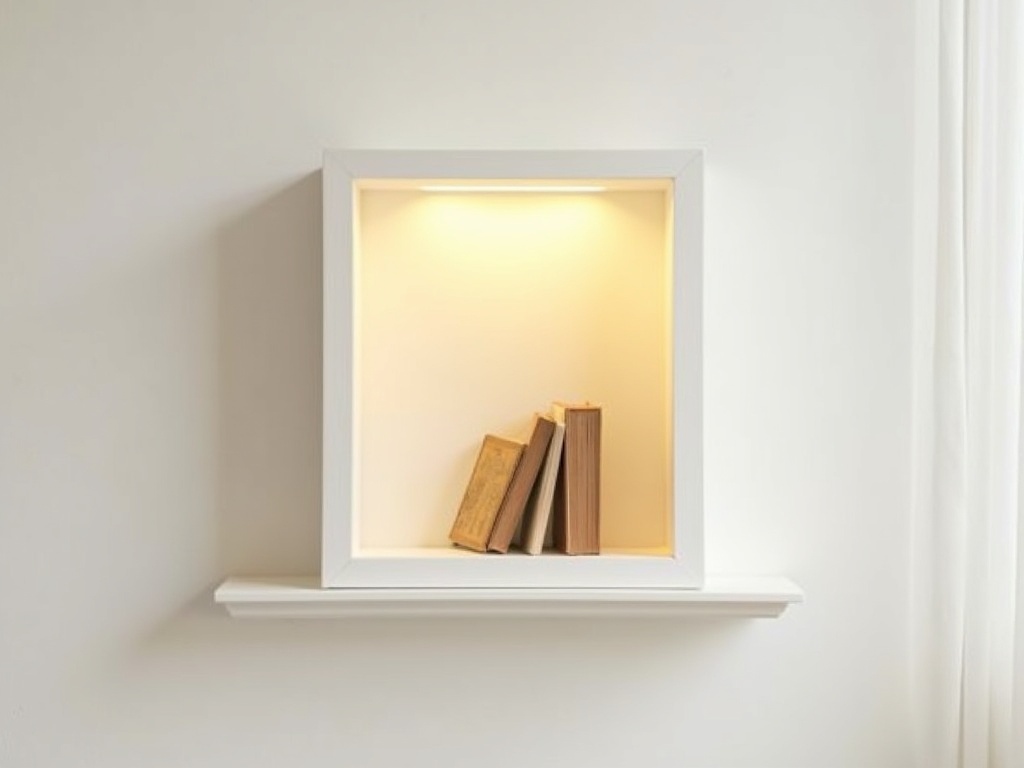
A physical barrier is the single most effective dust-proofing method available: a thin acrylic panel, glass display case, or DIY frame insert blocks the vast majority of airborne particles before they ever reach your miniature scene. A physical barrier is the single most effective dust-proofing method available. Nothing else comes close. The question is which cover format suits your specific book nook, your shelf depth, and how much access you want for photography and adjustments.
Thin Acrylic Panels Cut to Size
For book nooks that sit flush with a bookshelf spine, a thin clear acrylic panel (2 mm thickness) cut to the exact face dimensions works beautifully. Hardware stores and online retailers like TAP Plastics sell pre-cut panels; you can also order custom sizes. Attach with small neodymium magnets glued to the frame edges, so the panel lifts off for photography or adjustment without scratching the finish. Total cost is usually under $15 for a standard book nook face. That is probably the best $15 you will spend on a build that took you 20-plus hours to complete.
Glass Display Cases and Bell Jars
Freestanding book nooks or diorama-style builds benefit from a glass display case or a wide bell jar. These provide 360-degree protection, which matters if your build is meant to be seen from multiple angles. Glass cases also add a collectible, gallery-like feel that many builders in our community have told us elevates the perceived value of their work as a gift. Check that the interior dimensions give at least half an inch of clearance on each side so the scene breathes a little rather than fogging up in humid weather.
DIY Frame-and-Acrylic Covers
If you enjoy the building process as much as the finished piece, constructing a simple wooden frame with an acrylic insert is a satisfying weekend project. Use the same wood species as your book nook body for a unified look. Route a shallow channel inside the frame to seat the acrylic panel flush, and finish the wood to match. The frame doubles as a mounting aid if you want to hang the scene on a wall. Several builders in our community have shared photos of their framed nooks and the effect is genuinely gallery-worthy.
For ready-made protective accessories designed specifically for miniature builds, browse the book nook accessories collection, which includes magnetic acrylic panels and display hardware sized for the most popular kit formats.
If you are just starting out and want a kit that is designed with clean-lined surfaces that are especially easy to seal and protect, the Sun Room DIY Miniature House Kit is a great first build. Its open, bright interior means fewer textured traps for dust, and the build itself is one of the most satisfying beginner experiences we offer.

Easy starter under $50
Sun Room DIY Miniature House Kit
Beginner-friendly build · includes LED lighting · estimated 8-12 hrs
$49.99
Already have a more intricate kit in mind? The Tranquil Life DIY Miniature House Kit is our bestselling cottage build, with detailed interior textures that really reward careful sealing during the build process. Builders consistently tell us the brick and wood-panel surfaces seal beautifully with a single pass of matte acrylic, and the included LED wiring sits neatly behind the paneling so you can seal without interfering with any components.

Bestseller cottage kit
Tranquil Life DIY Miniature House Kit
Intermediate difficulty · includes LED lighting · seals beautifully with matte acrylic
$67.90
Not sure which kit is right for you? The full book nook kits collection (76 kits and counting) is filtered by difficulty level, so you can match your experience and your dust-proofing confidence at the same time.

Explore the collection
All Book Nook Kits
76 handcrafted book nook kits, filtered by difficulty level
Display Location: The Overlooked Variable
Where you place a book nook determines how quickly it collects dust: keeping it away from HVAC vents, open windows, cooking areas, and high shelves where warm air deposits particles will keep your miniature scene cleaner far longer. Where you place a book nook affects how quickly it collects dust more than almost any other factor. A few placement rules that make a measurable difference:
- Away from HVAC vents and floor registers: Forced air carries far more particles than still air. Even a vent across the room creates directional airflow that deposits dust preferentially on objects in its path.
- Below eye level rather than at ceiling height: Upper shelves accumulate more dust because warm air rises and carries particles upward. Mid-shelf or slightly below eye level positions tend to stay cleaner longer.
- Away from open windows: Outdoor particulates, pollen, and humidity spikes all accelerate the problem. A closed display in a climate-controlled room is the ideal environment.
- Not directly above a cooking or dining area: Airborne grease and food particles are adhesive. They bond dust to surfaces permanently and are extremely difficult to remove from delicate miniature textures.
- On a surface that is easy to access: This sounds obvious, but a book nook placed where you rarely reach tends to go neglected. Accessibility makes regular light maintenance far more likely to actually happen.
If you built one of our illuminated book nook kits, keep in mind that the LED components generate a small amount of heat. Position the scene so the LED heat dissipates upward and outward, not toward fabric or paper elements inside the build. The Miniature Greenhouse Kits in particular, with their botanical interiors and delicate paper foliage, benefit enormously from this kind of thoughtful placement.

Rare in the niche
Miniature Greenhouse Kits
22 LED-lit greenhouse builds · botanical interiors that especially benefit from dust-proofing
Ongoing Maintenance: Keeping Sealed Scenes Clean Long-Term
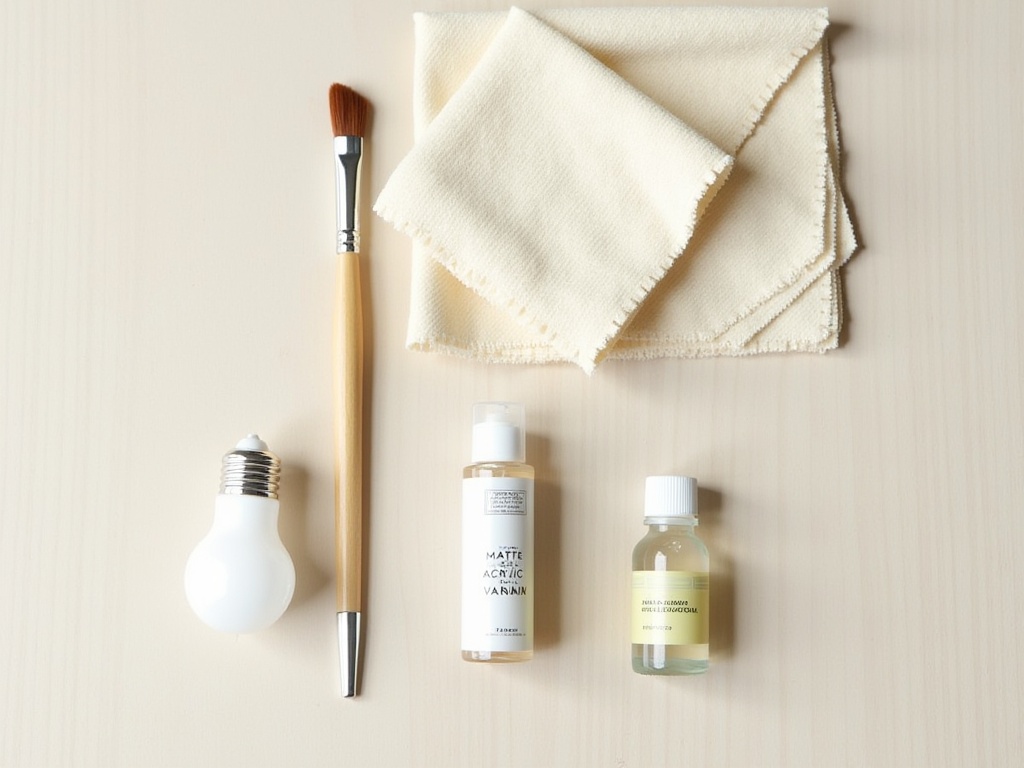
A sealed and well-positioned book nook stays pristine with a monthly exterior wipe, a quarterly interior air-puff with a squeeze bulb, and an annual matte varnish touch-up on accessible surfaces. Even a well-sealed and well-positioned book nook needs occasional attention. The key is a gentle, consistent routine rather than a deep clean every few years. I think of it the same way I think about the builds themselves: a little steady care beats a frantic rescue every time.
Monthly Exterior Wipe
A microfiber cloth barely dampened with distilled water is the safest option for wiping the outside of an acrylic or glass cover. Distilled water prevents mineral deposits that tap water leaves behind as it evaporates. Avoid paper towels; they scratch acrylic at a microscopic level that compounds over time and eventually turns a crystal-clear panel into a hazy one. One gentle pass every three to four weeks keeps the cover clear and lets the scene shine through exactly as you built it.
Quarterly Interior Check
Open the cover four times a year and use a squeeze bulb (the kind sold for camera lens cleaning) to blow loose particles off interior surfaces with a gentle puff of air. Do not use compressed-air cans; the propellant is too forceful and can dislodge small glued elements. Follow the air puff with a very soft artist’s brush, size 6 or larger, sweeping lightly across any surfaces that still look hazy. Seal the cover again immediately after so the freshly cleaned interior does not immediately collect new particles from the surrounding air.
Annual Varnish Touch-Up
Once a year, if accessible surfaces look dull, a single light mist of matte varnish over painted panels refreshes the protective coat. This is especially useful for book nooks displayed without a cover, or for builds with particularly porous materials like balsa wood or uncoated MDF. Do this outdoors or in a well-ventilated space, let it dry completely, and reposition the scene before dust settles on the wet coat. A finished build that gets this annual refresh can easily look pristine for five years or more.
For specific products that work well with our kits, including brushes, sealants, and finishing tools, the full accessories range has everything sorted by build stage so you can grab exactly what you need without guesswork.
Frequently Asked Questions about Dust-Proofing a Book Nook
Everything you might be wondering (click a question to expand).
Can I use a glass picture frame as a dust cover for my book nook?
Yes, with some modifications. A deep shadow-box frame (at least 2 inches deep) works well for book nooks up to 3 inches deep. The glass front provides solid protection, and the frame hardware makes wall-mounting straightforward. Just verify the internal depth before buying, as standard picture frames are too shallow for most kits. A shadow-box frame from a craft store is a genuinely elegant solution that also makes the nook look intentional and gallery-ready on the wall.
Does sealing a book nook affect the LED lighting inside?
A matte varnish applied to the interior walls slightly diffuses reflected light, which actually softens the glow in a pleasant way. It does not affect the LEDs themselves or their wiring. If your build uses warm white LEDs, the sealant coat has no measurable impact on color temperature or brightness. Just take care not to spray directly onto LED strips or battery connections.
My book nook already has dust inside. How do I clean it without damaging anything?
Start with a squeeze bulb to dislodge loose particles gently. Follow with a soft artist’s brush (dry) to sweep surfaces. For stubborn dust on sealed surfaces, a cotton swab barely dampened with 70% isopropyl alcohol works on painted wood and resin pieces. Avoid water on paper elements entirely. Work slowly, section by section, and let any moisture evaporate before closing the scene up again. This is exactly the process I used to rescue that early Victorian room I mentioned, and it does work with patience.
How often should I apply a new varnish coat?
For covered displays, once every 18 to 24 months is sufficient to maintain a protective barrier. For open displays, once a year is a better cadence. Watch for surfaces that start to look absorbent or slightly chalky when light catches them at an angle: that is usually the first sign the coat is thinning and ready for a refresh.
Are there any materials inside a book nook kit that should never be varnished?
Flocked surfaces, raw fabric swatches, and fine fiber elements like tiny rugs or curtains should not receive liquid varnish. It mats the fibers and kills the texture. The same goes for chalk-paint effects you may have added intentionally for an aged look: varnish can erase the deliberate matte character of chalk finish. For those elements, physical covering and careful placement are the only safe protection strategies.
What is the cheapest effective way to dust-proof a book nook on a tight budget?
A can of Krylon Matte Finish fixative (around $8) for sealing during the build, combined with a free-to-make acrylic panel cover using offcuts from a local hardware store, will get you excellent protection for under $15 total. The panel does not need to be fancy: a plain rectangle of 2 mm acrylic resting against the book nook face blocks the vast majority of airborne particles. That combination, plus a monthly wipe with a damp microfiber cloth, is genuinely all most builds need.
Building a Long-Lasting Display Habit Worth the Craft
Dust-proofing a book nook is not a complicated add-on: seal surfaces as you build, choose your shelf position with intention, and spend about five minutes monthly keeping the cover clean. The meditative hours spent assembling a miniature scene deserve a display that holds up over time. Dust-proofing a book nook is not a complicated project tacked onto the end of a build. It is a mindset: you think about sealing as you go, you choose your shelf position with intention, and you spend about five minutes every month keeping the cover clean. That is genuinely the whole system.
A book nook you built with care two years ago should still make you smile when you look at it today. With the right protection in place, it will. The tiny world inside stays exactly as you left it: lit, detailed, and quietly alive on your shelf.
When you are ready to start a new build and put these habits into practice from session one, the book nook kits collection is a great place to begin. And if you want collector-level results with botanical interiors that genuinely reward careful dust-proofing, the Monet’s Garden DIY Miniature House Kit is the one I reach for when I want to impress myself.
Premium collector piece
Monet’s Garden DIY Miniature House Kit
Advanced difficulty · includes LED lighting · botanical paper elements that reward careful sealing
$155.00
