🎁 Buy 2 kits, get the 3rd FREE · Free shipping on every order

What Is a Book Nook? The Complete Guide to Miniature Shelf Inserts
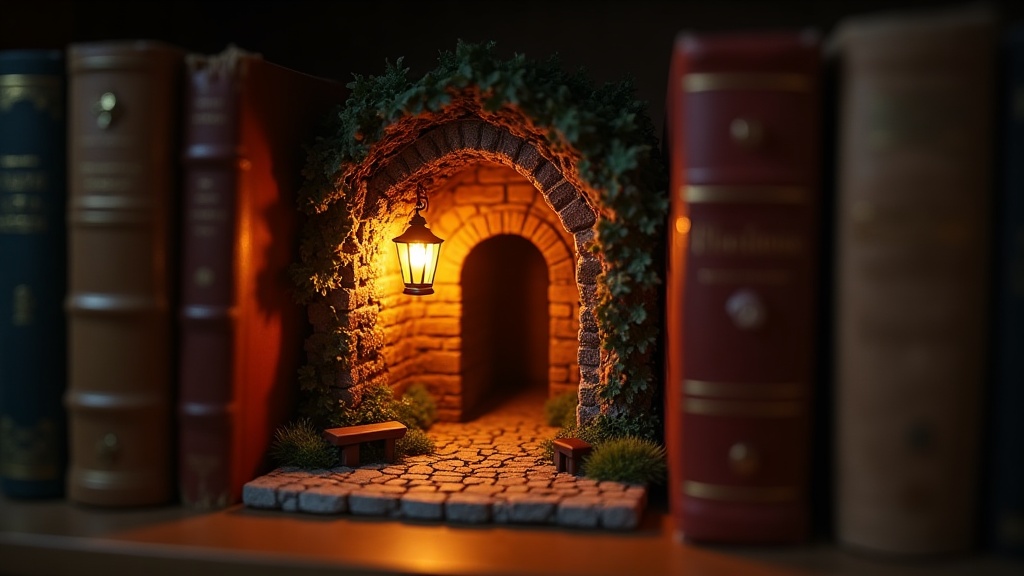
A book nook is a miniature diorama designed to sit between books on a shelf, creating the illusion of a tiny world hidden inside your bookcase. This complete guide covers the history of the craft from 17th-century wonder cabinets to today's vibrant DIY community, breaks down every component of a book nook's anatomy, compares kits versus scratch builds with honest difficulty ratings, and gives you a practical toolkit list and first steps for your own build.

A book nook is a miniature diorama built to fit between books on a shelf, creating the illusion of a tiny world hidden inside your bookcase. Slide one between two volumes and suddenly your shelving unit holds a cobblestone alley, a moonlit forest, a cozy tavern, or a secret library that seems to stretch infinitely into the wall. The effect is quietly magical. The craft is genuinely satisfying.
If you stumbled across one on social media and immediately thought “I need that,” you are far from alone. Book nooks have become one of the most-discussed DIY miniature projects of the past several years, beloved by crafters at every skill level. This guide covers exactly what they are, where they came from, how they are built, and how to decide whether a kit or a scratch build is the right starting point for you.
The Origins of Book Nooks: From Curiosity Cabinets to Bookshelves
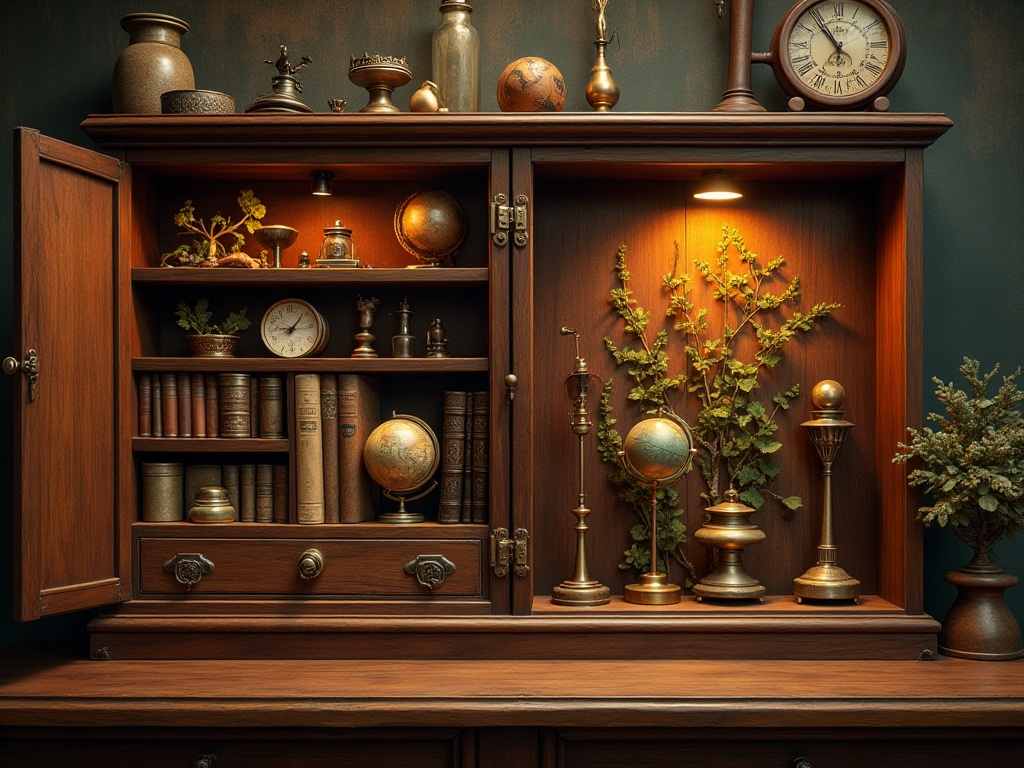
Book nooks trace their roots to centuries-old wonder cabinets and shadow-box crafts, arriving in their modern shelf-insert form around the 2010s when miniature makers began sharing glowing diorama builds on platforms like Reddit and YouTube. To understand the book nook, it helps to trace it back to a much older fascination: the desire to hold an entire world in a small container.
European collectors of the 1600s and 1700s kept Wunderkammern, or “wonder cabinets,” filled with miniaturized objects, natural specimens, and tiny architectural models. These weren’t toys. They were status symbols and philosophical statements about mastering knowledge by shrinking it. Queen Mary II of England famously commissioned a collection of Delft miniatures in the 1690s for her private cabinet at Kensington Palace.
📜 Did you know?
The oldest surviving miniature room in North America is believed to be the “Stettheimer Dollhouse,” completed around 1923 and now housed at the Museum of the City of New York. Its tiny rooms contain original artworks by Marcel Duchamp and Gaston Lachaise, painted to scale specifically for the project. The tradition of serious adults creating tiny inhabited spaces is older than most people assume.
The oldest surviving miniature room in North America is believed to be the “Stettheimer Dollhouse,” completed around 1923 and now housed at the Museum of the City of New York. Its tiny rooms contain original artworks by Marcel Duchamp and Gaston Lachaise, painted to scale specifically for the project. The tradition of serious adults creating tiny inhabited spaces is older than most people assume.
By the early 1900s, shadow boxes had become a popular parlor craft. These shallow frames contained miniature scenes, pressed botanicals, or symbolic arrangements of objects. They hung on walls and sat on mantlepieces. The goal was the same as a modern book nook shelf insert: compress meaning, atmosphere, and storytelling into a confined rectangular space.
The specific book nook format, designed to slide between books on a shelf, appeared in recognizable form around the 2010s, largely credited to the woodworking and miniature communities on platforms like Reddit’s r/bookshelf and later YouTube. Artist Monde Mossey and a wave of independent makers began sharing shelf insert builds, and the format spread rapidly. By 2020, dedicated kits were shipping from small workshops worldwide, and “book nook” had become a searchable category in its own right.
What stuck isn’t just the visual trick. It is the meditative quality of the build: the slow, deliberate assembly of tiny walls, miniature lights, painted textures, and careful scene-setting. Crafters consistently describe the process as genuinely calming, a rare hands-on activity that demands focus without feeling stressful. The appeal crosses age groups and skill levels, drawing in everyone from seasoned model-makers to people who have never picked up a hobby knife before.
It is also worth noting how the social dimension accelerated the craft’s growth. Completed book nooks photograph extraordinarily well. A single well-lit image of a glowing miniature bookshop inserted between real hardbacks routinely earns tens of thousands of shares. That viral quality introduced the format to audiences who had never encountered miniature making as a hobby, and many of them became builders themselves within weeks of first seeing a finished piece.
Anatomy of a Book Nook: What Makes One Work
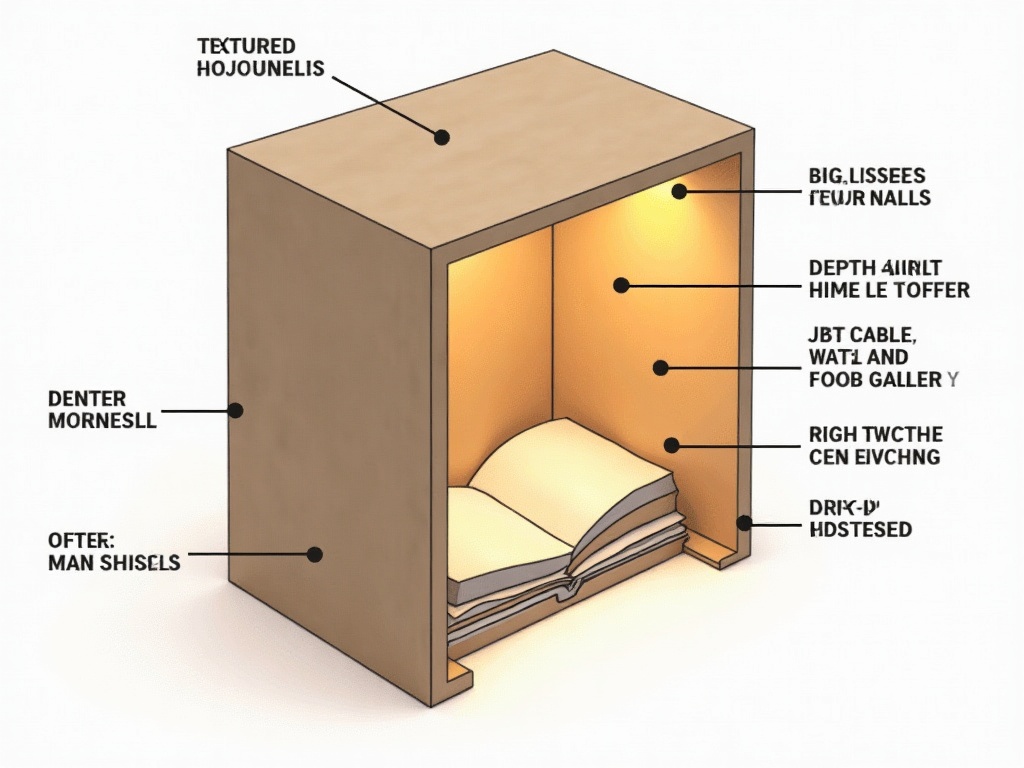
Every shelf insert diorama is built from the same core components: an outer shell, layered interior walls that create depth, LED lighting, miniature props, and a decorative spine cover that blends the piece into the surrounding books. A book nook looks like magic from the front, but the construction follows a clear logic. Understanding the individual parts helps you appreciate finished pieces and plan your own build more confidently. Every element serves a specific spatial or aesthetic purpose, and knowing which part does what makes troubleshooting much easier when something doesn’t look quite right.

The Outer Shell
The shell is the structural box that sits on your shelf, usually made from MDF (medium-density fiberboard), birch plywood, or basswood. Standard dimensions for a between-books insert range from roughly 4 inches wide to 6-8 inches wide, 8-11 inches tall, and 4-6 inches deep. Depth matters because it controls how far back the scene appears to recede. A deeper shell gives a more convincing sense of distance.
Material choice affects both weight and workability. MDF is dense, smooth, and takes paint evenly, making it the most common choice for kit manufacturers. Birch plywood is lighter and stronger but slightly more expensive. Basswood is the softest and easiest to cut by hand, which makes it popular with scratch builders who rely on hobby knives rather than power tools. For shelf display, any of the three holds up well over time as long as the finished piece isn’t exposed to sustained moisture.
Interior Walls and Floors
Inside the shell, a series of thin interior walls create depth layers. Each layer frames a slightly smaller opening than the one in front of it, which is what generates the classic “infinite corridor” illusion. The floors between layers are often textured: laser-engraved wood grain, painted stone, or hand-laid paper brickwork. Even subtle texture changes between layers amplify the sense of spatial depth.
The number of interior layers varies by kit complexity and shell depth. Most beginner kits include three to five layers. Advanced builds can feature eight or more, with each layer adding a fraction of an inch to the apparent depth of the scene. Some builders insert small mirrors at the very back of the shell to enhance the infinite-corridor effect further, though this requires precise alignment to avoid breaking the illusion by reflecting the viewer.
Lighting
Lighting is what separates a good book nook from a great one. Most modern kits include pre-wired LED strips or small LED fairy lights, typically powered by a USB cable or a set of AA batteries tucked at the back of the shell. Warm white LEDs (around 2700K-3000K color temperature) mimic candlelight and lanterns. Warm amber tones are the most universally flattering for fantasy and historical scenes.
Some builders add lighting effects: flickering LEDs for fire effects, blue-tinted strips for moonlit forest scenes, or tiny neon-colored lights for urban alley builds. The circuit work in beginner kits is minimal, usually just plugging pre-made components into place. For more advanced builds, some makers experiment with individually addressable LED strips that allow color programming, though this moves firmly into electronics territory and is not necessary for a beautiful result.
Placement of the light source is as important as the type of bulb. Positioning LEDs at the back of the shell and diffusing them with a thin layer of vellum or tracing paper creates a soft ambient glow rather than harsh direct spots. Side-mounted strips wash interior walls with warm light and reduce unwanted shadows. Spending a few minutes testing light placement before permanent installation pays off in a noticeably more polished finished piece.
Miniature Props and Figures
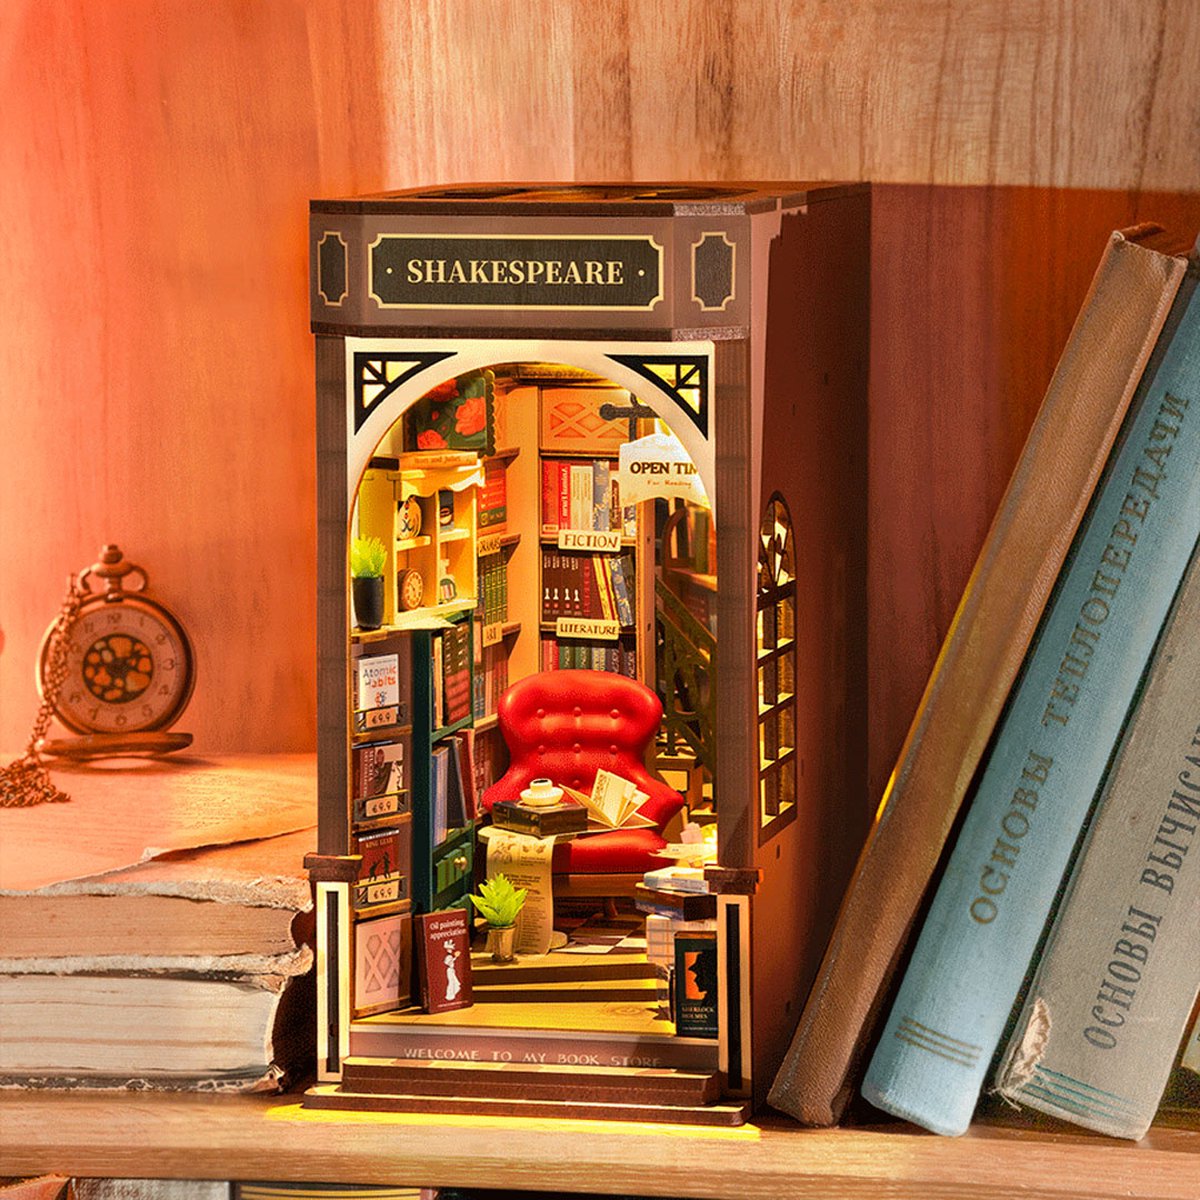
Props are where personal expression takes over. Tiny barrels, shelves of micro-books, potted plants, staircases, hanging lanterns, window frames with printed “glass,” miniature people frozen mid-step: these details are what give a book nook diorama its personality. Many kit builders supplement included pieces with parts from model train suppliers, resin printing files, or handmade paper and air-dry clay elements.
Scale consistency matters more than people expect when starting out. Most shelf insert builds work at approximately 1:24 or 1:12 scale. Mixing scales within a single scene tends to destroy the spatial illusion even when the viewer can’t immediately identify why something looks “off.” When sourcing additional props, always check the stated scale against what is already in your kit before purchasing.
The Spine Cover
The front face of a book nook often features a decorative spine panel, designed to look like a very thick book standing on your shelf. The spine cover blends the insert into the surrounding books, making the reveal of the scene inside feel like opening a hidden door. Some designs skip the spine entirely, leaving the scene fully visible, which works well for display shelves not packed tightly with books.
Spine covers can be painted, wrapped in decorative paper, embossed with foil lettering, or finished with faux leather texture. Many builders treat the spine as a creative element in its own right, hand-lettering a fictional title and author name that relates to the scene inside. A forest scene might have a spine reading “The Woodcutter’s Atlas.” A Victorian alley might say “Gaslight Chronicles, Vol. III.” These small storytelling touches delight viewers who look closely.
✨ Hannah’s tip
Before you paint any interior walls, hold each layer up to a single light source and look through from the front. This “test stack” shows you exactly how the depth illusion reads before anything is glued permanently. I saved myself from at least two badly positioned layers on my first Victorian alley build by doing this check. Fifteen seconds of preview saves an hour of regret.
Before you paint any interior walls, hold each layer up to a single light source and look through from the front. This “test stack” shows you exactly how the depth illusion reads before anything is glued permanently. I saved myself from at least two badly positioned layers on my first Victorian alley build by doing this check. Fifteen seconds of preview saves an hour of regret.
Book Nook Kits vs. Building from Scratch
A ready-made book nook kit gives most builders the fastest path to a beautiful finished result: pre-cut parts, curated props, and wired LEDs mean you focus entirely on painting, assembly, and personalisation rather than measuring and sourcing. The first real decision every new builder faces is this: buy a book nook kit for beginners, or source all materials independently and build from scratch?
Both paths produce beautiful results. The choice depends on your experience level, your available time, and how much of the “figuring it out” process you find enjoyable versus frustrating. Neither option is inherently superior. They simply serve different builders at different moments in their crafting journey.
Why Kits Work So Well for Most People
A good kit includes pre-cut wooden pieces, LED lighting components, decorative papers, miniature accessories, and step-by-step instructions. The shell dimensions are already calculated. The depth layers are already sized. The lighting is already wired. You supply the glue, the paint, and the patience.
- No measuring errors. All cuts are laser-precise, which matters enormously at small scales where a millimeter of misalignment visibly disrupts the depth illusion.
- Curated aesthetics. The props and papers are designed to work together as a coherent scene, so color palettes and visual styles don’t clash.
- Realistic time estimate. Most beginner kits take 6-15 hours to complete across several sessions, making it easy to plan around a busy schedule.
- Lower barrier to a first success. Finishing a kit builds the spatial reasoning, layering instincts, and lighting intuition needed to attempt scratch builds later.
- Community support. Popular kit builds have large communities of fellow builders who have documented their processes, shared solutions to common snags, and posted tips that aren’t in the instruction booklet.
Our complete collection of book nook kits covers difficulty levels from first-time builder to advanced, with scene styles ranging from forest cottages to medieval market streets. Each product listing includes a difficulty rating (1-5 stars), the full list of what’s inside the box, and an estimated build time so you can plan your sessions realistically.

When Scratch Builds Make Sense
Building from scratch suits people who already work with wood or model-making materials, who want a very specific scene a kit doesn’t offer, or who prefer the problem-solving process as much as the finished object. Scratch builders typically source MDF or basswood sheets, cut layers with a hobby knife or scroll saw, and source props from model train suppliers, resin printers, or hand-fabricated paper and clay elements.
The trade-off is time. A scratch-built book nook can take anywhere from 20 to 60 hours depending on complexity, versus 6-15 for a comparable kit build. Planning is essential: experienced scratch builders often sketch the full scene from the side as a cross-section before cutting a single piece of wood. This cross-section diagram shows every layer’s position, height, and opening width, and serves as a reference throughout the build. For most people new to the craft, a kit is the smarter first move. You learn the spatial logic, the layering system, and the lighting placement through a guided build, and then apply that knowledge to fully custom work later.
Difficulty Ratings: What They Actually Mean
Across most book nook kits, difficulty ratings break down roughly like this:
- Level 1-2 (Beginner): Pre-numbered parts, minimal cutting, large props, simple wiring. Ideal for ages 14 and up or complete crafting newcomers. Instructions are highly visual and assume no prior experience.
- Level 3 (Intermediate): More detailed painting required, smaller props, some freehand placement decisions. Comfortable for anyone who has completed a Level 1 kit or has basic model-making experience. May include some hand-cutting of paper or thin card elements.
- Level 4-5 (Advanced): Fine detail work, complex layering, custom lighting effects, often requires craft knife skills and patience for very small components. Some advanced kits include optional electronics modifications for builders who want to go further. The most rewarding builds for experienced makers.
If you are buying as a gift, erring toward Level 1-2 is almost always the right call unless you know the recipient has hands-on crafting experience. Check our best-selling book nook kits for picks that have been tested and loved by hundreds of our community members across skill levels.
What People Actually Build: Popular Themes and Styles
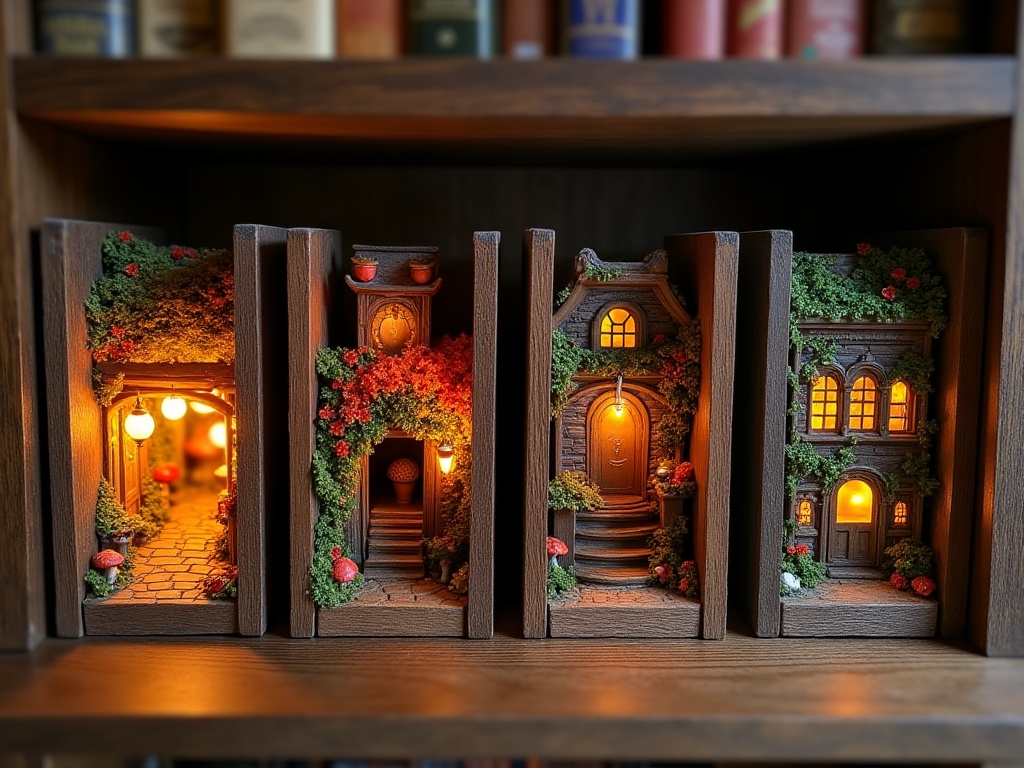
Fantasy settings, urban alleyways, seasonal cozy scenes, and fandom-inspired dioramas are the four most popular book nook themes, with fantasy firmly at the top and fandom builds growing fastest in the community. Part of what makes book nooks so appealing is the sheer range of possible scenes. There is no single “correct” aesthetic, and the community actively celebrates the diversity of themes that builders bring to their shelves.
Fantasy settings dominate: forest cabins with moss-covered roofs, wizard tower interiors, enchanted libraries with spiral staircases, and underground dwarf taverns. These pair naturally with fantasy fiction collections and appeal strongly to readers who want their shelves to reflect the worlds they love. A glowing wizard’s study nestled between worn paperback fantasy novels creates a display that feels entirely intentional and deeply personal.
Urban and architectural scenes come in second: Paris alleyways with wrought iron balconies, Japanese alley markets glowing with lantern light, Victorian London streets with cobblestones and gaslight effects. These tend to appeal to readers with a design or travel sensibility, and they photograph especially well because the architectural details reward close inspection. The contrast between the miniature street scene and the full-size books around it is visually arresting.
Seasonal and cozy builds are perennially popular: autumn cottages surrounded by laser-cut paper leaves, Christmas bookshops with miniature wrapped presents and string lights, rainy-day reading corners with tiny armchairs and steaming teacups. These often work as standalone gifts even for people who aren’t hardcore crafters, because the finished piece is genuinely display-worthy without any additional framing or mounting.

A growing number of builders are creating themed miniature shelf insert dioramas tied directly to specific books or series. A “Shire” insert for a Tolkien shelf. A Hogwarts corridor insert for a Harry Potter collection. A tiny candlelit coffee shop lifted straight from a beloved contemporary romance novel. The community celebrates this kind of personalized build enthusiastically, and it is one of the most-requested tutorial types our readers ask for. Fandom-inspired builds also make exceptional gifts for readers who have a known favorite series.
Natural history and botanical scenes are an emerging category: insect specimen cabinets at miniature scale, moss terrarium cross-sections, geological cave systems with crystal formations. These appeal particularly to science-minded builders and pair beautifully with non-fiction collections.
If you are drawn to a specific aesthetic but aren’t sure which kit matches it, the product pages in our book nook kit collection include detailed photographs of completed builds alongside the raw kit contents, so you can see exactly what the finished scene looks like before you commit.
Tools and Materials You’ll Need Beyond the Kit
Every book nook build, kit or scratch, needs the same short list of basic supplies: PVA glue, acrylic paints, fine brushes, tweezers, a cutting mat, toothpicks, a USB power source for LED testing, and painter’s tape. Even a well-stocked kit requires a few supplementary supplies. None of them are exotic or expensive, but gathering them before you open the box saves frustration mid-build. Running out of a basic supply in the middle of a gluing session is one of the most common reasons first-time builds get abandoned half-finished.
- White PVA craft glue (wood glue works too). Dries clear, repositionable for a short window, and bonds paper, card, and wood with equal reliability. Avoid superglue for most interior elements, as it bonds instantly and leaves no room for adjustment.
- Acrylic paints: brown, black, grey, white, and one or two accent colors are enough for most kits. Cheap craft acrylics from any hobby or art supply store work perfectly. You don’t need artist-grade pigments for miniature walls and floors.
- Fine-tipped paintbrushes: a size 0 or 1 detail brush for small elements and a broader flat brush (size 6-8) for base-coating walls and floors. Natural-bristle detail brushes hold paint better at very small scales.
- Tweezers: essential for placing small props. A pair of fine-tipped craft tweezers, not the chunky bathroom kind. Self-closing “reverse action” tweezers are particularly useful for holding tiny pieces steady while glue sets.
- Cutting mat and hobby knife: even kits sometimes include paper elements that need trimming to fit, and a self-healing cutting mat protects your work surface while giving you a stable base for precise cuts.
- Toothpicks: for applying tiny amounts of glue in tight spaces where a brush or nozzle is too large. Flat toothpicks with a tapered edge are more useful than round ones.
- USB power bank or phone charger: for testing the LED lighting during the build, before everything is glued into its final position. Testing at multiple stages of the build is far easier than troubleshooting a fully assembled scene.
- Washi tape or painter’s tape: for temporarily holding layers in position while glue dries, without leaving residue on finished surfaces.
That’s genuinely the full list for most beginner builds. The intentional simplicity is part of what makes the craft accessible. You don’t need a dedicated workshop, a scroll saw, or expensive specialty tools to make something genuinely beautiful. A kitchen table, good lighting, and an afternoon of unhurried focus are sufficient.
Caring for Your Finished Book Nook
A finished miniature shelf insert stays sharp for years with three simple habits: regular compressed-air dusting of interior layers, keeping it out of direct sunlight to prevent paint fade, and retaining the original wiring details for any future LED replacement. A completed book nook shelf insert is more durable than it looks, but a few basic care habits will keep it looking sharp for years.
Dust is the primary enemy of any miniature display. The interior of a book nook collects fine dust in its recessed layers, and because the spaces are small and packed with detail, cleaning requires care. A can of compressed air (the kind sold for cleaning keyboards) is the most effective tool: a quick two-second burst from a few inches away clears dust without disturbing any glued elements. Do this every few weeks if the shelf is in a high-traffic room, or monthly in a quieter space.
Avoid placing finished book nooks in direct sunlight. UV exposure fades acrylic paints, yellows decorative papers, and degrades the adhesive bonds holding small props in place over time. A shelf away from south or west-facing windows is ideal. If your display shelf gets afternoon sun, consider a UV-filtering film on the window rather than moving your books.
LED lighting used in most kits is rated for tens of thousands of hours of use, so bulb failure is rarely a concern. If your LEDs do fail, most pre-wired kits use standard 3V fairy light strings that are inexpensive and widely available as replacements. Keep the original wiring schematic from your kit instructions so you can match the connection type if a replacement is ever needed.
Frequently Asked Questions about Book Nooks
Everything you might be wondering (click a question to expand).
How long does it take to build a book nook kit?
Most beginner-level kits take between 6 and 10 hours of active building time, usually spread across 2-4 sessions. Intermediate kits average 10-15 hours. Advanced or large-format kits can run 20 hours or more. Spreading the build across multiple sessions also gives glue joints time to fully cure between stages, which produces a sturdier finished piece than rushing through in a single sitting. None of that time feels wasted: most builders describe the process as relaxing and meditative rather than laborious.
Do book nooks need to be attached to the bookshelf?
No. A standard between-books insert simply rests on the shelf, supported by the books on either side. Some builders add small adhesive non-slip silicone pads to the base to prevent sliding on smooth shelf surfaces. Freestanding display versions with a solid weighted base can stand on their own without any support from adjacent books, which is a good option for display shelves that aren’t tightly packed.
Are book nook kits suitable for children?
Most kits are recommended for ages 14 and up due to small parts and the use of sharp tools like hobby knives. Some simpler kits with larger components and no sharp cutting required can work for children aged 10-12 with adult supervision and assistance on cutting steps. Always check the recommended age on the specific kit before gifting to a younger crafter. For a child-friendly collaborative project, a parent doing the cutting steps while the child handles painting and prop placement works very well.
Can I customize a kit with my own additions?
Absolutely, and many builders consider the customization the most satisfying part of the entire process. Common additions include extra LED accent lighting, hand-sculpted air-dry clay details, printed paper art sized to scale, miniature figures from model train suppliers, pressed dried flowers for botanical scenes, and personal touches like tiny books with real titles hand-lettered on their spines. Kits are starting points, not finished products, and the community actively encourages builders to make each piece their own.
What is the difference between a book nook and a shadow box?
A shadow box is a framed, wall-mounted display case. A book nook is specifically designed to slot vertically between books on a shelf, using depth layering and lighting to simulate a receding space. The visual trick is fundamentally different: a shadow box presents a flat or shallow scene viewed from directly in front, while a book nook creates an illusion of depth that appears to extend far behind the bookshelf wall. The lighting in a book nook is integral to the depth illusion in a way it isn’t in a shadow box. Some builds combine both formats, but the terms refer to distinct objects with distinct spatial logics.
What shelf depth do I need for a book nook to fit properly?
Most standard bookshelves have a depth of 8-10 inches, which comfortably accommodates the majority of commercially available book nook kits. The kit’s shell depth typically runs 4-6 inches, leaving space behind the insert for the LED power cable and battery pack. If your shelf is shallower than 7 inches, check the product dimensions carefully before purchasing, or look for slim-profile kits specifically designed for shallow shelving. Some builders cut a small cable channel into the shelf back panel if the power cable is too bulky to sit flat.
Can I make a book nook without any woodworking tools?
Yes, if you start with a kit. All the wooden pieces in a pre-made kit arrive laser-cut and ready to assemble without any sawing or drilling. The only cutting you may need to do is trimming paper and card elements with scissors or a hobby knife on a cutting mat, both of which require no power tools. Full scratch builds do typically require at least a sharp hobby knife and metal ruler for scoring and cutting basswood or MDF sheets, but for kit builders, woodworking tools are not needed at any stage.
Starting Your First Build: Practical First Steps
Before opening the box, read the full instructions once end-to-end, study finished community builds for problem-solving inspiration, and set up a dedicated workspace you can leave between sessions: these three steps alone make the difference between a build you finish and one you abandon. The single most useful thing you can do before starting any build is to look at finished examples from other community members. Not for comparison, but for problem-solving inspiration. When you see how someone handled a tricky lighting situation, a tight interior corner, or a difficult texture effect, that knowledge transfers directly to your own build decisions. Time spent looking at finished builds before opening the box is never wasted.
Read the full instructions before touching any materials. This sounds obvious but is skipped more often than not. Many builders discover mid-build that step 12 requires something that should have been done at step 3, and backtracking with partially glued components is frustrating. A full read-through takes 15 minutes and gives you a mental map of the entire build sequence before you begin.
Our community shares completed builds, work-in-progress photos, and honest tips in the comments section of each product page. It is one of the most genuinely useful resources available: real feedback from real builders who used the exact same kit you are about to open, documenting the moments where they got stuck and how they solved them.
Start with a scene that genuinely excites you. The meditative quality of building holds up best when you care about the finished world you are creating. A forest cabin kit means more to a builder who loves hiking trails. A candlelit bookshop insert resonates differently for someone who grew up in independent bookstores. A Japanese alley market speaks to a different set of memories and aesthetics than a Victorian London street. Pick the scene that belongs on your shelf, not the one that looks most impressive in a thumbnail.
Set up your workspace before you begin. Good overhead lighting, a flat surface you can leave set up between sessions, all your supplementary tools within reach, and a cup of something warm. The builds that get finished are the ones that feel like a pleasure to return to, not a chore to resume. Creating the right physical conditions for the work is as much a part of the craft as the assembly itself.
Browse the best-seller picks to see which kits have earned the most community enthusiasm, then head to the full kit collection to filter by difficulty, theme, or lighting style. Your shelf has a world waiting inside it.
