🎁 Buy 2 kits, get the 3rd FREE · Free shipping on every order

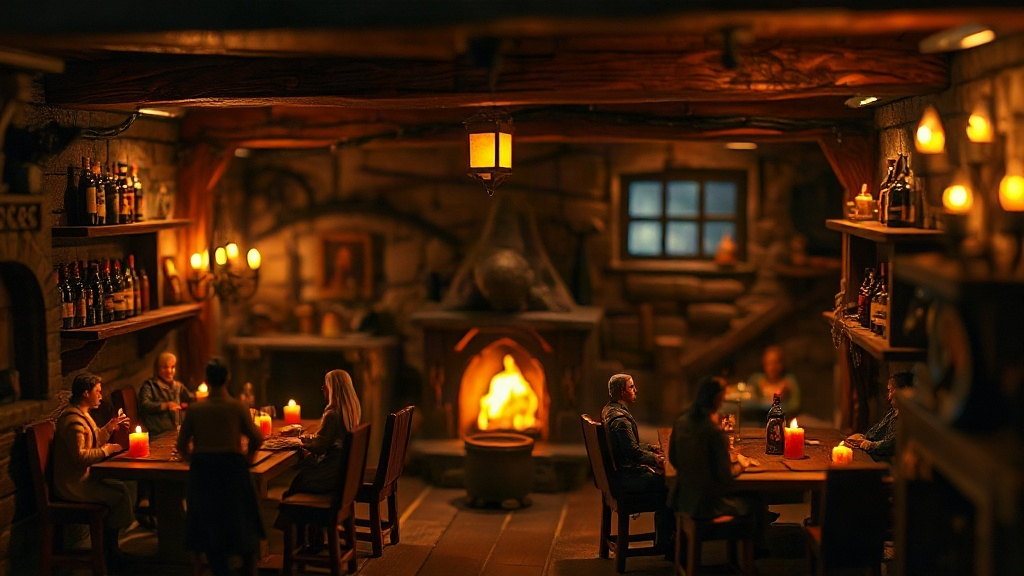
Witcher Inspired Miniature Scenes: Build Your Own Monster Hunter’s Haven
Learn how to build Witcher inspired miniature taverns and medieval villages. This guide covers kit selection, essential building techniques, difficulty levels, lighting design, and community resources for creating atmospheric fantasy dioramas that capture the franchise's gritty aesthetic.

There’s something deeply satisfying about watching a tavern materialize from wood, resin, and paint. The kind of moment when you step back and realize you’ve recreated a corner of a world you love, one brushstroke at a time. Witcher inspired miniature scenes tap into that exact feeling, blending the intricate craftsmanship of miniature building with the gothic fantasy atmosphere that made the franchise a cultural phenomenon.
These aren’t just dollhouses. They’re dioramas that capture the gritty taverns where witchers swap monster contracts, medieval villages frozen in candlelit anticipation, and alchemical workshops cluttered with potion bottles. For hobbyists, collectors, and gift buyers seeking something beyond mass-produced fantasy decor, building a Witcher scene offers both creative fulfillment and a tangible connection to a world you’ve already fallen into.
💬 From our community
When we asked our builder community what themes they most wanted to see as dedicated kits, “Witcher-style dark fantasy tavern” came back as the top request three seasons running. This guide is our direct response to that ask. If you’ve been waiting for a walkthrough that takes this theme seriously, here it is.
When we asked our builder community what themes they most wanted to see as dedicated kits, “Witcher-style dark fantasy tavern” came back as the top request three seasons running. This guide is our direct response to that ask. If you’ve been waiting for a walkthrough that takes this theme seriously, here it is.
What Makes Witcher Themed Miniatures Stand Out
Witcher themed miniatures stand out because they demand atmospheric storytelling: worn tavern surfaces, shadowed corners, and narrative props that make every dark fantasy diorama feel like a world mid-story, not a static decoration. The Witcher universe is built on contradictions: brutal and beautiful, gritty and atmospheric, medieval yet magical. Building Witcher miniature scenes means honoring those contradictions in miniature form. The taverns aren’t pristine; they’re worn, shadowed, full of detail that tells a story. A corner table where a contract was signed. Barrels stacked in ways that suggest lived-in chaos. Candles guttering in iron stands.
This level of detail separates a Witcher themed scene from generic fantasy builds. You’re not decorating with a princess aesthetic. You’re recreating authenticity. The crafting journey itself becomes meditative because every brushstroke, every tiny placed bottle, every shadow you deepen serves the narrative.
Compared to other fantasy miniature builds, Witcher inspired miniature scenes reward atmospheric storytelling above all else. A medieval tavern kit might focus on architecture and period accuracy. A Witcher tavern kit invites you to populate it with monsters hidden in shadow, contracts pinned to cork boards, and the kind of worn details that whisper of danger just beyond the doorway. That narrative tension is the heart of what makes these builds so compelling to experienced and first-time builders alike.
Essential Elements of a Witcher Tavern Build
A compelling Witcher tavern build relies on three non-negotiable elements: warm amber LED lighting to sculpt shadows, deliberate weathering to age every surface, and narrative props like scrolls and potion bottles that freeze a story in time. Starting a Witcher miniature tavern means understanding what components transform a basic medieval structure into something that feels authentically Witcher. Here’s what separates a compelling scene from a missed opportunity.
Lighting and Shadow
Witcher taverns live in shadow. Candlelight flickers. Corners remain mysterious. Most quality kits include LED lighting systems, often USB-powered, that let you position tiny lights to create pools of illumination and deep shadows. The amber glow of a fireplace. A single candle on a bar. This isn’t decoration; it’s atmosphere building. Without proper lighting, a Witcher tavern loses its soul.
Look for kits offering warm white (2700-3000K) LED options specifically. Cool white feels wrong for this aesthetic. You want that tavern glow, the sense that something dangerous is happening just beyond the lit circle. A well-lit Witcher inspired miniature scene is genuinely one of those things that stops visitors mid-step when they spot it on a shelf.
Our community member Sarah T. from Bristol shared this after completing her first dark-fantasy tavern build: “I didn’t believe the LED placement would matter that much until I tried three different positions. The difference between a candle dead-centre and one tucked to the left corner was genuinely shocking. The shadow it threw across the bar changed the whole mood.” That kind of discovery is exactly what makes this hobby so rewarding.
🪄 Hannah’s tip
Warm amber LEDs (2700K) are your best friend for dark-fantasy builds. I learned this the hard way on my second tavern kit: I used the included cool-white bulbs and the whole scene felt clinical, like a hospital corridor in miniature. Swap them out before you seal any wiring inside the structure. It costs almost nothing and saves enormous frustration later.
Warm amber LEDs (2700K) are your best friend for dark-fantasy builds. I learned this the hard way on my second tavern kit: I used the included cool-white bulbs and the whole scene felt clinical, like a hospital corridor in miniature. Swap them out before you seal any wiring inside the structure. It costs almost nothing and saves enormous frustration later.

Perfect for Witcher aesthetics
Dark Fantasy Book Nook Kits
76 handcrafted kits, including medieval and gothic styles
Book nook kits are especially popular for Witcher-style builds: the narrow proportions create exactly the shadowy, atmospheric depth the aesthetic demands. Many builders in our community use them as their first dark-fantasy project before tackling a full tavern.
Weathering and Patina
New wood looks new. Witcher worlds don’t. Effective tavern builds include weathering techniques: dry brushing to age wooden beams, rust washes on iron fixtures, darkened stone to suggest age and wear. Some kits come with pre-weathered components. Others challenge you to age them yourself, which (honestly) is where the meditation happens. You’re not just assembling; you’re aging a world into existence.
A practical weathering sequence that works well for gothic tavern builds: prime with a mid-brown base, dry-brush a lighter tan across raised edges, then apply a dark brown wash into recesses. Finish with a very light bone-white highlight on the highest corners of beams. Takes maybe 45 minutes per wall section and the result looks like decades of candle smoke and spilled ale. Community builder Marcus R. from Edinburgh documented this exact technique across his tavern build and the before/after is genuinely hard to believe.
Narrative Props
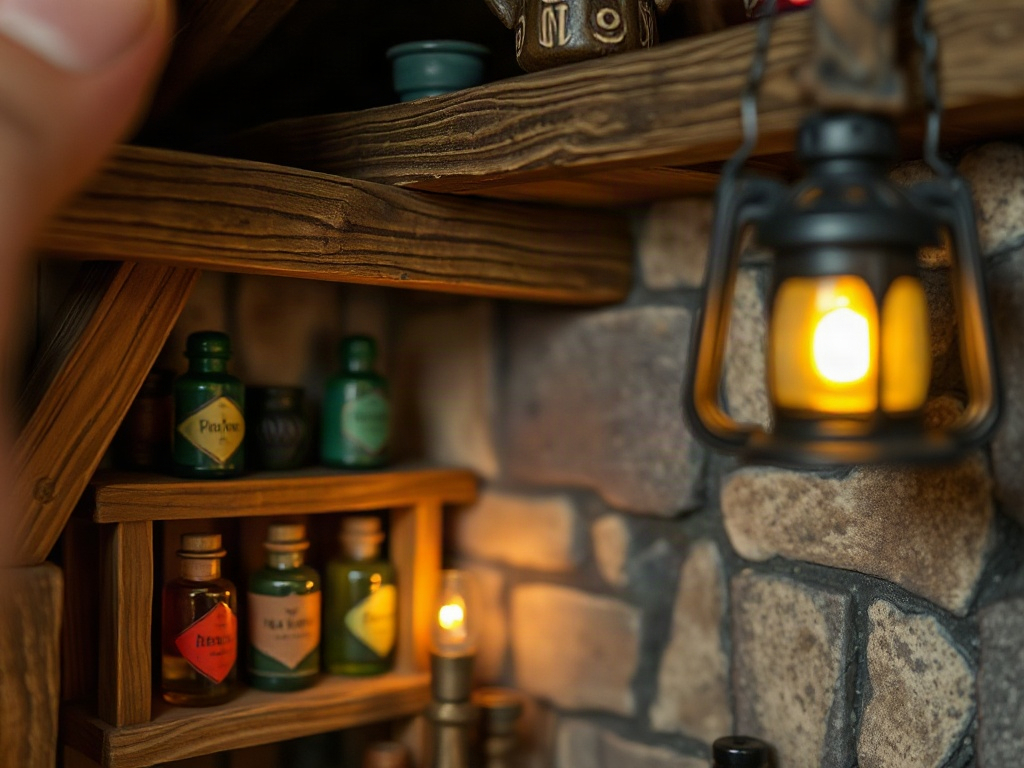
The smallest elements make the biggest impact. Tiny leather-bound contracts on tables. Potion bottles lining shelves. Monster trophies hung as warnings. Dice scattered mid-game. A tankard tipped over on the counter. These aren’t included in every kit, but they’re the details that transform a tavern into a story frozen in time.
Several builders in our community have started trading custom-made props specifically for Witcher-aesthetic builds: hand-rolled tiny scrolls sealed with red wax, miniature crossbow bolts bundled with thread, even small painted “wanted” notices pinned to cork. If you’re in our newsletter community, keep an eye on the monthly swap posts where these micro-props appear regularly.
🪄 Hannah’s tip
Don’t wait for every micro-prop to come with your kit. Source tiny accessories from miniature furniture makers or craft supply sites. A single potion bottle you find elsewhere and paint yourself tells a richer story than ten generic included pieces. The hunt for the right detail is part of the craft.
Don’t wait for every micro-prop to come with your kit. Source tiny accessories from miniature furniture makers or craft supply sites. A single potion bottle you find elsewhere and paint yourself tells a richer story than ten generic included pieces. The hunt for the right detail is part of the craft.
Medieval Village Scenes: Beyond the Tavern
Building a full medieval village miniature scene takes the Witcher aesthetic beyond a single tavern, letting you tell multiple stories at once across a blacksmith’s workshop, an alchemist’s storefront, and a notice board where contracts change everything. While taverns capture the social heart of Witcher’s world, building an entire medieval village miniature scene offers broader creative challenges. A village tells multiple stories simultaneously. The blacksmith’s workshop where swords are forged. The alchemist’s corner storefront. The notice board where contracts appear and destiny shifts.
Village builds typically require more workspace and planning than single-structure taverns. You’re thinking about sight lines, how buildings relate spatially, where light pools between structures, how weathering differs across the village. A cathedral might show centuries of care. A slum district reveals neglect. Planned or accidental details create depth. Several builders in our community have created sprawling multi-building layouts by starting with one tavern kit, then adding structures over six to twelve months as budget and confidence allowed. It’s genuinely one of the most satisfying long-form creative projects I’ve seen come through our workshop community.
Scale and Modularity
Most quality kits come in either 1:24 or 1:12 scale, representing either a more compact tabletop display or a larger, more detailed showcase. Modular systems let you add buildings incrementally, expanding your village across months or years without requiring one massive commitment upfront. This approach suits both patient builders and those new to the hobby.
Check kit descriptions carefully. Some medieval village packages are complete structures (tavern plus church plus market stall bundled). Others are individual buildings designed to connect to a growing set. Know your intention before purchasing. Our miniature house kits collection includes several structures well-suited to this kind of modular Witcher village layout, and the product notes flag which ones are designed to sit harmoniously side by side.
Terrain and Base Building
A village isn’t just buildings in a void. The ground matters. Cobblestone patterns, muddy patches suggesting heavy foot traffic, grass overgrowth at abandoned corners. High-quality kits include base materials or instructions for creating believable terrain using foam, paint, and static grass. This is where many builders add personal flair, adapting terrain to match their vision of the village’s story. A tip worth repeating: seal your static grass with a light misting of diluted PVA before display. It prevents shedding and protects months of careful work.
Difficulty Levels: Finding the Right Build for You
Witcher miniature kits span three clear difficulty tiers: beginner builds taking 15-25 hours at $45-85, intermediate projects running 30-50 hours at $80-180, and advanced dioramas that can exceed 120 hours and $200 for serious modelers. Not every Witcher miniature kit requires master craftsperson skills. Builders range from complete beginners to seasoned modelers, and kits reflect that spectrum. The table below gives you a clear comparison to find the right entry point.
| Level | Difficulty | Build Time | Typical Cost | Best For |
|---|---|---|---|---|
| Beginner | 1-2 / 5 | 15-25 hrs | $45-85 | First-time builders; gift recipients new to the hobby |
| Intermediate | 2.5-3.5 / 5 | 30-50 hrs | $80-180 | Builders with 1-2 completed kits; comfortable with basic painting |
| Advanced | 4-5 / 5 | 60-120+ hrs | $200+ | Experienced modelers; ambitious multi-building village projects |
Beginner-Friendly Tavern Kits
Pre-cut components, detailed instruction booklets, and all major pieces included. Typically difficulty rated 1-2 out of 5. Expect 15-25 hours of build time. Perfect for understanding the fundamentals: assembly, basic painting, lighting installation. Cost generally ranges $45-85 depending on final size and included accessories. Our miniature house kits starting range covers this tier well, and several are styled with the dark-wood medieval aesthetic that translates beautifully into Witcher builds with minimal customization.
Intermediate Builds
Require some painting skill, light weathering, and problem-solving when pieces don’t fit perfectly on the first try. Difficulty 2.5-3.5 out of 5. Build time spans 30-50 hours. These kits trust you to source some accessories, customize coloring, and adapt instructions to your vision. Price point typically $80-180. This is where most of our returning community builders spend their time, and where the craft really starts to feel personal.
Advanced Dioramas

Approachable entry kit under $50
Sun Room DIY Miniature House Kit
$49.99
Several builders have used this kit as their first complete build before moving on to darker-themed projects. The assembly and lighting techniques you learn here transfer directly to more atmospheric builds.
Complex lighting circuits, extensive scratch-building alongside kit components, advanced weathering and aging techniques. Difficulty 4-5 out of 5. These aren’t kits so much as frameworks for ambitious projects. You might spend 60-120+ hours layering details. Cost can exceed $200, but serious builders view them as investments in creative expression rather than purchases.
Honestly assess your time and skill level before ordering. Building something slightly easier than your actual skill feels rewarding. Building far beyond your comfort zone feels frustrating. There’s no shame in starting at beginner level and graduating as your confidence grows. We’d rather you finish one beginner build and fall in love with the hobby than abandon an advanced kit halfway through.
Display, Lighting, and Finishing Touches
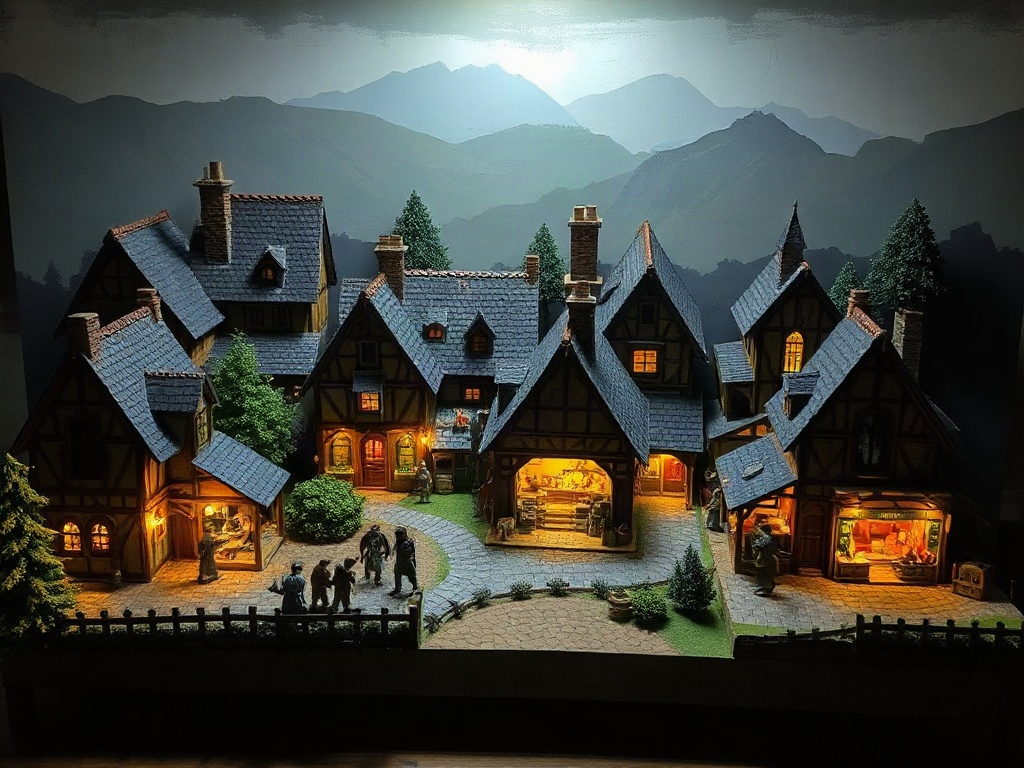
The display phase turns a finished Witcher miniature scene into an immersive atmosphere: a painted night-sky backdrop, thoughtfully positioned LED lighting, and one well-chosen figure can make viewers feel they’ve stepped into the world. Once your Witcher miniature scene is built, the display phase begins. This determines whether viewers see a collection of small components or step into an atmosphere.
Backdrop and Environment
A plain white shelf diminishes impact. A painted backdrop suggesting night sky, stormy weather, or distant mountains grounds the scene. Some builders commission custom backdrops. Others photograph their scenes against fabric and digital composites. The backdrop doesn’t need to be massive; even 12-18 inches of painted surface behind your display transforms it from craft project to immersive diorama. Dark grey-blue for a night sky, deep forest green for a woodland village clearing, charcoal with a hint of smoke for a burnt-out district: all work beautifully with Witcher-style colour palettes.
Integrated Lighting Design
Most kits include LED systems, but thoughtful placement matters. Backlighting (lights behind buildings creating silhouettes) suggests mysterious depths. Side lighting emphasizes architectural details and weathering. Spotlighting a single element (a tavern’s entrance, a character figure) draws focus. Experiment. You might leave your scene dark for several weeks, then discover that a single candle-warm light completely changes how you perceive it. Several of our community builders describe this discovery moment as genuinely one of their favorite experiences in the whole craft.
Living Scenes with Figures
Adding carefully chosen miniature figures transforms a static building into a narrative moment. A witcher studying a contract at the bar. A merchant nervous in the corner. A figure that suggests unseen tension. Not every scene needs figures, but the right one adds layers of storytelling that building materials alone cannot achieve. For Witcher-themed builds specifically, a single cloaked figure is often more effective than a crowd: it implies the world beyond the frame.
📜 Did you know?
Medieval European taverns were often the only heated public spaces during winter and served as de facto community centers. They’re documented as sites where everything from marriages to business transactions happened. The Witcher’s tavern aesthetic draws from this authentic historical grittiness, making your miniature build part of centuries of storytelling tradition.
Medieval European taverns were often the only heated public spaces during winter and served as de facto community centers. They’re documented as sites where everything from marriages to business transactions happened. The Witcher’s tavern aesthetic draws from this authentic historical grittiness, making your miniature build part of centuries of storytelling tradition.

Sourcing Components and Customization
A quality base kit is just the foundation; true personalization comes from sourcing specialty components like weathered barrels, tiny books, and hand-painted potion bottles that make your dark fantasy diorama uniquely yours. A quality base kit provides foundation. True personalization comes from sourcing additional components. Specialty miniature suppliers offer weathered wood, aged barrels, tiny books, potion bottles in various colors, iron fixtures, and countless other details. This isn’t an additional cost burden; it’s the optional next step that transforms your Witcher tavern from something anyone with the kit could build into your unique interpretation.
The miniatures community is unexpectedly generous. Forums, Discord servers, and social platforms share techniques, recommend suppliers, and celebrate builds. Asking “where did you source that barrel?” often leads to discovering new makers whose work aligns with your vision. We’ve seen friendships built entirely around trading potion bottle techniques. It’s that kind of hobby.
💬 Community voice
“I was embarrassed to share my first Witcher tavern because the weathering was uneven. I posted anyway. Within an hour I had three experienced builders explaining the exact washes they use and where to source aged metal accessories I didn’t even know existed. The community literally levelled up my second build for me.” (Shared by Priya M., community builder, via our newsletter.)
“I was embarrassed to share my first Witcher tavern because the weathering was uneven. I posted anyway. Within an hour I had three experienced builders explaining the exact washes they use and where to source aged metal accessories I didn’t even know existed. The community literally levelled up my second build for me.” (Shared by Priya M., community builder, via our newsletter.)
Witcher Miniatures as Gifts
Witcher miniature kits make exceptional gifts for franchise fans who appreciate handcrafted detail, but matching the right difficulty tier to the recipient’s available time and experience is the key decision that determines whether the gift lands perfectly. These builds appeal to a specific person: someone who loves the Witcher universe, appreciates handcrafted detail, and values projects that reward sustained focus. As gifts, they work best when paired with understanding about difficulty and time commitment. A beginner kit (20-30 hours) feels achievable as a winter project. An advanced build might overwhelm unless you know the recipient has serious hobby time and experience.
Consider pairing a kit with supplementary items: quality brushes, specialty paints in atmospherically appropriate colors (dark browns, muted greys, deep ambers), or a reference book of real medieval taverns for inspiration. These signal that you understand this is a serious creative pursuit, not a casual craft activity.
If the recipient is already building miniature scenes, offering a Witcher-themed kit expands their range and gives them a thematic anchor for a new project. If they’re new to the hobby but deeply engaged with the franchise, provide the beginner kit alongside honest conversation about what building actually involves. A person who tries the hobby and loves it becomes a lifelong builder. A person surprised by complexity may abandon the project, which serves no one. Our full kit range has difficulty ratings on every product page to make gift-buying easier.
Community and Continued Growth
After finishing a first Witcher tavern, most builders find themselves drawn to expanding their scene with a second structure, more advanced techniques, and lighting design that makes their dark fantasy diorama photograph like a professional display. After completing your first Witcher tavern or village scene, many builders find themselves drawn to expanding. A second building to create a richer narrative. Advanced techniques discovered during the first build, now applied with greater confidence. Specialized lighting design that turns a simple scene into something that photographs professionally.
The miniature building community celebrates progression without gatekeeping. Beginners share their first builds alongside masters who have spent decades perfecting the craft. The shared language is patience, precision, and genuine appreciation for handmade beauty in small scale. Your Witcher tavern isn’t in competition with anyone else’s. It’s your contribution to a world that rewards attention to detail and creative vision.
Whether you’re drawn to these builds because you’re seeking a meditative, focused creative outlet, hunting for a gift that signals genuine thoughtfulness, or wanting to inhabit the Witcher universe in a tangible way, a miniature scene offers something modern mass-produced decor cannot: the satisfaction of building it yourself, one careful piece at a time.
Frequently Asked Questions about Witcher Inspired Miniature Scenes
Everything you might be wondering (click a question to expand).
How long does it actually take to build a Witcher tavern miniature?
Beginner kits typically require 15-30 hours of work spread across several weeks. Intermediate builds span 30-60 hours. Advanced dioramas can exceed 100 hours. This isn’t consecutive time; most builders work in 2-4 hour sessions, allowing paint and adhesive to dry between steps. Time varies based on experience, attention to detail, and whether you’re adding custom elements beyond the kit.
Do I need special tools to get started?
A quality beginner kit includes most essentials: small cutting tools, brushes, assembly adhesive. Supplementary tools (precision knife, magnifying lamp, specialized paintbrushes) enhance the experience but aren’t required initially. Total tool investment for a serious hobbyist typically runs $50-120 and lasts years across multiple projects.
Are these miniatures fragile once completed?
Thoughtfully built scenes are surprisingly durable. Glued components hold firm. Painted finishes resist scratching if applied properly. The main vulnerability is LED wiring; protect cables from pinching and moisture. Display in stable environments (avoid direct sunlight, extreme humidity, temperature swings). Treated properly, a completed miniature scene lasts decades.
Can I mix components from different kit makers?
Yes. Scale consistency is the primary concern. Ensure buildings, figures, and props are in the same scale (1:12 or 1:24). Beyond that, mixing creates richer results. One maker’s tavern paired with another’s medieval furniture and a third’s custom-painted figures produces scenes more visually interesting than using only one kit maker’s components.
Where can I find Witcher themed kits and components?
Specialized miniature hobbyist sites carry themed kits. Etsy hosts independent makers creating Witcher-inspired components. General miniature suppliers offer the building blocks (furniture, figures, props) you customize into Witcher aesthetics. Check product reviews and builder community recommendations before ordering; quality varies considerably across suppliers. Our own medieval-style kits are a solid starting point, and we flag the dark-wood gothic options in the collection filters.
What paint colors work best for a dark fantasy Witcher atmosphere?
Deep browns, warm ambers, charcoal greys, and muted ochres form the core Witcher palette. For walls: Raw Umber base with a black wash. For wood: Dark chocolate brown, dry-brushed with a lighter tan. For stone: Neutral grey with a dark brown wash pooled in crevices. Avoid bright or saturated colors; the Witcher world is desaturated and worn. A little burnt sienna in the right places suggests firelight perfectly.
Building Your First Witcher Scene
Starting your first Witcher inspired miniature scene requires only intention and a kit matched to your available time: choose your difficulty tier, gather your tools, and let the meditative process of building a dark fantasy world in miniature do the rest. Starting doesn’t require perfect conditions or advanced skills. It requires intention. Choose a kit that aligns with your available time and patience. Gather your tools. Clear a workspace. Then begin the meditative process of bringing a corner of the Witcher world into existence at miniature scale. Each placed component, each layer of paint, each careful shadow contributes to something nobody else can create exactly as you will.
That’s what makes Witcher inspired miniature scenes worth the time: the builds are repeatable, but the result is always yours. Browse our full kit range and our book nook collection to find your entry point. When you finish your first build, share it with the community. We genuinely want to see what you create.
