🎁 Buy 2 kits, get the 3rd FREE · Free shipping on every order

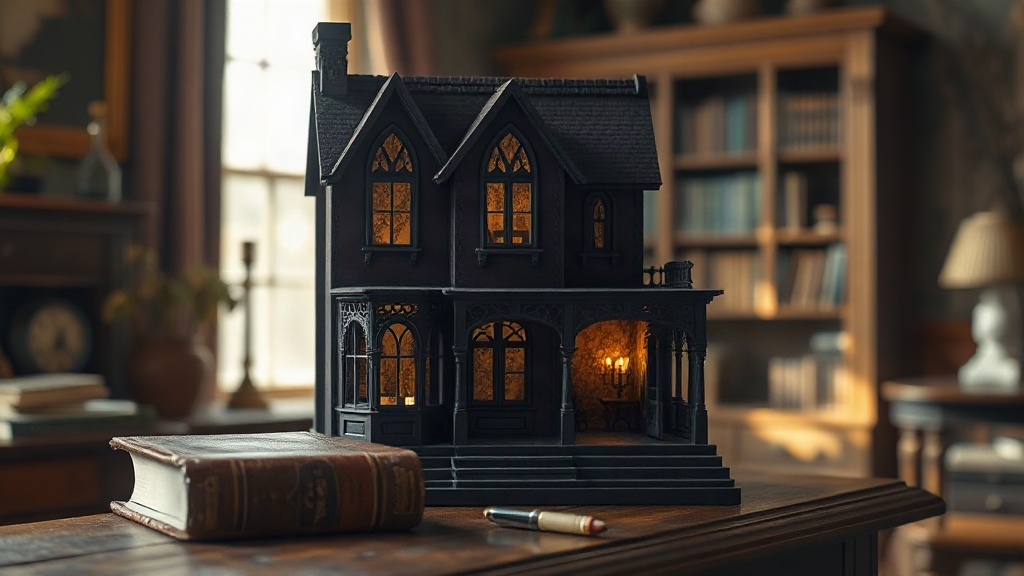
Haunted House Miniature Kits: Build Your Own Gothic Dollhouse Scene
A comprehensive guide to haunted house miniature kits, exploring why they appeal to crafters, what to expect during assembly, design customization options, and how to create genuinely atmospheric gothic dollhouse scenes without supernatural frustration.

There’s something deeply satisfying about building a haunted house miniature kit. You arrange tiny furniture in shadowed rooms, position a ghostly figure near a window, add flickering LED candles to a parlor, and suddenly a 12-by-8-inch wooden structure becomes a complete world. The appeal isn’t just the finished piece. It’s the meditative hours spent gathering details, the small decisions about paint color and fabric texture, the moment you step back and realize you’ve created something genuinely atmospheric.
Unlike mass-produced decorations that sit static on a shelf, a haunted miniature house kit invites you into the creative process. You’re not buying a finished product. You’re buying potential, and then you shape that potential with your hands.
Why Haunted House Miniature Kits Stand Out
A haunted house miniature kit stands out because it bridges two distinct pleasures: the gothic aesthetic that works year-round as shelf art, and the meditative build process that turns 15 to 25 hours of careful handwork into something genuinely atmospheric.
The gothic aesthetic has broad appeal beyond Halloween. Victorian homes, classic horror literature, steampunk design, dark academia, and fantasy worldbuilding all draw on the same visual language that haunted house kits tap into. A miniature haunted mansion works as seasonal decor in October, but it also lives as year-round shelf art in a collector’s study, a gamer’s campaign map backdrop, or a reader’s book nook centerpiece.
The build itself ranges from beginner-friendly to advanced, depending on the kit you choose. Most quality haunted house miniature kits include:
- Pre-cut wooden structure (walls, floors, roof) requiring assembly with wood glue or small nails
- Wallpaper panels and flooring materials, pre-printed or ready to apply
- A small collection of furniture and decorative objects (chairs, tables, mirrors, picture frames)
- Optional lighting components (battery-operated LED strips, tiny lamps)
- Paint, adhesives, and small craft tools
- Instruction booklet with step-by-step photographs
Assembly typically takes 15 to 25 hours spread across several weeks. That timeline works in your favor. Rushing a miniature kit through in one weekend leads to wobbly walls and regret. Spending an hour or two every few evenings lets the adhesive cure properly, gives your eyes regular breaks, and turns the project into something meditative instead of stressful.
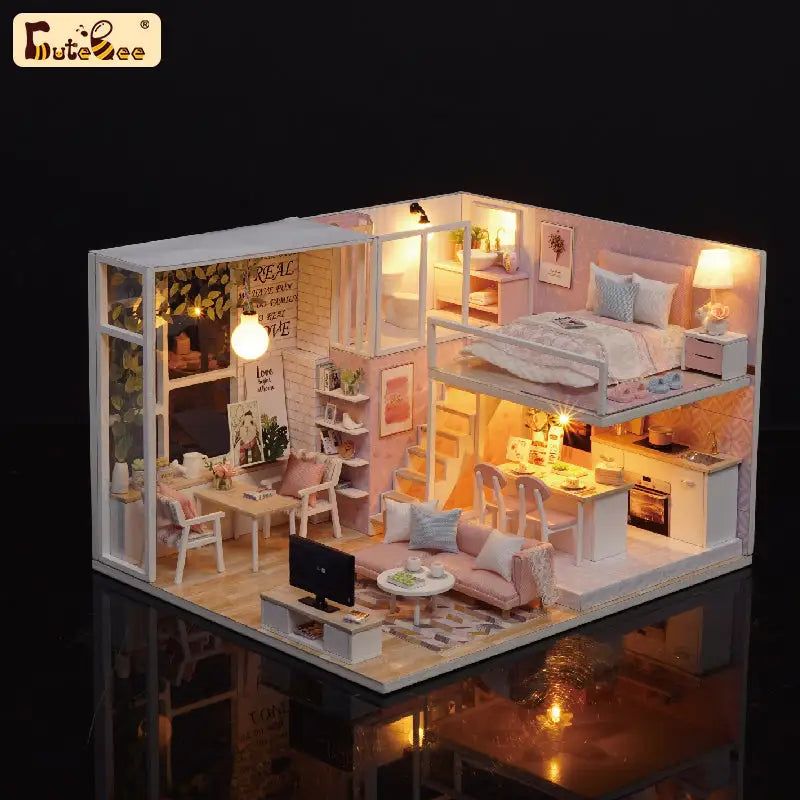
Bestseller cottage kit
Tranquil Life DIY Miniature House Kit
$67.90
New to miniature kits? The Tranquil Life is the kit we recommend first. Its relaxed cottage interior teaches all the core techniques, including wallpaper application, furniture finishing, and LED wiring, before you tackle a darker gothic build.
View this kit →
Difficulty Ratings and What They Actually Mean
Difficulty ratings on miniature kits describe how much precision and patience each build demands, not how much prior craft experience you need, so even a complete beginner can succeed with the right starting kit.
Kit manufacturers label difficulty as beginner, intermediate, or advanced. These labels matter, but they’re not absolute.
Beginner kits assume no prior experience with miniatures. Walls slot together or glue simply. Decorations are pre-made and require only placement. Paint is minimal or optional. Assembly tools are basic: a craft knife, glue, small scissors, possibly a small hammer. Time investment is 8 to 12 hours. These kits teach you how to handle miniature materials without overwhelming you.
Intermediate kits introduce more steps. You might paint baseboards, assemble furniture from component parts, apply patterned wallpaper, or position lighting carefully to hide wiring. Some decorative objects come unfinished. You’ll need patience and precision but not specialized skills. Time is 15 to 20 hours. The satisfaction payoff increases noticeably because you’ve made more visible choices.
Advanced kits demand steady hands and problem-solving confidence. Components might require custom assembly, paint blending, or electrical wiring knowledge. Wallpaper application involves careful pattern alignment. Tiny hinges and doors may require adjustment. Time stretches to 25 to 35 hours. These kits appeal to experienced builders who want a challenge and are willing to troubleshoot when something doesn’t fit perfectly.
The haunted house aesthetic actually levels the playing field. Gothic spaces benefit from imperfection. A slightly crooked picture frame adds character. Uneven paint texture mimics age and neglect. This is one genre of miniature kit where “I meant to make it look worn” is often the true answer, and it works.
🪄 Hannah’s tip
Start by assembling the wooden structure first, then do all painting before you install decorations. Once the room is painted, you’ll see the scale of shadows and light better, and you can place furniture and accessories with clearer intention. Reversing that order traps paint brushes next to tiny sofas and turns a joy into an obstacle course.
Start by assembling the wooden structure first, then do all painting before you install decorations. Once the room is painted, you’ll see the scale of shadows and light better, and you can place furniture and accessories with clearer intention. Reversing that order traps paint brushes next to tiny sofas and turns a joy into an obstacle course.
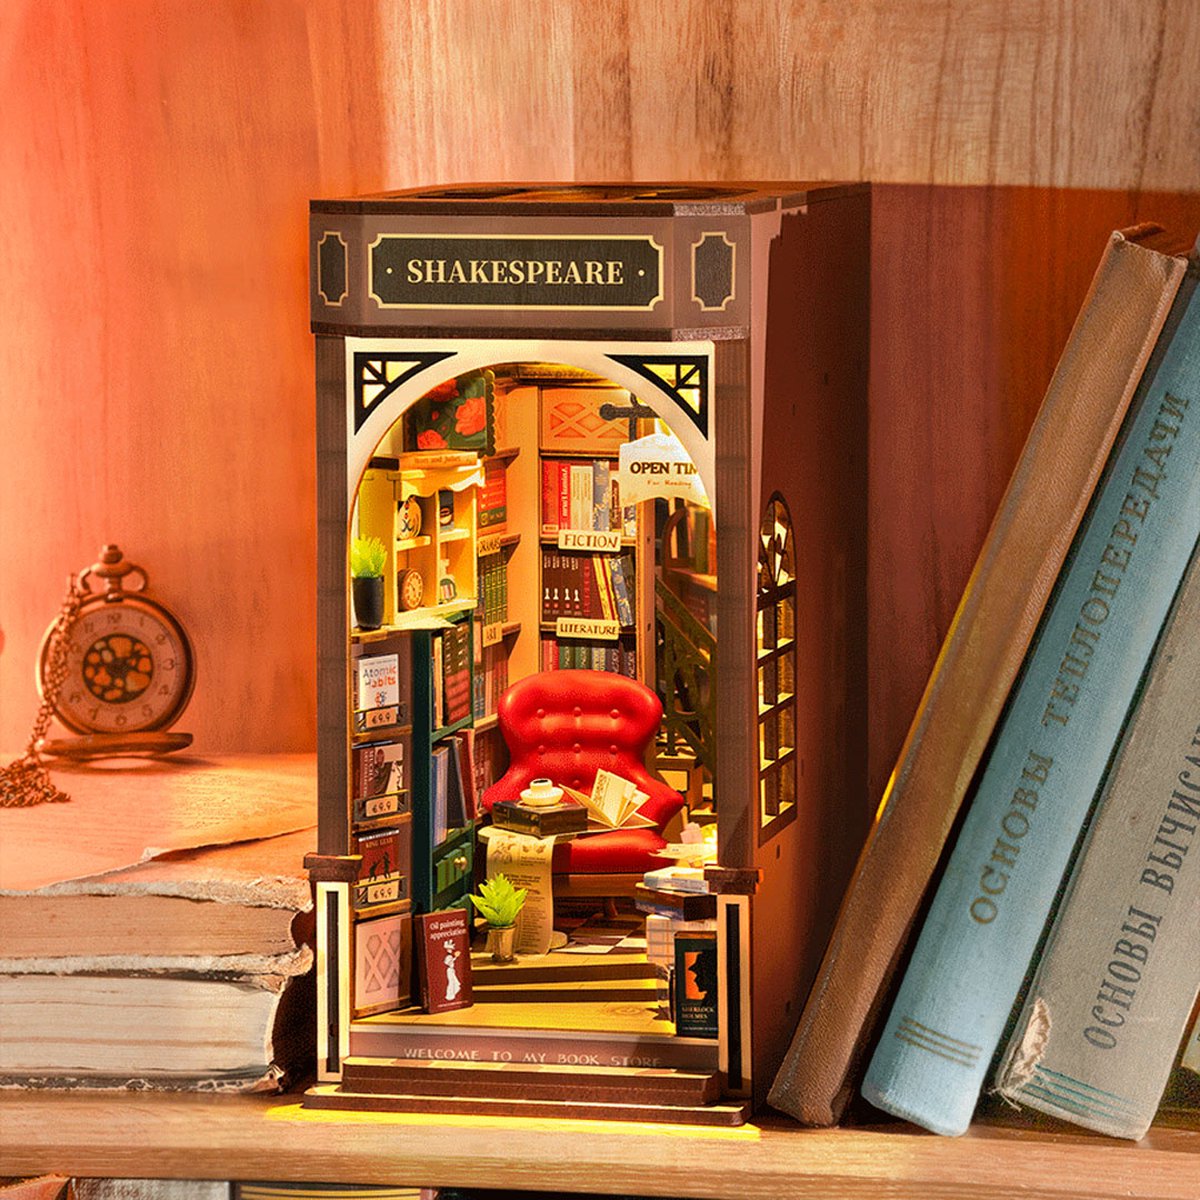
Explore the collection
All Book Nook Kits
76 handcrafted book nook kits
Several of our book nook kits carry the same gothic atmosphere as a haunted miniature build. Narrow shelved corridors, candlelit reading rooms, shadowed archways. If you want to display your finished haunted house inside a larger bookshelf scene, browse here first.
Browse all book nooks →
Materials You’ll Encounter in a Gothic Miniature Build
Quality haunted house kits use real wood, actual fabric, and genuine paper rather than plastic, and that difference in materials is exactly what gives a finished gothic miniature its weight and presence on a shelf.
Wood comes pre-cut but still requires sanding in most kits. It arrives with tool marks and rough edges. Spending 10 minutes with fine-grit sandpaper before assembly prevents splinters and lets finishes adhere better. This small step separates a kit that feels stable from one that feels fragile.
Wallpaper panels are printed on substantial paper, often with a slight texture. You apply them with craft adhesive. The paper stretches slightly if you’re not careful, so alignment matters. Haunted house designs lean into gothic patterns: damask, floral scrollwork, or subtle distressed effects that read as aged even when new. The color palette typically runs toward deep purples, blacks, dark greens, or charcoal grays.
Furniture is either solid wood (requiring paint or stain) or pre-finished resin. Resin pieces save time and accept paint well if you want to customize. Wood pieces let you practice finishing techniques: you can stain them to match the woodwork, paint them a contrasting color, or leave them natural for a cabin aesthetic within the gothic frame.
Lighting components, when included, are battery-operated LED strips or individual tiny bulbs wired to a small battery compartment. Modern kits use warm-white LEDs that create genuine ambiance rather than the harsh blue-white of older kits. If the kit includes lighting, the instruction manual walks you through wire routing step-by-step. This is not sorcery. It’s just careful threading of very thin wires along the interior perimeter of walls before you seal rooms.
Design Customization Within the Box
Every haunted house miniature kit is a framework, not a prescription: the paint colors, furniture arrangement, and added accessories are entirely your decisions, which means two builders working from the same box will always end up with different worlds.
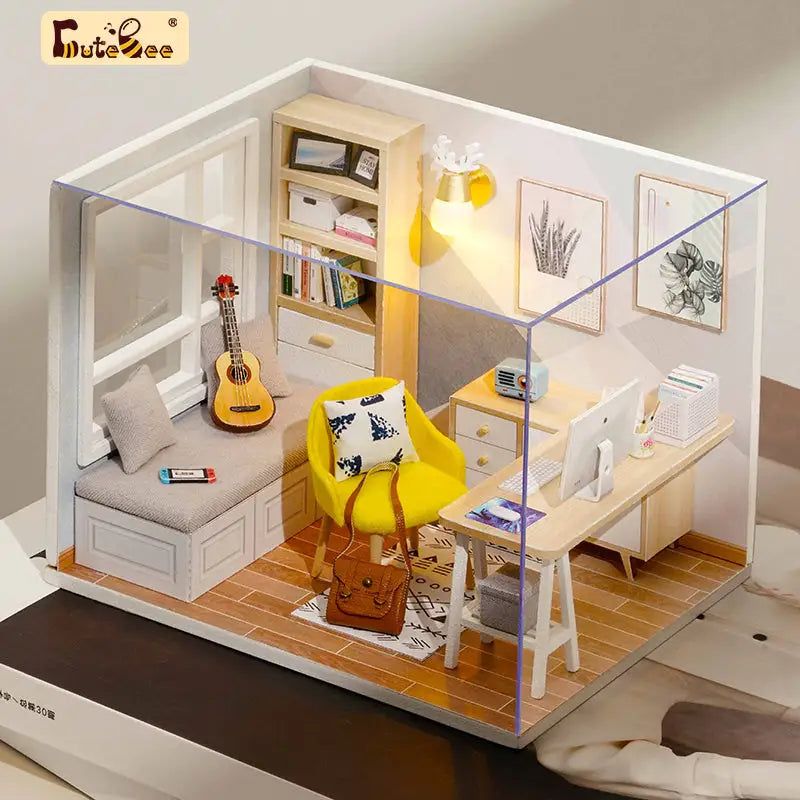
Learn customization first
Sun Room DIY Miniature House Kit
$49.99
The Sun Room kit is the place where builders practice paint mixing and accessory placement before they commit those skills to a more complex gothic build. Its open layout makes every customization decision visible and easy to adjust.
Start with this kit →
One misconception about miniature kits is that you follow the instructions exactly and end up with one predetermined result. The kit provides the framework. Your choices determine the personality.
Paint colors are the fastest way to shift mood. A haunted house painted in deep forest green with gold accents reads very differently from one in black with purple shadows. The wallpaper might come in multiple options; you choose which rooms get which pattern. You decide whether to leave furniture as-is or repaint it to match your color scheme.
Accessory placement is entirely yours. One builder arranges the parlor as an abandoned seance room: chairs tipped over, tarot cards scattered, a mirror draped in cloth. Another creates a tidy but eerie Victorian library with books lining every shelf and a single portrait watching from the wall. Same kit, completely different story.
Many crafters add decorative elements beyond the kit contents. Tiny candles from the dollar store, Spanish moss from a craft supply, miniature skeleton hands, photographs printed at 1-inch scale, small painted portraits. This is where the kit becomes your personal creative statement rather than a replica of the instruction booklet photograph.
📜 Did you know?
Victorian parlors often featured séance rooms in the 1880s and 1890s, with darkened furniture and heavy curtains to create the atmosphere spiritualists believed was necessary to contact the dead. Haunted house kit designers draw inspiration directly from period photographs and museum collections of these real spaces, which is why authentic gothic miniatures read as genuinely historical rather than cartoonish.
Victorian parlors often featured séance rooms in the 1880s and 1890s, with darkened furniture and heavy curtains to create the atmosphere spiritualists believed was necessary to contact the dead. Haunted house kit designers draw inspiration directly from period photographs and museum collections of these real spaces, which is why authentic gothic miniatures read as genuinely historical rather than cartoonish.
Tools, Adhesives, and Setup You’ll Actually Need
A haunted house miniature kit build needs surprisingly few tools: a sharp craft knife, tweezers, fine sandpaper, two types of adhesive, good task lighting, and a dedicated 18-inch work surface you can leave set up between sessions.
Most haunted house kits include the basics, but having your own toolkit prevents frustration. You need a sharp craft knife or hobby knife, small scissors, fine-grit sandpaper, a glue brush or small paintbrush, tweezers for positioning tiny parts, a craft mat or protected work surface, and good task lighting.
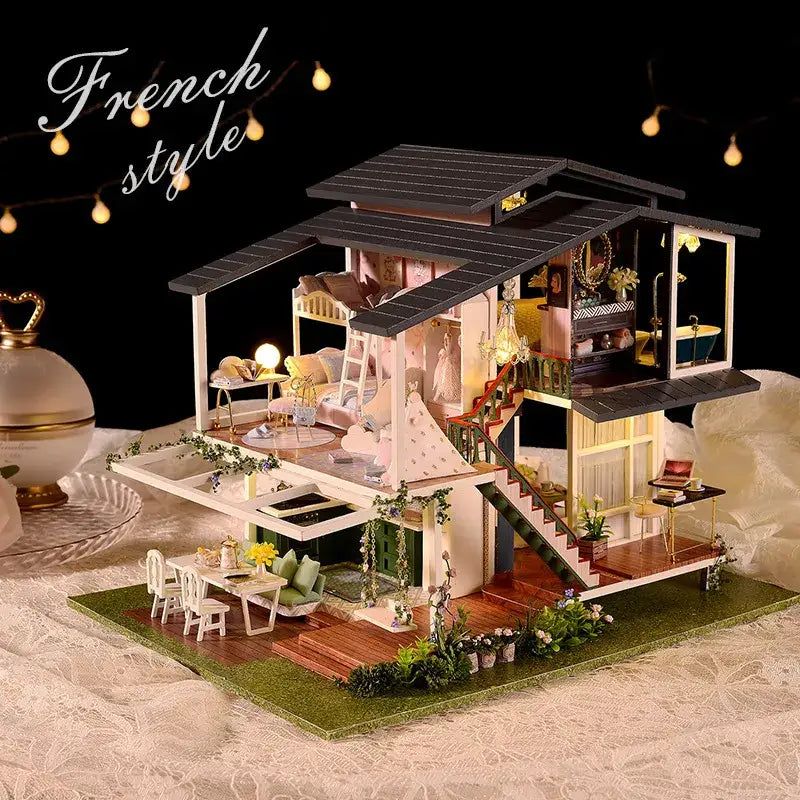
Rare in the niche
Miniature Greenhouse Kits
22 LED-lit greenhouse builds
Once you’ve mastered the tools and techniques from your first miniature build, greenhouse kits are the natural next step: they use the same wood assembly, LED wiring, and finishing skills in a completely different aesthetic direction.
See our greenhouse range →
Adhesives matter more than you’d think. The kit typically includes a wood glue for structural assembly and craft glue for decorative elements. Wood glue dries transparent and grips firmly but needs pressure and drying time. Craft glue (like a gel-based craft adhesive) grabs quickly and works on paper, resin, and fabric. Some builders prefer a combination approach: wood glue for frame assembly, craft glue for decorations.
Set up your workspace so you’re not rebuilding it every session. A small tray or box to corral pieces, a second container for your tools, adequate task lighting that doesn’t create shadows on your work, and a clear surface at least 18 inches square. You’re not building a full dollhouse; a compact miniature haunted house needs minimal real estate.
Working in the same spot every time creates a rhythm. Your hands know where the tweezers are. You don’t waste 10 minutes hunting for a tiny piece because it landed in the wrong corner of the table. This consistency also means you’re more likely to return to the project regularly, which keeps momentum and morale high.
Displaying Your Finished Haunted House Miniature
A finished haunted house miniature deserves a display spot where task lighting can cast shadows into its windows: a glass cabinet, a dedicated shelf, or inside a larger gothic book nook scene will each protect the tiny details and let the atmosphere read properly.
A completed haunted house kit deserves a good home. Shelving, a dedicated display stand, or integrated into a larger fantasy book nook collection all work depending on your space and vision. Dust is the enemy of tiny details, so a glass cabinet or acrylic display case protects your work and keeps it visible.
Lighting makes an enormous difference in how the finished piece reads. A single small lamp positioned to cast light into the miniature’s windows, or an LED strip placed behind the structure, transforms a daytime craft project into genuinely atmospheric decor. The flickering warmth of battery-operated candles inside the miniature creates depth and shadow. Visitors lean in. They want to know the story of every room.
Consider the surrounding decor. A haunted house miniature pairs beautifully with gothic novels stacked nearby, vintage candlesticks, framed historical maps, or a collection of botanical prints. It doesn’t demand flashy staging. Quiet, curated context lets it speak.
Premium collector piece
Monet’s Garden DIY Miniature House Kit
$155.00
Discover this kit →
Frequently Asked Questions about Haunted House Miniature Kits
Everything you might be wondering (click a question to expand).
How long does it take to build a haunted house miniature kit?
Most quality kits take 15 to 25 hours spread across several weeks. Advanced kits can extend to 35 hours. The timeline is a feature, not a bug. Rushing creates wobbly assembly and frustration. Pacing the build keeps it meditative and lets adhesives cure properly.
Do I need special tools or crafting experience?
No. Most kits include or recommend basic tools: craft knife, glue, small scissors, and tweezers. If you can follow instructions and work with your hands, you can build a miniature haunted house. Intermediate and advanced kits demand more patience and attention to detail, but not prior miniature-building experience.
Can I customize the colors and design after I buy a kit?
Absolutely. Paint colors, furniture placement, accessory choices, and additional decorations are entirely up to you. The kit provides the structure and base materials. Your decisions shape the aesthetic. Many builders add elements beyond the kit to create a unique piece.
Will the lighting components work for years, or do I need to replace them?
Modern LED lighting in quality kits is durable and energy-efficient. Batteries typically last months of regular use. Replace them when brightness dims. The LED components themselves rarely fail. If a kit uses older incandescent bulbs, they burn hotter and have shorter lifespans, so check kit specifications before you buy.
Is a haunted house miniature kit a good gift for a beginner?
Yes, if you choose a beginner or intermediate-level kit. It’s a gift that arrives as a project, not a finished object, which appeals to hands-on makers. It provides clear instructions, includes most materials, and delivers genuine satisfaction on completion. Pair it with a small gift card toward additional accessories or paints, and the recipient has everything needed to create something entirely their own.
What scale do most haunted house miniature kits use?
Most kits use 1:12 scale, meaning one inch in the miniature equals one foot in real life. This is the most widely used scale in the hobby, which makes it easy to mix furniture and accessories from different kits or craft suppliers. Some smaller kits use 1:24 scale for a more compact build footprint. Always check the scale before buying add-on accessories to make sure proportions match.
Building Atmosphere, One Detail at a Time
The real reward of a haunted house miniature kit is not the finished photograph you post online; it is the quiet decision-making hours spent in the middle of the build, when a room starts to feel like it has a history.
The magic of a gothic miniature build isn’t in the final photograph or the shelf display. It’s in the hours you spend deciding whether a mirror should hang at an angle, whether the parlor needs one candle or three, whether the wallpaper pattern feels right in afternoon light. It’s in the satisfaction of solving a small structural problem or discovering that a piece you repainted fits the mood better than you expected.
You’re not just assembling a product. You’re building a world. And that world, however small, holds real atmosphere because you made it with intention.